IIS 5: Setting up SSL - Appendix A: Installing Certificate Services
21 September 2001 • by Bob • IIS, SSL, Windows
In this blog post I'll discuss installing Certificate Services for Windows 2000 in order to test SSL in your environment. To install Certificate Services, use the following steps:
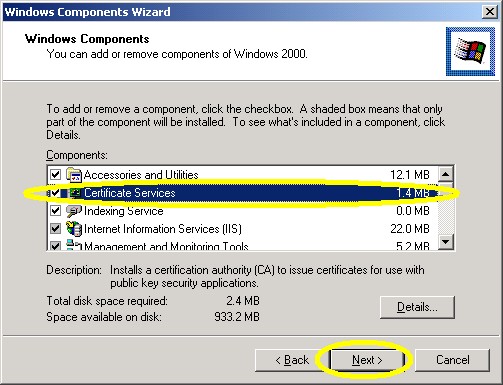
- Run the "Windows Component Wizard" in "Add/Remove Programs", choose "Certificate Services", and click "Next":

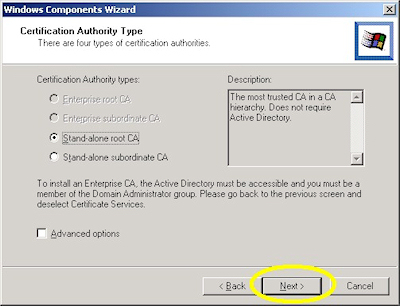
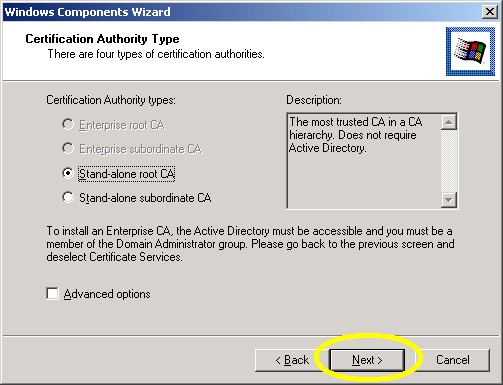
- Choose "Stand-alone root CA", then click "Next":
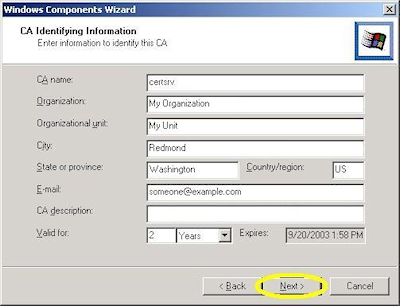
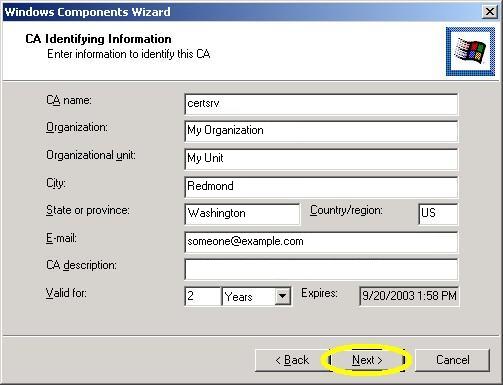
- Enter all requested information, then click "Next":
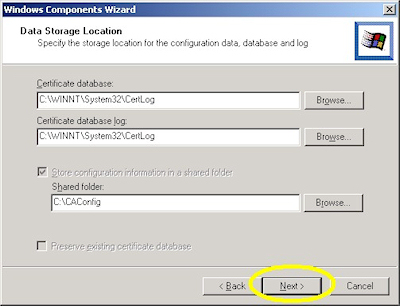
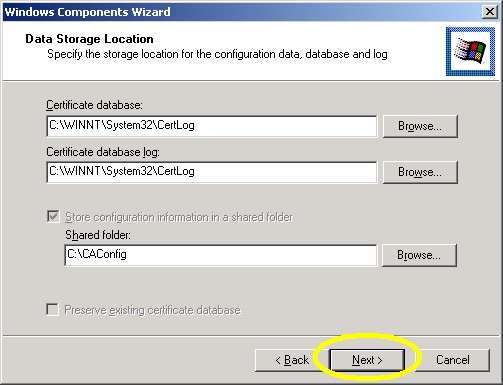
- Accept the defaults for the data locations and click "Next":
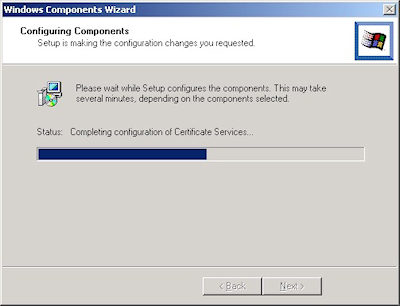
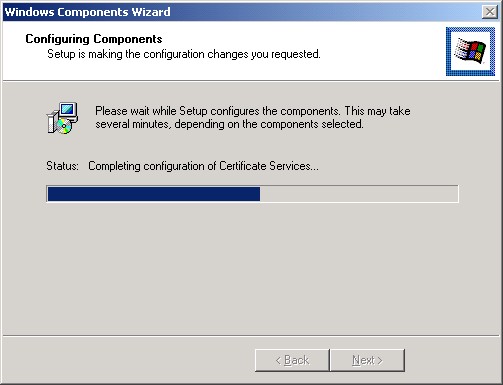
- The wizard will step through installing the services:
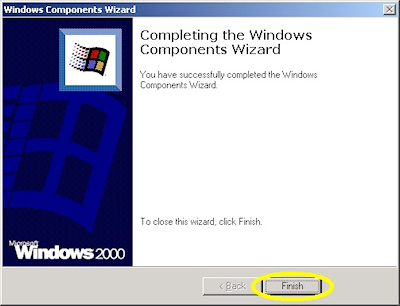
- When the wizard has completed, click "Finish" to exit the wizard:

IIS 5: Setting up SSL - Part 3: Installing a Certificate
21 September 2001 • by Bob • IIS, SSL
Installing Your Certificate
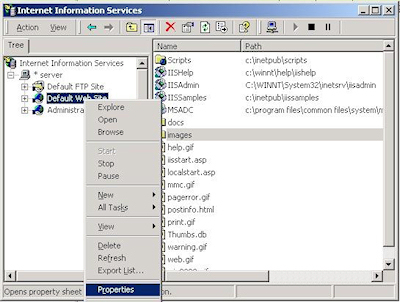
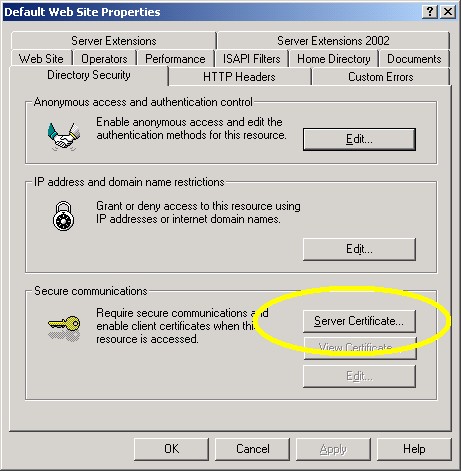
- Bring up the properties for a web site:
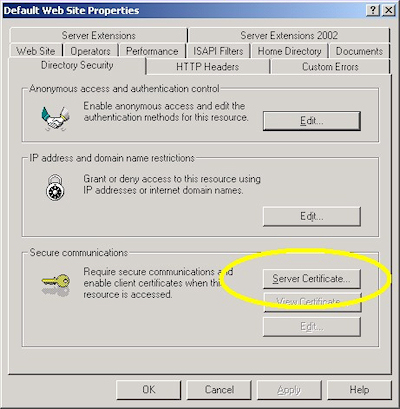
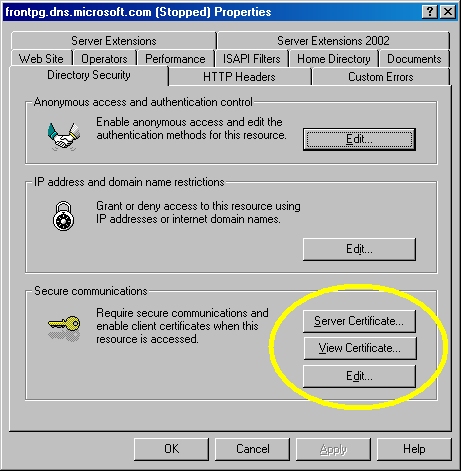
- Switch to the "Directory Security" tab and click "Server Certificate:"
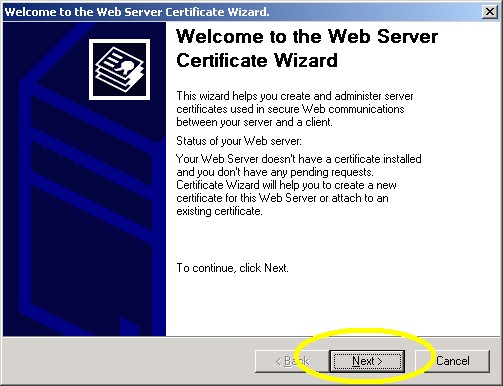
- Click "Next" to bypass the first page:

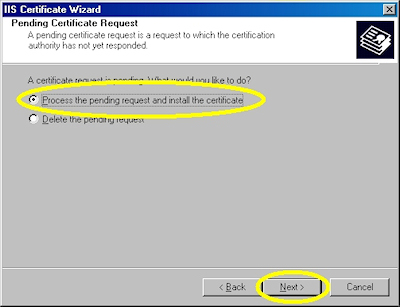
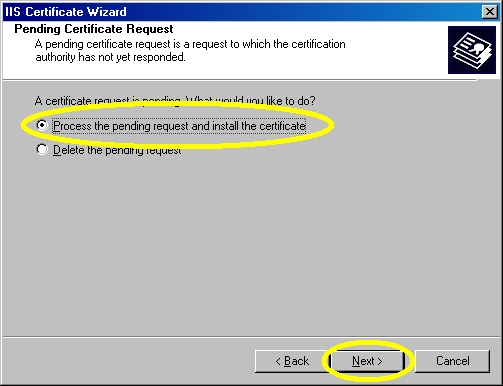
- Choose to process the request and click "Next":
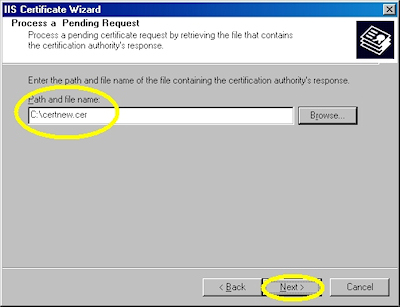
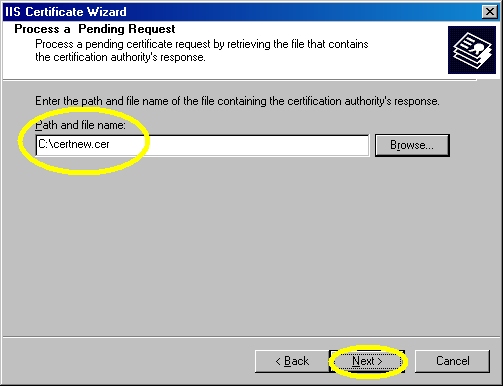
- Browse to the location of your certificate and click "Next":
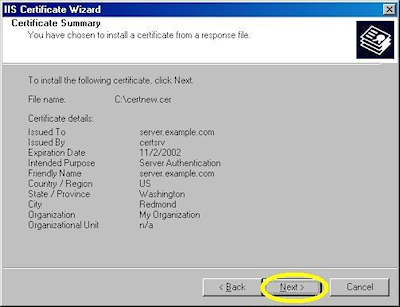
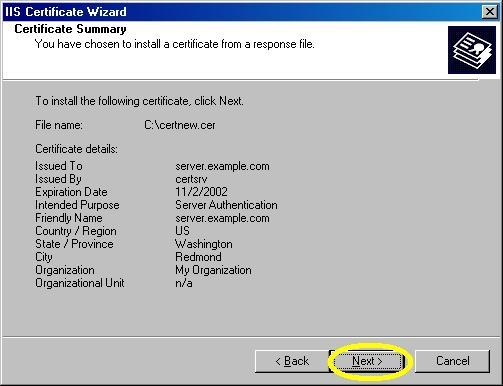
- Review the information to make sure it is correct and click "Next":
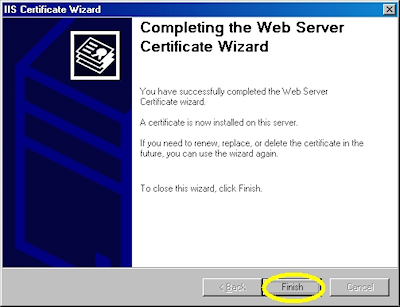
- Click "Finish" to close the wizard:
- Notice that you now have all the buttons available for SSL.

Verifying Your Certificate
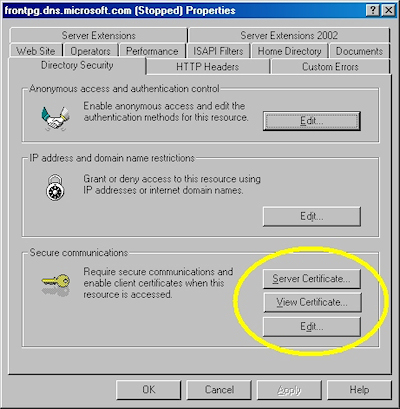
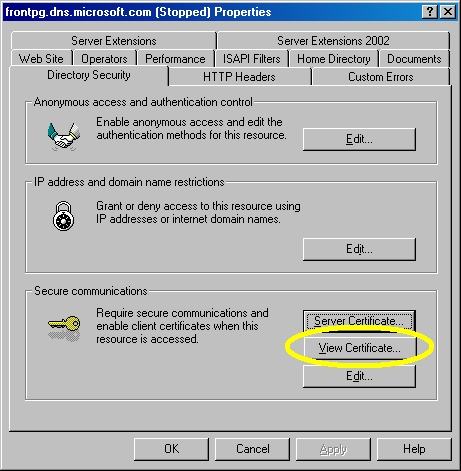
- Bring up the properties for a web site:
- Switch to the "Directory Security" tab and click "View Certificate":
- On the "General" tab, if the certificate is good you will see a normal certificate icon. (If not, you will see a warning or error icon.)

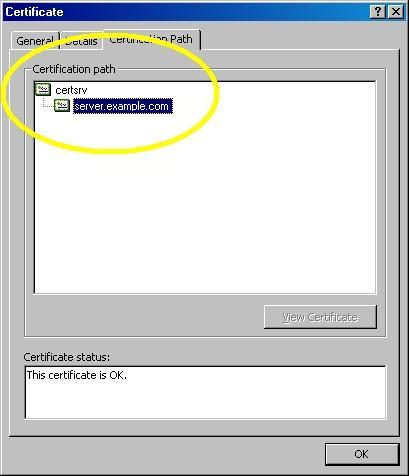
- On the "Certification Path" tab you will see your certificate hierarchy:
IIS 5: Setting up SSL - Part 2: Obtaining a Certificate
21 September 2001 • by Bob • IIS, SSL
Typically you would submit your certificate request to any one of several Certificate Authorities (CA). There are several that are available, but here are just a few:
- Thawte Digital Certificates
http://www.thawte.com/ - VeriSign Digital Certificates
http://www.verisign.com/
The steps to obtain a certificate differ for each CA, and it would be way outside the scope of my limited blogspace to include the steps for every CA on the Internet. So for my blog series I'm going to show how to use Certificate Services on Windows 2000 to obtain a certificate. This process is broken into three steps:
Step 1 - Submit the Certificate Request
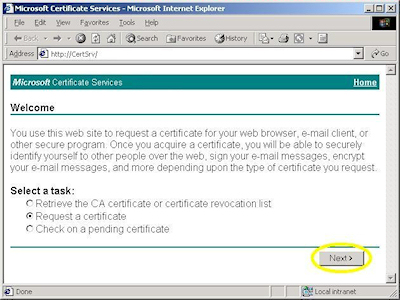
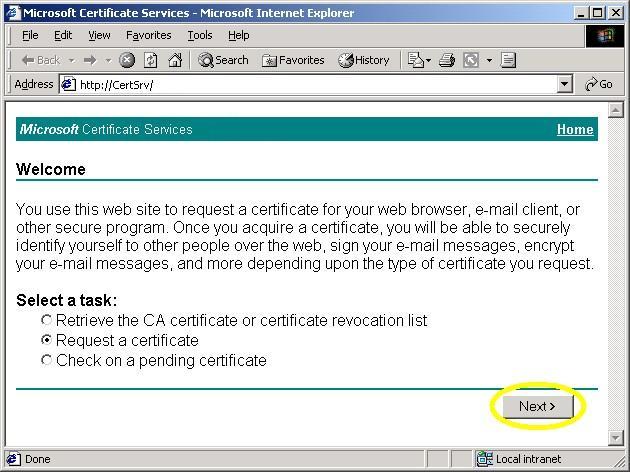
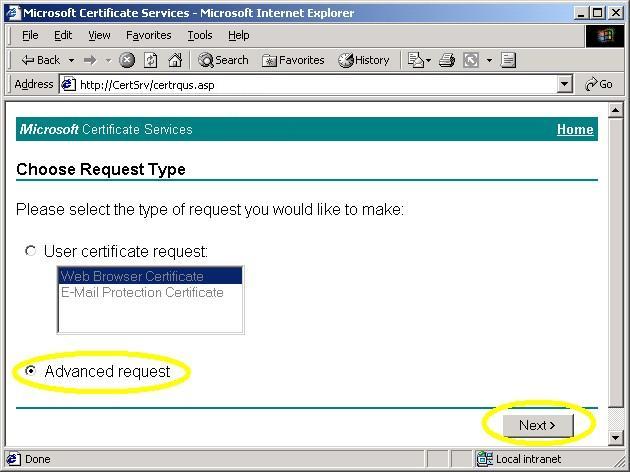
- Browse to the "Certificate Services" web site, choose to "Request a Certificate", then click "Next":
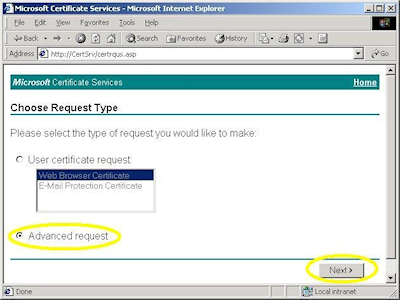
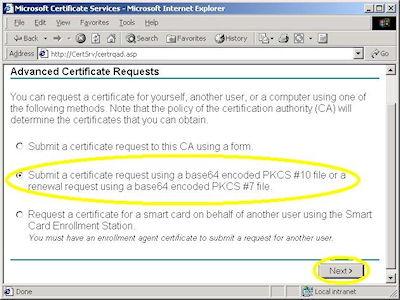
- Choose "Advanced request", then click "Next":
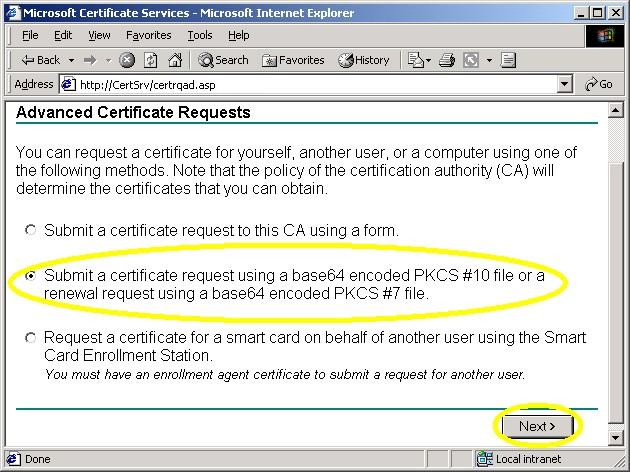
- Choose the option to submit a request using a base64 encoded file, then click "Next":
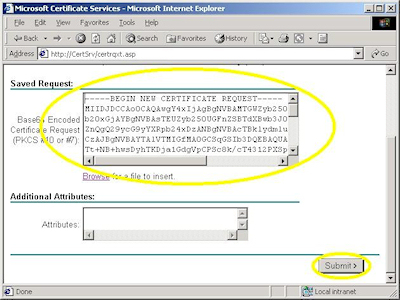
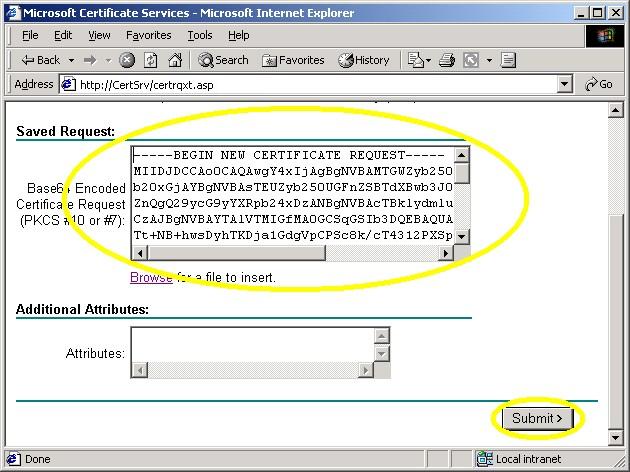
- Copy the text from your certificate request file and paste it into the "Base64 Encoded Certificate Request" text box, then click "Submit":
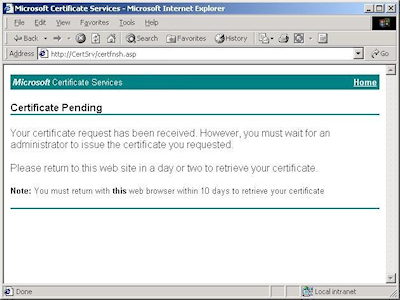
- By default, Certificate Services will return a message stating that your certificate is pending. You will need to notify your Certificate Services administrator that your certificate needs to be approved.

Step 2 - Certificate Processing
At this point the Certificate Authority (CA) will consider your request. (See processing a Certificate Request for details on issuing your own requests.)
Step 3 - Obtain the Certificate
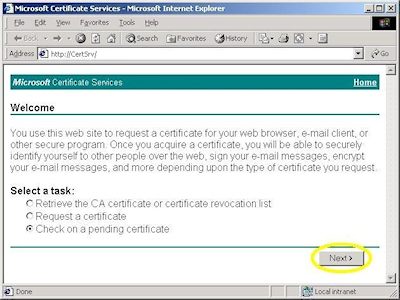
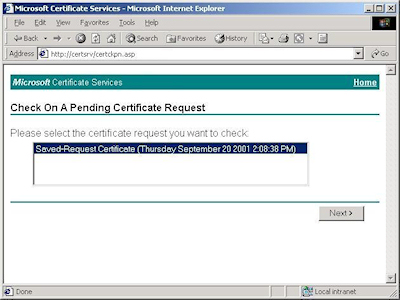
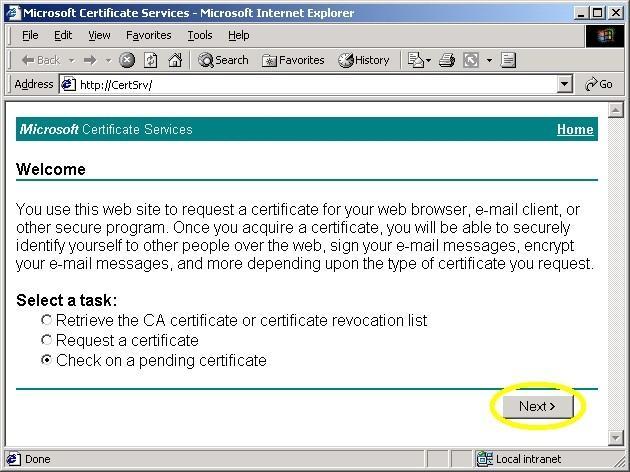
- Browse to the "Certificate Services" web site, choose to "Check on a Pending Certificate", then click "Next":
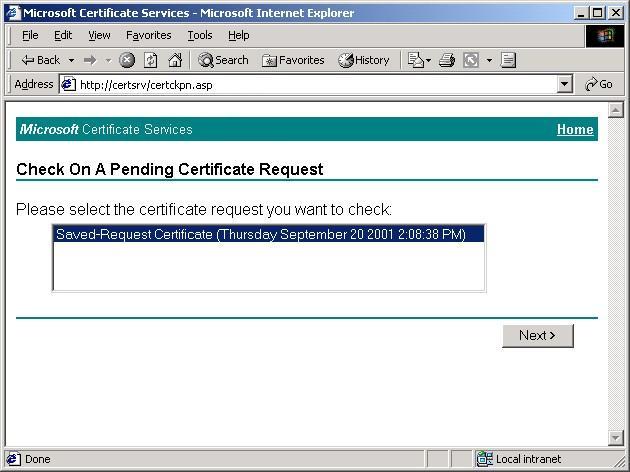
- Highlight your approved request, then click "Next":
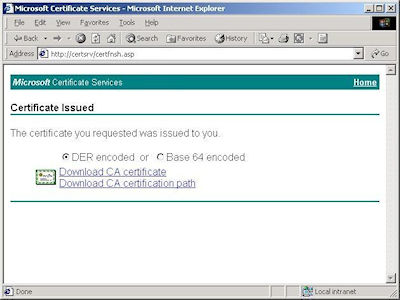
- Click the link to "Download CA certificate":
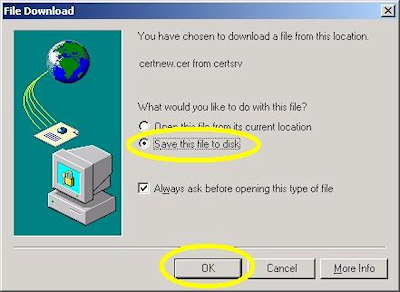
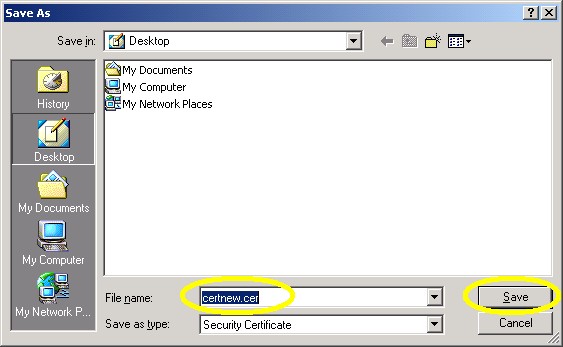
- When prompted, choose to save the file to disk, then click "OK":
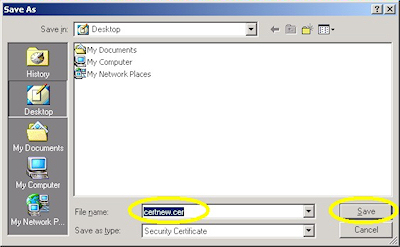
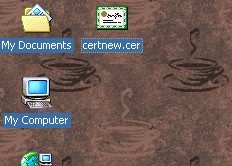
- Save the file to somewhere convenient, like your desktop:
- When you have saved the file to your computer, Windows Explorer will display the file with an icon that indicates that it contains a certificate:


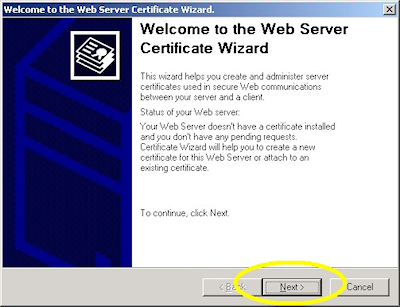
IIS 5: Setting up SSL - Part 1: Making a Request
21 September 2001 • by Bob • IIS, SSL
- Bring up the properties for a web site:

- Switch to the "Directory Security" tab and click "Server Certificate:"

- Click "Next" to bypass the first page:
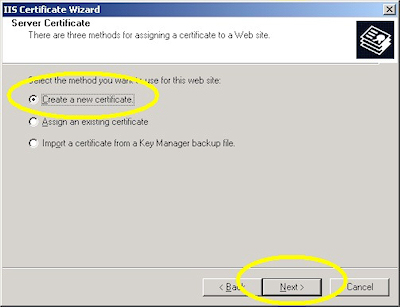
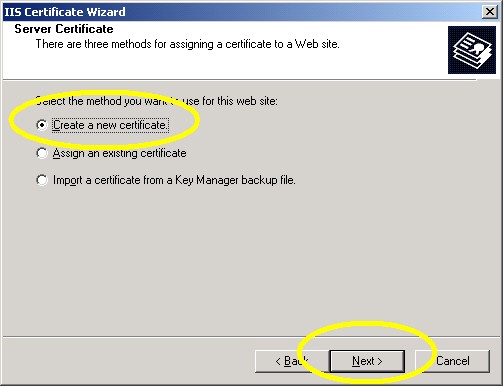
- Choose to "Create a new certificate" and click "Next":
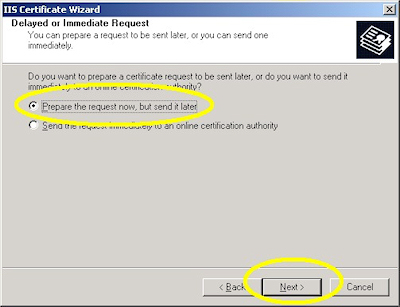
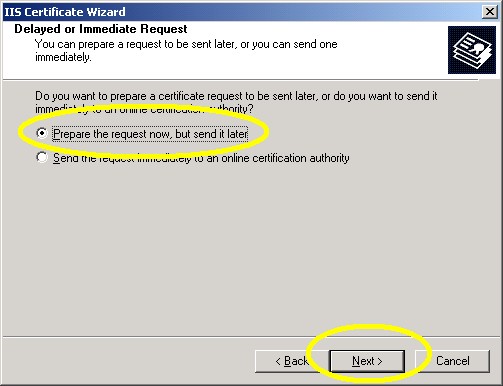
- Choose to "Prepare the request now, but send later" and click "Next":
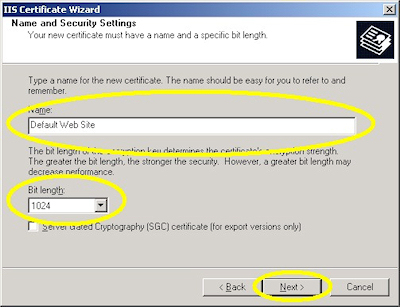
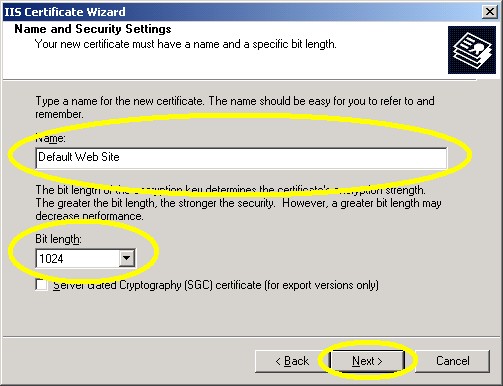
- Enter a friendly "Name" for the request, and your desired "Bit length". (SGC certificates are only necessary for overseas customers.) Click "Next":
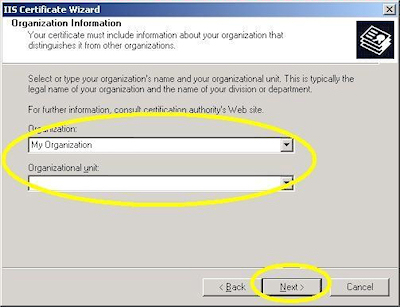
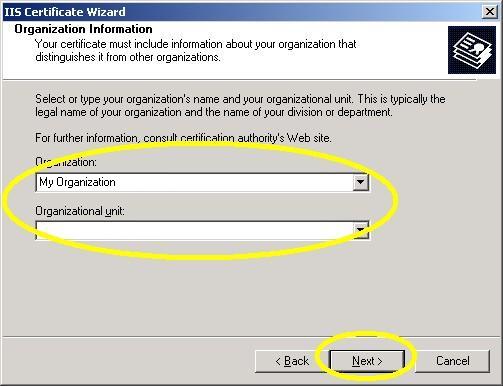
- Enter your "Organization" and "Organization unit", then click "Next":
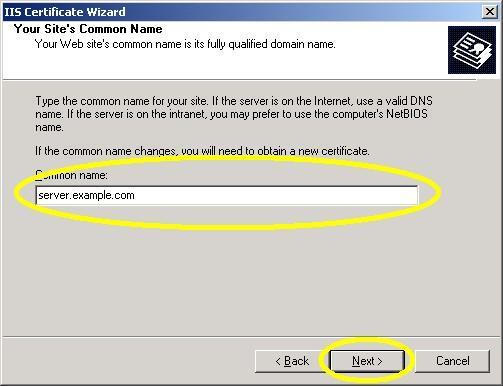
- Enter the "Common name" for your site then click "Next":
Note: This must be the actual web address that users will browse to when they hit your site.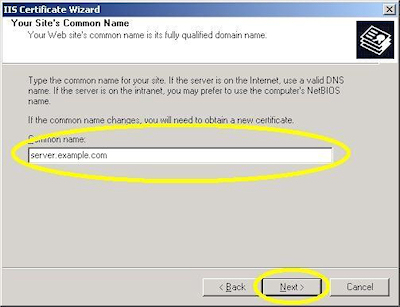
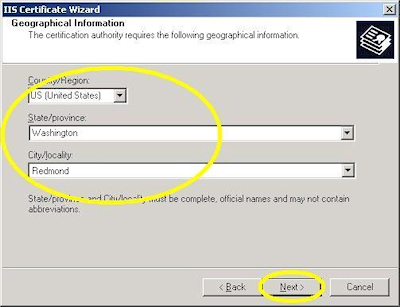
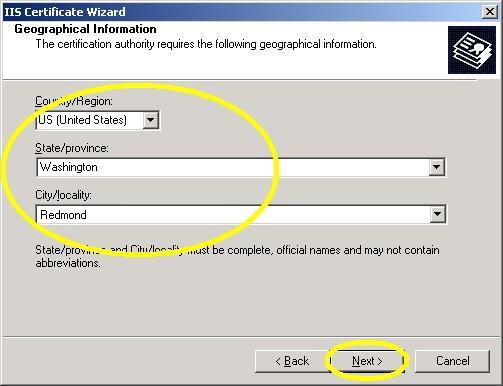
- Enter your "Country", "State", and "City", then click "Next":
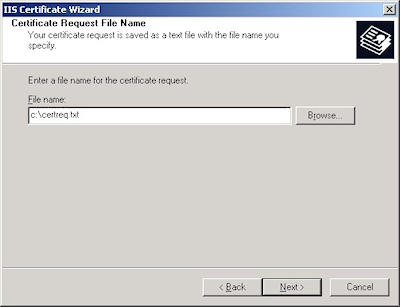
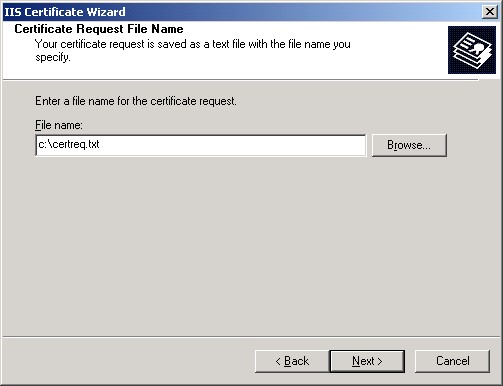
- Enter the "File name" for your request, then click Next:
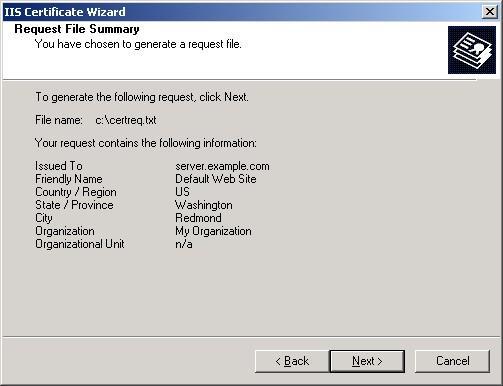
- Review the information for your request, then click Next:
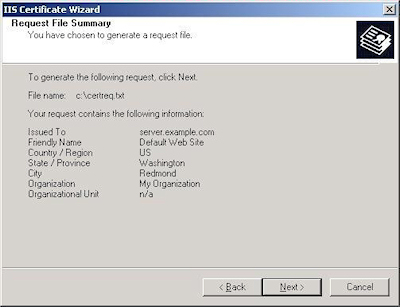
- Click "Finish" to exit the wizard.
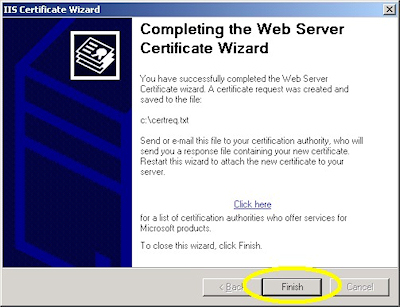


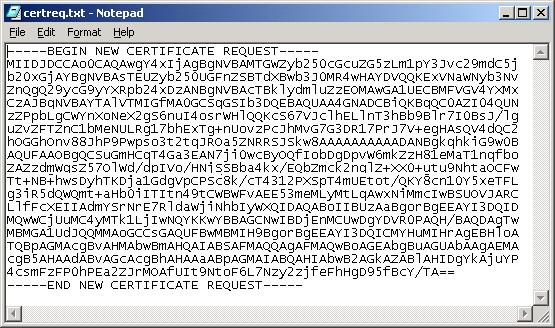
FYI: If you were to open your request file in Notepad, it will look something like the following:
IIS 5: Setting up SSL - Overview
21 September 2001 • by Bob • IIS
I wrote a series of instructions for my coworkers some time ago in order to show how to set up and enable Secure Sockets Layer (SSL) communications in IIS. I've had to troubleshoot a bunch of SSL issues over the years, so I thought that it would be a good idea to turn my notes into a blog series.
By way of explanation, setting up SSL on IIS is pretty simple. SSL is a Public Key/Private Key technology, and setting up SSL is essentially obtaining a Public Key from a trusted organization. The basic process for working with SSL is reduced to the following actions:
- Creating a Certificate Request
- Obtaining a Certificate from a Certificate Authority
- Installing the Certificate
While not necessary, installing certificate services on your computer is helpful when troubleshooting SSL issues, and I'll discuss that later in this blog series.
Creating a Certificate Request
This is a series of steps that need to be performed on the web server, and they differ widely depending on the server and version. A web administrator is required to enter information about their organization, their locality, etc. This information will be used to validate the requester.
Obtaining a Certificate from a Certificate Authority
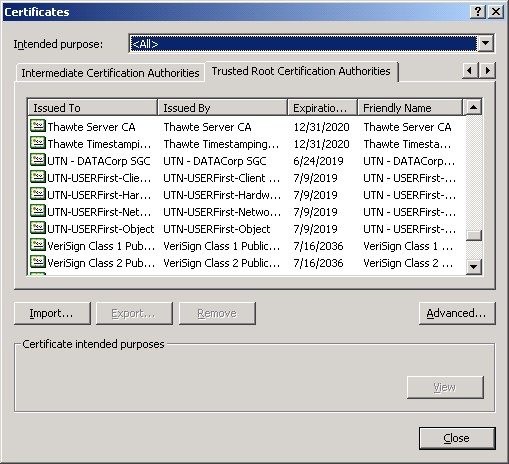
This is when a web administrator submits their request for a certificate to a Certificate Authority (CA), which is a trusted organization like VeriSign or Thawte. For a list of trusted organizations, see the following section in Internet Explorer.
You can choose to trust a new CA by obtaining the Root Certificate from the CA. (I'll post an Obtaining a Root Certificate blog with more information later.)
Installing the Certificate
After a request has been processed by a CA, the web administrator needs to install the certificate on the web server. Once again, this series of steps needs to be performed on the web server, and the steps differ depending on the web server and version.
For the Future...
In future blogs I'll go through the steps for creating certificate requests, obtaining certificates from a CA, and installing certificates. Following that, I'll discuss setting up a CA for testing SSL in your environment.
IIS: Notes on Server-Side Includes (SSI) syntax
29 October 1998 • by Bob • IIS
A few years ago I put together a bunch of notes about using Server-Side-Include (SSI) files with IIS 4. These notes eventually became Microsoft KB article Q203064, and I updated that information a couple of years later to incorporate IIS 5. This information is no longer available from Microsoft's support website, so I thought that it would make a good blog post.
SUMMARY
This article details some features that are available in the Microsoft implementation of Server-Side Include (SSI) files for Internet Information Server (IIS) and provides general syntax and examples for SSI directives.
APPLIES TO
- Microsoft Internet Information Services 5.0
- Microsoft Internet Information Server 4.0
MORE INFORMATION
SSI files are most commonly used with IIS to allow content authors to include the contents of one file inside another file, allowing the easy creation of script libraries or page headers and footers.
SSI files, like Active Server Pages (ASP) and Internet Data Connector (IDC) files, are script-mapped by file extension to a preprocessor dynamic-link library (DLL). In the case of SSI, the handler is Ssiinc.dll. SSI files are usually named with .stm file extensions, although extensions of .shtm and .shtml are also supported.
SSI is employed by the use of special preprocessing directives in SSI documents. These directives are parsed by the SSI DLL and processed. All directives are contained in HTML comment tokens and take the following general form:
<!--#<DIRECTIVE> [<ADDITIONAL DATA>]-->
Supported Directives
The following directives are supported in the IIS implementation of SSI:- #config - Configures how variables and commands are displayed.
- The general syntax for the #config directive is as follows:
<!-- #CONFIG <ERRMSG/TIMEFMT/SIZEFMT>="<format>" -->
- The following is an example of a simple page that uses the #config directive:
<html>
<body>
<!-- #CONFIG TIMEFMT="%m/%d/%y" -->
<p>Today's Date = <!--#ECHO VAR = "DATE_LOCAL" --></p>
<!-- #CONFIG TIMEFMT="%A, %B %d, %Y" -->
<p>Today's Date = <!--#ECHO VAR = "DATE_LOCAL" --></p>
</body>
</html>
- The general syntax for the #config directive is as follows:
- #echo - Inserts the value of various Common Gateway Interface (CGI) system environment variables.
- The general syntax for the #echo directive is as follows:
<!--#ECHO VAR = "<CGI_VARIABLE_NAME>"-->
- The following is an example of a simple page that uses the #echo directive:
<html>
<body>
<p>Server Name = <!--#ECHO VAR = "SERVER_NAME"--></p>
<p>Date = <!--#ECHO VAR = "DATE_LOCAL" --></p>
<p>Page URL = <!--#ECHO VAR = "URL" --></p>
</body>
</html>
- The general syntax for the #echo directive is as follows:
- #exec - Executes CGI or Internet Server API (ISAPI) command scripts and inserts output into an HTML document.
- The general syntax for the #exec directive is as follows:
<!-- #EXEC <CGI/CMD>="<command>" -->
- The CMD command for the #exec directive is disabled by default on IIS 5.0. For more information, see the following Microsoft Knowledge Base article:
233969 SSIEnableCmdDirective is set to FALSE by default
- The following is an example of a simple page that uses the #exec directive:
<html>
<body>
<p>Root Directory of C:</p>
<pre><!--#EXEC CMD="cmd /c dir c:\ /b"--></pre>
</body>
</html>
- The general syntax for the #exec directive is as follows:
- #flastmod - Retrieves the last modification time of a specified file.
- The general syntax for the #flastmod directive is as follows:
<!--#FLASTMOD <FILE/VIRTUAL> = "filename.ext"-->
- The following is an example of a simple page that uses the #flastmod and #config directives:
<html>
<body>
<!-- #CONFIG TIMEFMT="%m/%d/%y" -->
<p>Modified Date = <!--#FLASTMOD FILE="filename.ext"--></p>
<!-- #CONFIG TIMEFMT="%B %d, %Y" -->
<p>Modified Date = <!--#FLASTMOD FILE="filename.ext"--></p>
</body>
</html>
- The general syntax for the #flastmod directive is as follows:
- #fsize - Retrieves the size of a specified file.
- The general syntax for the #fsize directive is as follows:
<!--#FSIZE <FILE/VIRTUAL> = "filename.ext"-->
- The following is an example of a simple page that uses the #fsize and #config directives:
<html>
<body>
<!-- #CONFIG SIZEFMT="BYTES" -->
<p>File Size = <!--#FSIZE FILE="filename.ext"--> bytes</p>
<!-- #CONFIG SIZEFMT="ABBREV" -->
<p>File Size = <!--#FSIZE FILE="filename.ext"--> KB</p>
</body>
</html>
- The general syntax for the #fsize directive is as follows:
- #include - Includes the contents of one specified file inside another.
- The general syntax for the #include directive is as follows:
<!--#INCLUDE <FILE/VIRTUAL> = "filename.ext"-->
- The following is an example of a simple page that uses the #include directive:
<html>
<body>
<!--#INCLUDE FILE = "header.inc"-->
<p>Hello World!</p>
<!--#INCLUDE VIRTUAL = "/includes/footer.inc"-->
</body>
</html>
- The general syntax for the #include directive is as follows:
More Information on File and Virtual Syntax
SSI directives that use file paths can reference files by using a file or virtual path.- The file element is used with files that are relative to the folder of the current document. The following example includes a file in the current folder:
<!--#include file="myfile.txt"-->
- The virtual element represents paths that are relative to the base folder of the Web server. The following example includes a file in the /scripts virtual folder:
<!--#include virtual="/scripts/myfile.txt"-->
REFERENCES
For additional information on using SSI with IIS, click the following article numbers to view the articles in the Microsoft Knowledge Base: