IIS 6.0 WebDAV and Compound Document Format Files Revisited with Workarounds
24 April 2013 • by Bob • IIS, WebDAV, IIS 6
A few years ago I wrote the following blog, wherein I described how the WebDAV functionality in IIS 6.0 worked with files that are Compound Document format:
IIS 6.0 WebDAV and Compound Document Format Files
As I explained in that blog post, WebDAV needs somewhere to store "properties" for files that are uploaded to the server, and WebDAV uses the compound document format to accomplish this according to the following implementation logic:
- If the file is already in the compound document file format, IIS simply adds the WebDAV properties to the existing file. This data will not be used by the application that created the file - it will only be used by WebDAV. However, the file size will increase because WebDAV properties are added to the compound document.
- For other files, WebDAV stores a compound document in an NTFS alternate data stream that is attached to the file. You will never see this additional data from any directory listing, and the file size doesn't change because it's in an alternate data stream.
I recently had a customer contact me in order to ask if there was a way to disable this functionality since he didn't want his files modified in order to store the WebDAV properties. Unfortunately there is no built-in option for IIS that will disable this functionality, but there are a few workarounds.
Workaround #1 - Change the File Type
First and foremost - you can change your file type to something other than the compound document format. For example, if you are uploading files that were created in Microsoft Office, if you can upload your files in the newer Office Open XML formats, then you will not run into this problem. By way of explanation, older Microsoft Office files are in compound document format, whereas files that are that are created with Microsoft Office 2010 and later are in a zipped, XML-based file format. These files will have extensions like *.DOCX for Microsoft Word documents, *.XLSX for Microsoft Excel spreadsheets, and *.PPTX for Microsoft PowerPoint presentations.
Workaround #2 - Wrap Compound Document Files in a Separate File Type
If you are using a file that must be in compound document format, like a setup package in Microsoft Installer (*.MSI) format, you can upload the file in a *.ZIP file, or you can wrap the setup package inside a self-extracting executable by using a technology like Microsoft's IExpress Wizard (which ships as a built-in utility with most versions of Windows).
Workaround #3 - Block WebDAV Properties
If you absolutely cannot change your document from compound document format, I have a completely unsupported workaround that I can suggest. Since the problem arises when properties are added to a file, you can find a way to intercept the WebDAV commands that try to set properties. The actual HTTP verb that is used is PROPPATCH, so if you can find a way to keep this command from being used, then you can prevent files from being modified. Unfortunately you cannot simply suppress PROPPATCH commands by using a security tool like Microsoft's UrlScan to block the command, because this will cause many WebDAV clients to fail.
Instead, what I did as a workaround was to write an example ISAPI filter for IIS 6.0 that intercepts incoming PROPPATCH commands and always sends a successful (e.g. "200 OK") response to the WebDAV client, but in reality the filter does nothing with the properties and ends the request processing. This tricks a WebDAV client into thinking that it succeeded, and it prevents your files in compound document format from being modified. However, this also means that no WebDAV properties will ever be stored with your files; but if that's acceptable to you, (and it usually should be), then you can use this workaround.
With that in mind, here's the C++ code for my example ISAPI filter, and please remember that this is a completely unsupported workaround that is intended for use only when you cannot repackage your files to use something other than the compound document format.
#define _WIN32_WINNT 0x0400

#include <windows.h>
#include <httpfilt.h>

#define STRSAFE_LIB
#include <strsafe.h>

#define BUFFER_SIZE 2048

const char xmlpart1[] = "<?xml version=\"1.0\"?>"
  "<a:multistatus xmlns:a=\"DAV:\">"
  "<a:response>"
  "<a:href>";

const char xmlpart2[] = "</a:href>"
  "<a:propstat>"
  "<a:status>HTTP/1.1 200 OK</a:status>"
  "</a:propstat>"
  "</a:response>"
  "</a:multistatus>";

BOOL WINAPI GetFilterVersion(PHTTP_FILTER_VERSION pVer)
{
  HRESULT hr = S_OK;
  // Set the filter's version.
  pVer->dwFilterVersion = HTTP_FILTER_REVISION;
  // Set the filter's description.
  hr = StringCchCopyEx(
    pVer->lpszFilterDesc,256,"PROPPATCH",
    NULL,NULL,STRSAFE_IGNORE_NULLS);
  if (FAILED(hr)) return FALSE;
  // Set the filter's flags.
  pVer->dwFlags = SF_NOTIFY_ORDER_HIGH | SF_NOTIFY_PREPROC_HEADERS;
  return TRUE;
}

DWORD WINAPI HttpFilterProc(
  PHTTP_FILTER_CONTEXT pfc,
  DWORD NotificationType,
  LPVOID pvNotification )
{
  // Verify the correct notification.
  if ( NotificationType == SF_NOTIFY_PREPROC_HEADERS)
  {
    PHTTP_FILTER_PREPROC_HEADERS pHeaders;
    HRESULT hr = S_OK;

    bool fSecure = false;

    char szServerName[BUFFER_SIZE] = "";
    char szSecure[2] = "";
    char szResponseXML[BUFFER_SIZE] = "";
    char szResponseURL[BUFFER_SIZE] = "";
    char szRequestURL[BUFFER_SIZE] = "";
    char szMethod[BUFFER_SIZE] = "";

    DWORD dwBuffSize = 0;

    pHeaders = (PHTTP_FILTER_PREPROC_HEADERS) pvNotification;

    // Get the method of the request
    dwBuffSize = BUFFER_SIZE-1;
    // Exit with an error status if a failure occured.
    if (!pfc->GetServerVariable(
      pfc, "HTTP_METHOD", szMethod, &dwBuffSize))
      return SF_STATUS_REQ_ERROR;

    if (strcmp(szMethod, "PROPPATCH") == 0)
    {
      // Send the HTTP status to the client.
      if (!pfc->ServerSupportFunction(
        pfc, SF_REQ_SEND_RESPONSE_HEADER,"207 Multi-Status", 0, 0))
        return SF_STATUS_REQ_ERROR;

      // Get the URL of the request.
      dwBuffSize = BUFFER_SIZE-1;
      if (!pfc->GetServerVariable(
        pfc, "URL", szRequestURL, &dwBuffSize))
        return SF_STATUS_REQ_ERROR;

      // Determine if request was sent over secure port.
      dwBuffSize = 2;
      if (!pfc->GetServerVariable(
        pfc, "SERVER_PORT_SECURE", szSecure, &dwBuffSize))
        return SF_STATUS_REQ_ERROR;
      fSecure = (szSecure[0] == '1');

      // Get the server name.
      dwBuffSize = BUFFER_SIZE-1;
      if (!pfc->GetServerVariable(
        pfc, "SERVER_NAME", szServerName, &dwBuffSize))
        return SF_STATUS_REQ_ERROR;

      // Set the response URL.
      hr = StringCchPrintf(
        szResponseURL,BUFFER_SIZE-1, "http%s://%s/%s",
        (fSecure ? "s" : ""), szServerName, &szRequestURL[1]);
      // Exit with an error status if a failure occurs.
      if (FAILED(hr)) return SF_STATUS_REQ_ERROR;

      // Set the response body.
      hr = StringCchPrintf(
        szResponseXML,BUFFER_SIZE-1, "%s%s%s",
        xmlpart1, szResponseURL, xmlpart2);
      // Exit with an error status if a failure occurs.
      if (FAILED(hr)) return SF_STATUS_REQ_ERROR;

      // Write the response body to the client.
      dwBuffSize = strlen(szResponseXML);
      if (!pfc->WriteClient(
        pfc, szResponseXML, &dwBuffSize, 0))
        return SF_STATUS_REQ_ERROR;

      // Flag the request as completed.
      return SF_STATUS_REQ_FINISHED;
    }
  }

  return SF_STATUS_REQ_NEXT_NOTIFICATION;
}
I hope this helps. ;-]
Note: This blog was originally posted at http://blogs.msdn.com/robert_mcmurray/
IIS 6: Setting up SSL - Appendix C: Processing a Certificate Request using Windows 2003 Certificate Services
03 August 2011 • by Bob • IIS, SSL
In this last appendix for my blog series about using SSL with IIS 6, I'll discuss processing a certificate request by using Windows 2003 Certificate Services. When you are running a certificate server for your network environment, you will need to physically issue the certificates that clients will request from your certificate server. There is a way that you can configure certificate services to automatically issue certificates, but I'd advise against that, unless you are only issuing certificates for testing purposes. If so, then you should read the Set the default action upon receipt of a certificate request topic on Microsoft's TechNet website.
That being said, the procedure to approve and issue a certificate is relatively easy; to do so, use the following steps:
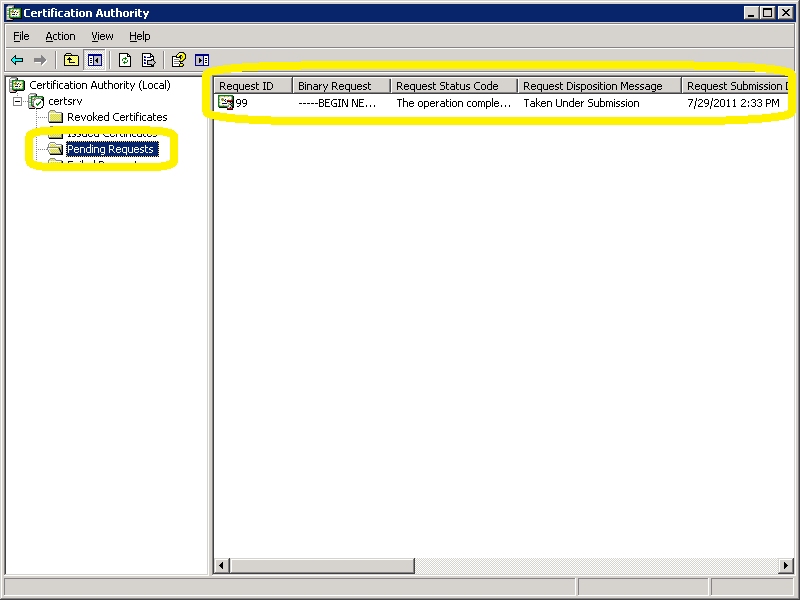
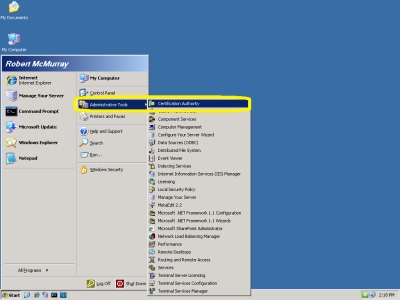
- Open the "Certificate Authority" administrative tool:
- Click on "Pending Requests":

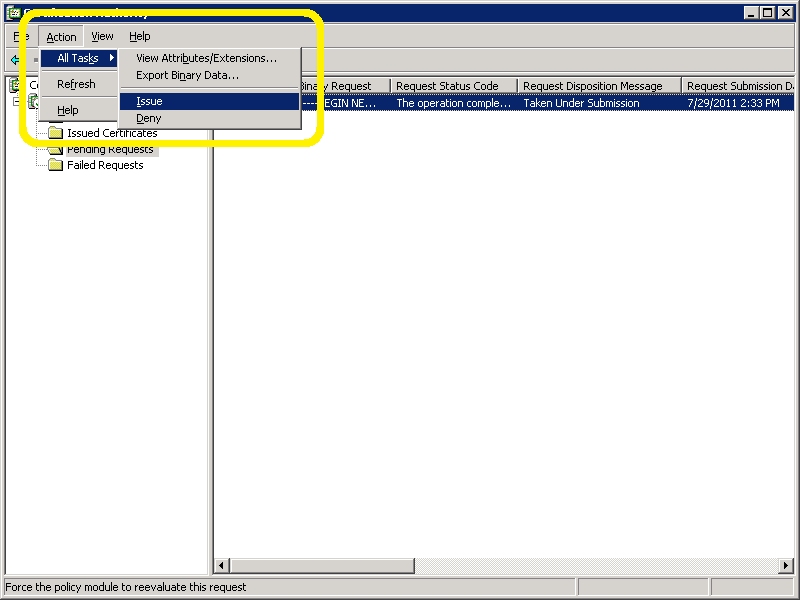
- Right-click the pending request and choose "All Tasks", then click "Issue":

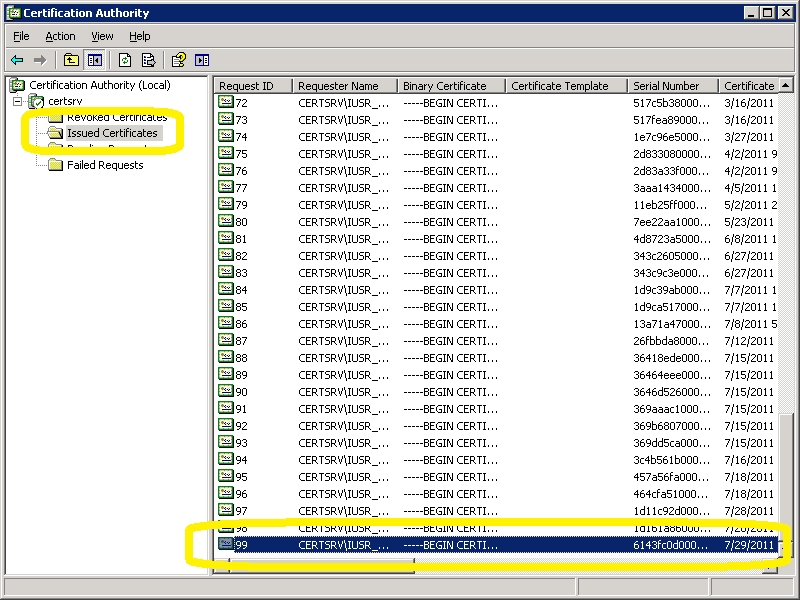
- The certificate will now show up under "Issued Certificates":

That wraps up the last post in this blog series about using Secure Sockets Layer (SSL) with IIS 6.0, as well as some related information about using Windows 2003 Certificate Services. I hope this information helps administrators that have yet to upgrade to Windows Server 2008 or Windows Server 2008 R2. ;-]
Note: This blog was originally posted at http://blogs.msdn.com/robert_mcmurray/
IIS 6: Setting up SSL - Appendix B: Obtaining a Root Certificate from Windows Server 2003 Certificate Services
29 July 2011 • by Bob • IIS, SSL
In this second appendix for my blog series about using SSL with IIS 6, I'm going to discuss obtaining the root certificate from Windows Server 2003 Certificate Services. By way of explanation, obtaining a root certificate is one of the most important steps for servers or clients that will use certificates that you issue. While this step is not necessary on the server where you installed Certificate Services, it is absolutely essential on your other servers or clients, because this step will allow those computers to trust your certificate server as a Certificate Authority (CA). Without that trust in place, you will either receive error messages or SSL simply won't work.
I've broken this process into two steps:
Downloading the Root Certificate
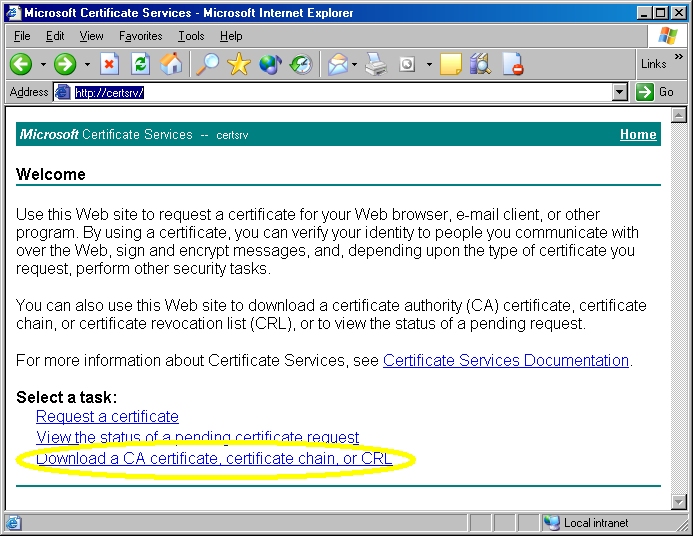
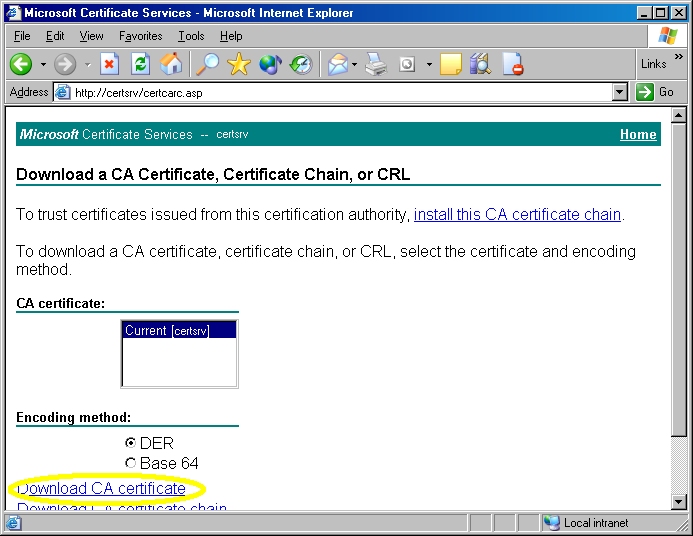
- Browse to your certificate server's address, (e.g. http://<server-name>/certsrv/), and choose to retrieve the CA certificate:

- Click the link to download the CA certificate:

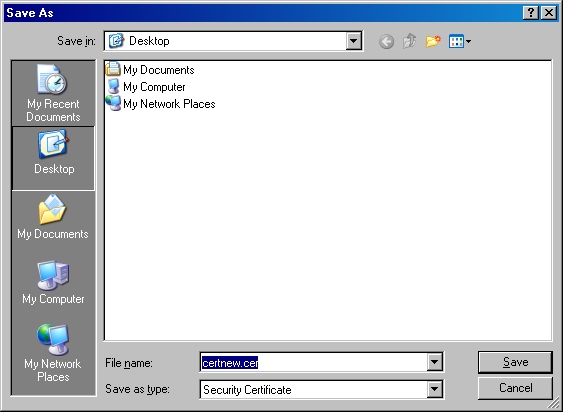
- Choose to save the certificate file to disk:

- Save the file to your desktop:

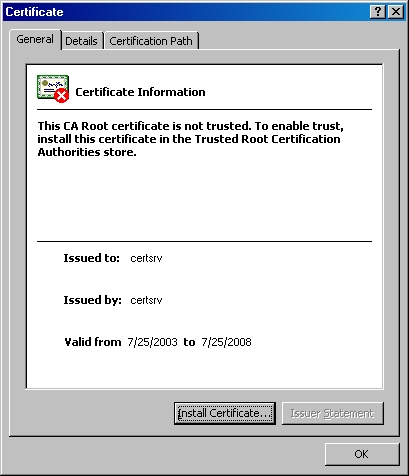
Note: If you were to bring up the properties for the root certificate, the certificate's icon should show an error; this is because the certificate has not been imported.
Installing the Root Certificate
Before using any certificates that you issue on a computer, you need to install the Root Certificate. (This includes web servers and clients.)
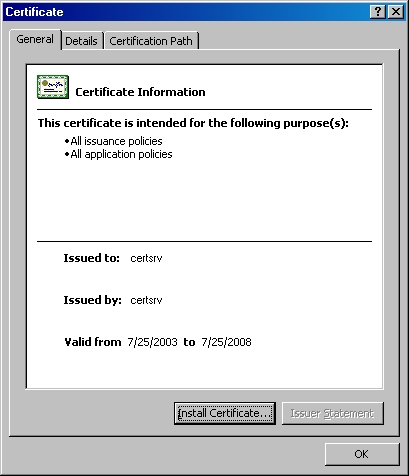
- Double-click the file on your desktop:

- Click the "Install Certificate" button:

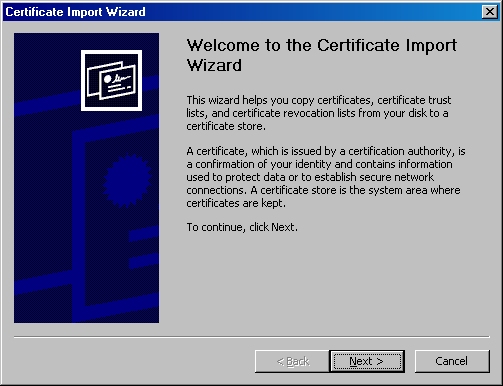
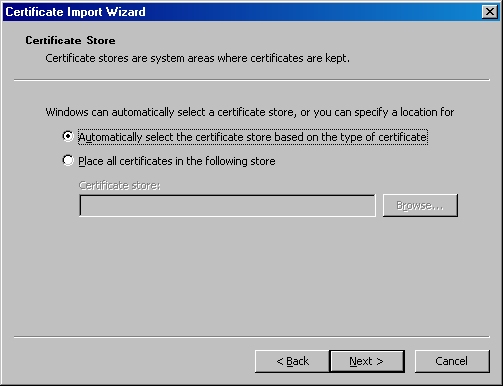
- Click "Next" to start the Certificate Import Wizard:

- Choose to automatically choose the store:

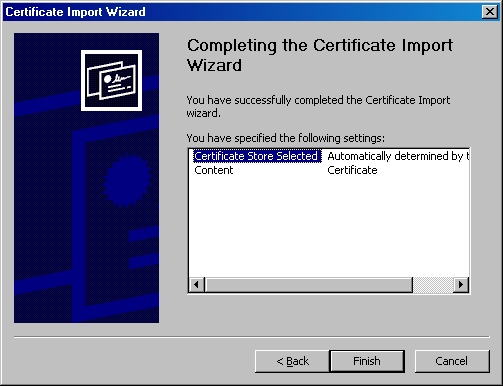
- Click the "Finish" button:

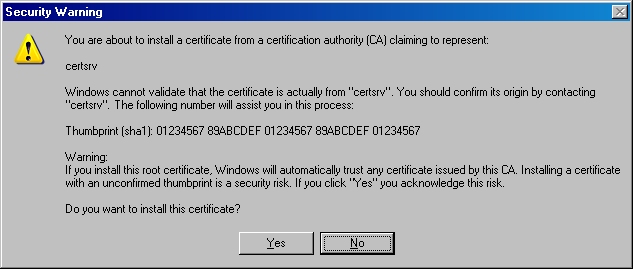
- Click "Yes" when asked if you want to add the certificate:
NOTE: This step is very important. If you do not see this dialog, something went wrong, and you may need to manually place the certificate in the correct store.
- Click "OK" when informed that the import was successful.

Note: If you were to bring up the properties for the root certificate after you have installed it on your computer, you should see that the icon for the certificate no longer shows an error.
That's it for this post. In my next blog post, I'll discuss processing a certificate request.
Note: This blog was originally posted at http://blogs.msdn.com/robert_mcmurray/
IIS 6: Setting up SSL - Appendix A: Installing Windows Server 2003 Certificate Services
28 July 2011 • by Bob • IIS, SSL
I needed to take a short break from my blog series about using SSL with IIS 6 in order to work on some other projects, but I wanted to finish the series by giving you a few appendices that give you some additional details that you might want to know if you are using SSL with IIS 6.
In this first appendix, I'll discuss how to install Certificate Services for Windows Server 2003. Installing Certificate Services will allow you to have your own Certificate Authority (CA), and thereby you will be able to issue certificates for your organization. It should be noted that Internet clients that are not part of your organization will not inherently trust your certificates - you will need to export your Root CA certificate, which I will describe in a later appendix for this blog series.
There are four different configurations that you can choose from when you are installing Certificate Services:
| Enterprise root CA | Integrated with Active Directory Acts as the root CA for your organization |
|---|---|
| Enterprise subordinate CA | Integrated with Active Directory Child of your organization's root CA |
| Stand-alone root CA | Not integrated with Active Directory Acts as the root CA for your certificate chain |
| Stand-alone subordinate CA | Not integrated with Active Directory Child of your certificate chain's root CA |
Note: More information about these options is available at http://technet.microsoft.com/en-us/library/cc756989.aspx
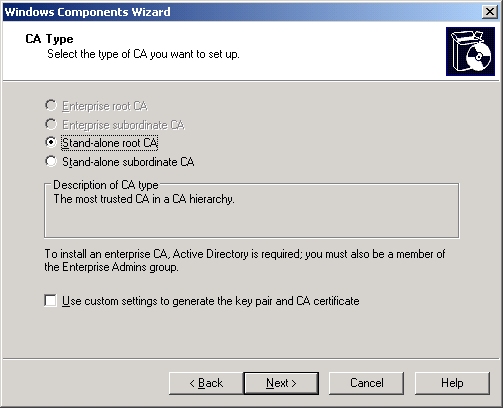
For this blog, I will discuss setting up a Stand-alone root CA.
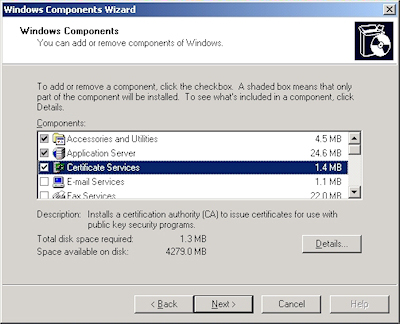
- Run the "Windows Component Wizard" in "Add/Remove Programs", choose "Certificate Services", and click "Next":
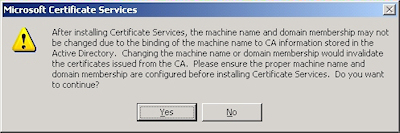
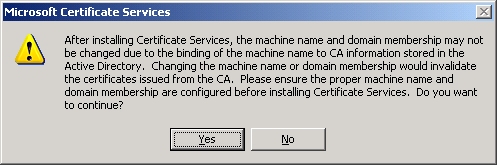
- Click "Yes" when prompted to continue:
- Accept the defaults, then click "Next":

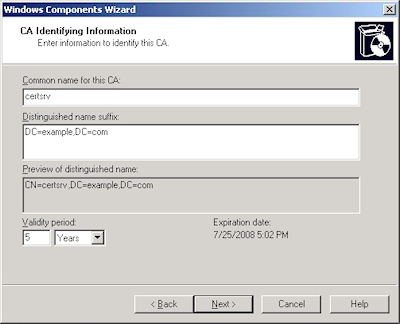
- Enter all requested information, then click "Next":
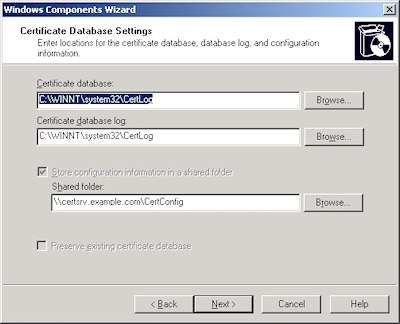
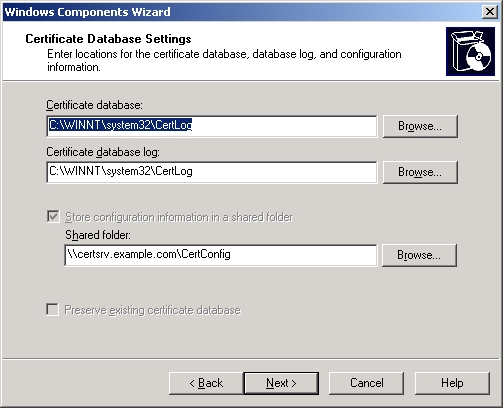
- Accept the defaults for the data locations and click "Next":
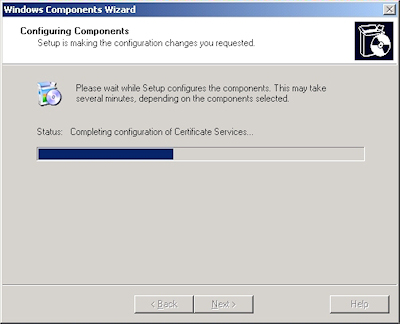
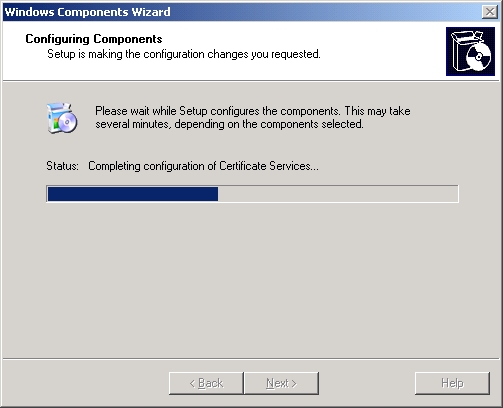
- The wizard will step through installing the services:
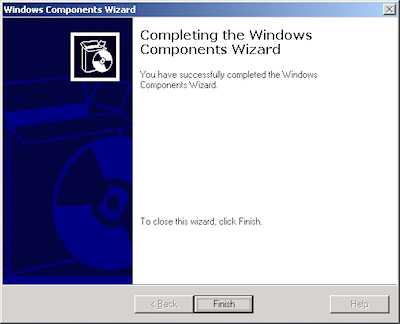
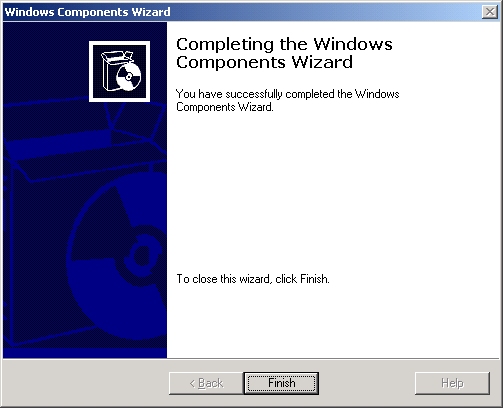
- When the wizard has completed, click "Finish" to exit the wizard:


That wraps up this blog post. In my next post I'll discuss obtaining the root certificate for your certificate server so you can install it on a client computer or an IIS server; this will allow other computers to trust the certificates that you issue.
Note: This blog was originally posted at http://blogs.msdn.com/robert_mcmurray/
IIS 6.0 WebDAV and Compound Document Format Files
22 April 2010 • by Bob • IIS, WebDAV, IIS 6
We recently ran into a situation where a customer thought that they were seeing file corruption when they were transferring files from a Windows 7 client to their IIS 6.0 server using WebDAV. More specifically, the file sizes were increasing for several specific file types, and for obvious reasons the checksums for these files would not match for verification. Needless to say this situation caused a great deal of alarm on the WebDAV team when we heard about it - file corruption issues are simply unacceptable.
To alleviate any fears, I should tell you right up front that no corruption was actually taking place, and the increase in file size was easily explained once we discovered what was really going on. All of that being said, I thought that a detailed explanation of the scenario would make a great blog entry in case anyone else runs into the situation.
The Customer Scenario
First of all, the customer was copying installation files using a batch file over WebDAV; more specifically the batch file was copying a collection of MSI and MST files. After the batch file copied the files to the destination server it would call the command-line comp utility to compare the files. Each MSI and MST file that was copied would increase by a small number of bytes so the comparison would fail. The customer computed checksums for the files to troubleshoot the issue and found that the checksums for the files on the source and destination did not match. Armed with this knowledge the customer contacted Microsoft for support, and eventually I got involved and I explained what the situation was.
The Architecture Explanation
Windows has a type of file format called a Compound Document, and many Windows applications make use of this file format. For example, several Microsoft Office file formats prior to Office 2007 used a compound document format to store information.
A compound document file is somewhat analogous to a file-based database, or in some situations like a mini file system that is hosted inside another file system. In the case of an MST or MSI file these are both true: MST and MSI files store information in various database-style tables with rows and columns, and they also store files for installation.
With that in mind, here's a behind-the-scenes view of WebDAV in IIS 6.0:
The WebDAV protocol extension allows you to store information in "properties", and copying files over the WebDAV redirector stores several properties about a file when it sends the file to the server. If you were to examine a protocol trace for the WebDAV traffic between a Windows 7 client and an IIS server, you will see the PUT command for the document followed by several PROPPATCH commands for the properties.
IIS needs a way to store the properties for a file in a way where they will remain associated with the file in question, so the big question is - where do you store properties?
In IIS 7 we have a simple property provider that stores the properties in a file named "properties.dav," but for IIS 5.0 and IIS 6.0 WebDAV code we chose to write the properties in the compound document file format because there are lots of APIs for doing so. Here's the way that it works in IIS 5 and IIS 6.0:
- If the file is already in the compound document file format, IIS simply adds the WebDAV properties to the existing file. This data will not be used by the application that created the file - it will only be used by WebDAV. This is exactly what the customer was seeing - the file size was increasing because the WebDAV properties were being added to the compound document.
- For other files, WebDAV stores a compound document in an NTFS alternate data stream that is attached to the file. You will never see this additional data from any directory listing, and the file size doesn't change because it's in an alternate data stream.
So believe it or not, no harm is done by modifying a compound document file to store the WebDAV properties. Each application that wants to pull information from a compound document file simply asks for the data that it wants, so adding additional data to a compound document file in this scenario was essentially expected behavior. I know that this may seem counter-intuitive, but it's actually by design. ;-]
The Resolution
Once I was able to explain what was actually taking place, the customer was able to verify that their MST and MSI files still worked exactly as expected. Once again, no harm was done by adding the WebDAV properties to the compound document files.
You needn't take my word for this, you can easily verify this yourself. Here's a simple test: Word 2003 documents (*.DOC not *.DOCX) are in the compound document file format. So if you were to create a Word 2003 document and then copy that document to an IIS 6.0 server over WebDAV, you'll notice that the file size increases by several bytes. That being said, if you open the document in Word, you will see no corruption - the file contains the same data that you had originally entered.
I hope this helps. ;-]
IIS 6: FTP User Isolation with Multiple User Accounts
09 May 2006 • by Bob • FTP, IIS
In IIS 4.0 and IIS 5.0, if you created a virtual directory that had a name that was identical to a user name, when the user logged in to the FTP site they would automatically be changed to their folder. When multiple users will access the same FTP content, you could create another virtual directory that is identical to the other user name and point it to the same content.
This allowed sharing a single FTP site across several users and content sets without advertising user names or content folders. Even though a user could type "CD /" from an FTP prompt, they would not be able to see the virtual directories from other user accounts on that server because virtual directories are not listed when a user types "ls -l" or "dir" from an FTP prompt at the root. That being said, this security feature still doesn't go far enough from a security perspective.
One of the great IIS 6.0 features is User Isolation, which is discussed in the Hosting Multiple FTP Sites with FTP User Isolation (IIS 6.0) topic on MSDN. As a quick review, there are three different isolation modes that you can choose when creating an IIS 6.0 FTP site:
- "Do Not Isolate Users"
No user isolation; FTP works like IIS 4.0 or IIS 5.0.
(Not covered in this post.) - "Isolate Users"
Simple user isolation through folders.
(Described below.) - "Isolate Users Using Active Directory"
Requires A.D. configuration.
(Not covered in this post.)
To configure the "Isolate Users" mode, you first need to create your FTP site and choose the "Isolate Users" option when prompted for FTP User Isolation. Once the FTP site has been created, you need to create a physical folder named "LocalUser" for local user accounts or named after your domain under your FTP server's root folder. To isolate users to a specific folder, you use these rules that I copied from the MSDN topic that I listed earlier in this post:
- For anonymous users, the home directory is LocalUser\Public under the FTP root directory.
- For local users, the home directory is LocalUser\UserName under the FTP root directory.
- For users that log on with Domain\UserName, the home directory is Domain\UserName under the FTP root directory.
This is very easy to configure, and when a user logs in to your FTP server they will be restricted to their physical folder under the FTP root. Typing "CD /" from an FTP prompt will always restrict the user within their own site.
That being said, because physical directories are required for this configuration it may seem like a step backward when you consider that you used to be able to create multiple virtual directories that pointed to content in varying locations and for multiple user accounts. Not to worry, however, because Windows provides a way around this limitation using NTFS junctions.
For those of you that are not familiar with NTFS junctions, there are several topics that discuss this. (For example, see Inside Win2K NTFS, Part 1.) A junction is somewhat like a symbolic directory link in the UNIX world, where a junction looks like a folder but points to content that is physically located somewhere else. There are two tools that you can use to create junctions, LINKD from the Windows Resource Kit, and JUNCTION from www.sysinternals.com. Using these tools with IIS 6.0 can allow you the freedom to deploy FTP folder structures much like you did with IIS 4/5 while utilizing the user isolation features in IIS 6.
Here's an example - when configuring an IIS 6.0 FTP site, I used the following steps:
- I chose the "Isolate Users" option when creating my FTP site.
- I created the "LocalUser" physical folder under my FTP site's root folder.
- I created junctions under the "LocalUser" physical folder that were named after user accounts and pointed to various content folders.
When a user logs in to my FTP site using their user account, they are automatically dropped in their content folder via the junction. Since you can create multiple junctions that point to the same content folder, you can create junctions for every user account that will work with a set of content.
I hope this helps!
Note: This blog was originally posted at http://blogs.msdn.com/robert_mcmurray/
IIS 6: Reverting log files back to the default W3C fields
27 March 2006 • by Bob • IIS, Scripting
Recently I had to work with a customer that was trying to use a 3rd-party utility that read W3C log files and it was failing to complete processing. I had the customer send me his log files, and upon examination I discovered that the trouble was occuring because the customer had been experimenting with adding and removing the different fields from their log files and this was causing the log parsing utility to crash.
As luck would have it, IIS provides a useful logging utility object that you can read more about at the following URL:
- http://www.microsoft.com/windows2000/en/server/iis/htm/asp/comp6ant.htm
- http://technet.microsoft.com/en-us/library/cc338643.aspx
I had used this logging utility object for an earlier project, so I was familiar with how it worked. With that knowledge in mind, I wrote the following script that loops through all of the log files in a folder and creates new log files in a subfolder that contain only the default W3C fields. (BTW - I sent this script to the customer and he was able to parse all of his log files successfully. ;-] )
Option Explicit
Randomize Timer

' Declare variables.

Dim objIISLog
Dim objFSO, objFolder, objFile
Dim objOutputFile, strInputFile
Dim strOutputFile, strOutputPath
Dim strLogRecord
Dim blnExists

' Create file system object.
Set objFSO = WScript.CreateObject("Scripting.FileSystemObject")
' Retrieve an object For the current folder.
Set objFolder = objFSO.GetFolder(".")

' Create a subfolder with a random name.
blnExists = True
Do While blnExists = True
 strOutputPath = objFolder.Path & "\" & CreateRandomName(20)
 blnExists = objFSO.FolderExists(strOutputPath)
Loop
objFSO.CreateFolder strOutputPath

' Loop through the log files in the current folder.
For Each objFile In objFolder.Files

 ' Test for a log file.
 If Right(LCase(objFile.Name),4) = ".log" Then

  ' Format the file names/paths.
  strInputFile = objFolder.Path & "\" & objFile.Name
  strOutputFile = strOutputPath & "\" & objFile.Name

  ' Create and open an IIS logging object.
  Set objIISLog = CreateObject("MSWC.IISLog")
  ' Open the input log file.
  objIISLog.OpenLogFile strInputFile, 1, "", 0, ""
  ' Open the output log file.
  Set objOutputFile = objFSO.CreateTextFile(strOutputFile)

  ' Read the initial record from the log file.
  objIISLog.ReadLogRecord

  ' Write the headers to the output log file.
  objOutputFile.WriteLine "#Software: Microsoft Internet Information Services 5.0"
  objOutputFile.WriteLine "#Version: 1.0"
  objOutputFile.WriteLine "#Date: " & BuildDateTime(objIISLog.DateTime)
  objOutputFile.WriteLine "#Fields: date time c-ip cs-username s-ip s-port " & _
   "cs-method cs-uri-stem cs-uri-query sc-status cs(User-Agent)"

  ' Loop through the records in the log file.
  Do While Not objIISLog.AtEndOfLog

   ' Format the log file fields.
   strLogRecord = BuildDateTime(objIISLog.DateTime)
   strLogRecord = strLogRecord & _
    " " & FormatField(objIISLog.ClientIP) & _
    " " & FormatField(objIISLog.UserName) & _
    " " & FormatField(objIISLog.ServerIP) & _
    " " & FormatField(objIISLog.ServerPort) & _
    " " & FormatField(objIISLog.Method) & _
    " " & FormatField(objIISLog.URIStem) & _
    " " & FormatField(objIISLog.URIQuery) & _
    " " & FormatField(objIISLog.ProtocolStatus) & _
    " " & FormatField(objIISLog.UserAgent)

   ' Write the output log file record.
   objOutputFile.WriteLine strLogRecord

   ' Read the next record from the log file.
   objIISLog.ReadLogRecord

  Loop

  ' Close the input log file.
  objIISLog.CloseLogFiles 1
  objIISLog = Null

 End If

Next

' Inform the user that the operation has completed.
MsgBox "Finished!"

' Format a log file field.
Function FormatField(tmpField)
 On Error Resume Next
 FormatField = "-"
 If Len(tmpField) > 0 Then FormatField = Trim(tmpField)
End Function

' Format a log file date.
Function BuildDateTime(tmpDateTime)
 On Error Resume Next
 tmpDateTime = CDate(tmpDateTime)
 BuildDateTime = Year(tmpDateTime) & "-" & _
  Right("0" & Month(tmpDateTime),2) & "-" & _
  Right("0" & Day(tmpDateTime),2) & " " & _
  Right("0" & Hour(tmpDateTime),2) & ":" & _
  Right("0" & Minute(tmpDateTime),2) & ":" & _
  Right("0" & Second(tmpDateTime),2)
End Function

' Create a random name.
Function CreateRandomName(intNameLength)
 Const strValidChars = "ABCDEFGHIJKLMNOPQRSTUVWXYZ0123456789"
 Dim tmpX, tmpY, tmpZ
 For tmpX = 1 To intNameLength
  tmpY = Mid(strValidChars,Int(Rnd(1)*Len(strValidChars))+1,1)
  tmpZ = tmpZ & tmpY
 Next
 CreateRandomName = tmpZ
End Function
Happy coding!
Note: This blog was originally posted at http://blogs.msdn.com/robert_mcmurray/
IIS 6: Creating an Itemized List of Server Bindings
21 February 2006 • by Bob • IIS, Scripting
One of my servers has a large number of individual web sites on it, and each of these web sites has several server bindings for different IP addresses, Port Assignments, and Host Headers. As I continue to add more web sites on the server, it becomes increasingly difficult to keep track of all the details using the IIS user interface.
With that in mind, I wrote the following ADSI script which creates a text file that contains an itemized list of all server bindings on a server.
Option Explicit
On Error Resume Next

Dim objBaseNode, objChildNode
Dim objBindings, intBindings
Dim objFSO, objFile, strOutput

' get a base object
Set objBaseNode = GetObject("IIS://LOCALHOST/W3SVC")
Set objFSO = WScript.CreateObject("Scripting.FileSystemObject")
Set objFile = objFSO.CreateTextFile("ServerBindings.txt")

' check if if have an error ...
If (Err.Number <> 0) Then

    ' ... and output the error.
    strOutput = "Error " & Hex(Err.Number) & "("
    strOutput = strOutput & Err.Description & ") occurred."

' ... otherwise, continue processing.
Else
    ' loop through the child nodes
    For Each objChildNode In objBaseNode
        ' is this node for a web site?
        If objChildNode.class = "IIsWebServer" Then
            ' get the name of the node
            strOutput = strOutput & "LM/W3SVC/" & _
                objChildNode.Name
            ' get the server comment
            strOutput = strOutput & " (" & _
                objChildNode.ServerComment & ")" & vbCrLf
            ' get the bindings
            objBindings = objChildNode.ServerBindings
            ' loop through the bindings
            For intBindings = 0 To UBound(objBindings)
                strOutput = strOutput & vbTab & _
                    Chr(34) & objBindings(intBindings) & _
                    Chr(34) & vbCrLf
            Next
        End If
    ' try not to be a CPU hog
    Wscript.Sleep 10
    Next
End If

objFile.Write strOutput
objFile.Close

Set objBaseNode = Nothing
Set objFSO = Nothing
Hope this helps!
IIS 6: Listing the Host Headers of all Web Sites using ADSI
04 October 2005 • by Bob • IIS, Scripting, IIS 6
Note: I originally wrote the following script for a friend, but as every good programmer often does, I kept the script around because I realized that it could come in handy. I've found myself using the script quite often with several of the servers that I manage, so I thought that I'd share it here.
When managing a large web server with dozens of web sites, it's hard to keep track of all the host headers that you have configured in your settings. With that in mind, I wrote the following script that lists the host headers that are assigned on an IIS web server. To use the example script, copy the script into notepad or some other text editor, save it to your server as "HostHeaders.vbs", and then double-click the script to run it. The script will create a text file named "HostHeaders.txt" that contains all the host headers listed by site for your server.
Option Explicit
On Error Resume Next

Dim objBaseNode, objChildNode
Dim objBindings, intBindings
Dim objFSO, objFile, strOutput

' get a base object
Set objBaseNode = GetObject("IIS://LOCALHOST/W3SVC")
Set objFSO = WScript.CreateObject("Scripting.FileSystemObject")
Set objFile = objFSO.CreateTextFile("HostHeaders.txt")

' check if we have an error ...
If (Err.Number <> 0) Then

    ' ... and output the error.
    strOutput = "Error " & Hex(Err.Number) & "("
    strOutput = strOutput & Err.Description & ") occurred."

' ... otherwise, continue processing.
Else

    ' loop through the child nodes
    For Each objChildNode In objBaseNode

        ' is this node for a web site?
        If objChildNode.class = "IIsWebServer" Then

            ' get the name of the node
            strOutput = strOutput & "LM/W3SVC/" & _
                objChildNode.Name

            ' get the server comment
            strOutput = strOutput & " (" & _
                objChildNode.ServerComment & ")" & vbCrLf
            ' get the bindings
            objBindings = objChildNode.ServerBindings
            ' loop through the bindings
            For intBindings = 0 To UBound(objBindings)
                strOutput = strOutput & vbTab & _
                    Chr(34) & objBindings(intBindings) & _
                    Chr(34) & vbCrLf
            Next
        End If
    ' try not to be a CPU hog
    Wscript.Sleep 10
    Next
End If
objFile.Write strOutput
objFile.Close
Set objBaseNode = Nothing
Set objFSO = Nothing
If you feel adventurous, you could easily modify the script to return the text in a tab-separated or comma-separated format.
Enjoy!