Some Useful and Obscure FTP Configuration Settings
30 June 2014 • by Bob • Configuration, FTP, IIS
I get a lot of question about various configuration settings for the IIS FTP service, and most of the settings that I discuss with people can be configured through the FTP features in the IIS Manager. That being said, there are some useful configuration settings for the FTP service which I periodical send to people that have no user interface for setting them. With that in mind, I thought I would write a quick blog to point out a few of these obscure settings that I personally use the most-often or I send to other people.
Using Domain Name Syntax as an FTP Virtual Hostname
I use this setting on all of my FTP servers because it seems a little more natural to me. Here's the scenario: the IIS FTP service supports two kinds of hostnames:
- "Real" FTP hostnames - these are real FTP hostnames that are specified by using the FTP HOST command (as defined in RFC 7151)
- "Virtual" ftp hostnames - these are FTP hostnames that are specified as part of the FTP USER command
Real FTP hostnames are pretty straight-forward: an FTP client specifies the hostname with a HOST command when a user is connecting to the server. Once the IIS FTP service receives that command, the FTP service routes the FTP session to the correct FTP site.
That being said, the FTP HOST command is still rather new, so only a handful of FTP clients currently support it. Because of that, you can use FTP "virtual" hostnames with the IIS FTP service. By default that syntax uses the "vertical line" or "pipe" character to differentiate between the hostname and user name. For example:
- "
ftp.contoso.com|username" - "
ftp.fabrikam.com|username"
When you are specifying your FTP credentials in your FTP client, you would enter your username like the preceding examples. While this syntax is valid for both the IIS FTP service and the underlying FTP protocol, it seems a little odd to most users (including me). With that in mind, we added a configuration setting for the FTP service that will allow you to use the more-familiar domain\username syntax like the following examples:
- "
ftp.contoso.com\username" - "
ftp.fabrikam.com\username"
To enable this feature, use the following steps:
- Open a command prompt as an administrator.
- Type the following commands:
cd /d "%SystemRoot%\System32\Inetsrv"
appcmd.exe set config -section:system.ftpServer/serverRuntime /hostNameSupport.useDomainNameAsHostName:"True" /commit:apphost
net.exe stop FTPSVC
net.exe start FTPSVC - Close the command prompt.
More information about this feature is available in the IIS configuration reference at the following URL:
- FTP Host Name Support <hostNameSupport>
http://www.iis.net/ConfigReference/system.ftpServer/serverRuntime/hostNameSupport
FTP Credential Caching
The FTP service caches user credentials for successfully-authenticated user sessions in order to help improve login performance, and I wrote the following detailed blog about this a couple of years ago:
Credential Caching in FTP 7.0 and FTP 7.5
I don't want to re-post an old blog, but I have sent several people to that blog over the years, so I thought that it was worth mentioning here since it seems to be referenced quite often. The problem that people seem to run into the most is that their old password is still valid for FTP after they have changed it, and this is caused by the FTP service caching their user credentials.
This is especially annoying for me personally when I am working on a development computer where I am creating an authentication provider. Unless I disable credential caching on my development computer, I can never seem to get any work done. To resolve this issue, I disable credential caching for the FTP service by using the following steps:
- Open a command prompt as an administrator.
- Type the following commands:
cd /d "%SystemRoot%\System32\Inetsrv"
appcmd.exe set config -section:system.ftpServer/caching /credentialsCache.enabled:"False" /commit:apphost
net.exe stop FTPSVC
net.exe start FTPSVC - Close the command prompt.
The blog which I mentioned earlier goes into more detail about setting a custom timeout interval for credential caching instead of disabling the feature entirely, and all of the settings for FTP credential caching are in the IIS configuration reference at the following URLs:
- FTP Caching <caching>
http://www.iis.net/ConfigReference/system.ftpServer/caching - FTP Credentials Cache <credentialsCache>
http://www.iis.net/ConfigReference/system.ftpServer/caching/credentialsCache
FTP Client Certificate Authentication
FTP Client Certificate Authentication is an often-overlooked feature of the IIS FTP service, and I think that this is due to two reasons:
- There is no user interface to configure the required settings
- Configuring the required settings is very difficult
My second reason cannot be understated; I usually have to set up FTP Client Certificate Authentication once or twice a year in order to test various scenarios, and each time I do so I am reminded of just how difficult it can be to get everything right, and equally how easy it is to get something wrong.
Fortunately I took the time a couple of years ago to write a blog which documents everything that it takes to configure the FTP service, and I have used my notes in that blog several times. In complement to my blog on the subject, Vivek Kumbhar wrote an excellent blog series with additional steps to configure your Active Directory for certificate authentication. With that in mind, here are all of the requisite blog posts that you would need to set up this feature:
- Configuring FTP Client Certificate Authentication in FTP 7
Describes how to configure your FTP server for FTP Client Certificate Authentication. - Configure Client Certificate Mapping in FTP 7.5 - Part 1
Describes how to set up your Active Directory server, IIS server, and FTP client systems. - Configure Client Certificate Mapping in FTP 7.5 - Part 2
Walks you through obtaining and installing a server certificate, which you will use later for your FTP site. - Configure Client Certificate Mapping in FTP 7.5 - Part 3
Walks you through setting up an FTP site with SSL. - Configure Client Certificate Mapping in FTP 7.5 - Part 4
Describes how to configure Active Directory mapping for a user account.
As I have mentioned before, configuring this feature is not for the faint-of-heart, but it can be very beneficial from a security standpoint.
For more information about the settings that are required for FTP Client Certificate Authentication, see the following articles in the IIS configuration reference:
- FTP Client Certificate Authentication <clientCertAuthentication>
http://www.iis.net/ConfigReference/system.applicationHost/sites/site/ftpServer/security/authentication/clientCertAuthentication - FTP over SSL <ssl>
http://www.iis.net/ConfigReference/system.applicationHost/sites/site/ftpServer/security/ssl - FTP SSL Client Certificates <sslClientCertificates>
http://www.iis.net/ConfigReference/system.applicationHost/sites/site/ftpServer/security/sslClientCertificates
That wraps it up for today's post. ;-]
Note: This blog was originally posted at http://blogs.msdn.com/robert_mcmurray/
Configuring FTP Client Certificate Authentication in FTP 7
26 April 2012 • by Bob • FTP, Scripting
We had a customer question the other day about configuring FTP Client Certificate Authentication in FTP 7.0 and in FTP 7.5. It had been a while since the last time that I had configured those settings on an FTP server, so I thought that it would be great to re-familiarize myself with that feature. To my initial dismay, it was a little more difficult than I had remembered, because there are a lot of parts to be configured.
That being said, there are a few primary activities that you need to know about and configure correctly:
I will explain each of those in this blog, although I will defer some of the details for Active Directory mapping to an excellent blog series that I discovered by Vivek Kumbhar.
Configuring the FTP Service
There are several settings that you need to configure for the FTP server; unfortunately there is no user interface for those settings, so you might want to familiarize yourself with the following settings:
- FTP Client Certificate Authentication <clientCertAuthentication>
- FTP over SSL <ssl>
- FTP SSL Client Certificates <sslClientCertificates>
At first I had made a batch file that was configuring these settings by using AppCmd, but I eventually abandoned that script and wrote the following VBScript code to configure all of the settings at one time - the only parts that you need to change is your site name and the hash value your SSL certificate, which are highlighted in yellow:
Set adminManager = CreateObject("Microsoft.ApplicationHost.WritableAdminManager")
adminManager.CommitPath = "MACHINE/WEBROOT/APPHOST"
Set sitesSection = adminManager.GetAdminSection("system.applicationHost/sites", "MACHINE/WEBROOT/APPHOST")
Set sitesCollection = sitesSection.Collection

siteElementPos = FindElement(sitesCollection, "site", Array("name", "ftp.contoso.com"))
If (addElementPos = -1) Then
   WScript.Echo "Element not found!"
   WScript.Quit
End If
Set siteElement = sitesCollection.Item(siteElementPos)

Set ftpServerElement = siteElement.ChildElements.Item("ftpServer")
Set securityElement = ftpServerElement.ChildElements.Item("security")

Set sslClientCertificatesElement = securityElement.ChildElements.Item("sslClientCertificates")
sslClientCertificatesElement.Properties.Item("clientCertificatePolicy").Value = "CertRequire"
sslClientCertificatesElement.Properties.Item("useActiveDirectoryMapping").Value = True

Set authenticationElement = securityElement.ChildElements.Item("authentication")
Set clientCertAuthenticationElement = authenticationElement.ChildElements.Item("clientCertAuthentication")
clientCertAuthenticationElement.Properties.Item("enabled").Value = True

Set sslElement = securityElement.ChildElements.Item("ssl")
sslElement.Properties.Item("serverCertHash").Value = "57686f6120447564652c2049495320526f636b73"
sslElement.Properties.Item("controlChannelPolicy").Value = "SslRequire"
sslElement.Properties.Item("dataChannelPolicy").Value = "SslRequire"

adminManager.CommitChanges

Function FindElement(collection, elementTagName, valuesToMatch)
   For i = 0 To CInt(collection.Count) - 1
      Set element = collection.Item(i)
      If element.Name = elementTagName Then
         matches = True
         For iVal = 0 To UBound(valuesToMatch) Step 2
            Set property = element.GetPropertyByName(valuesToMatch(iVal))
            value = property.Value
            If Not IsNull(value) Then
               value = CStr(value)
            End If
            If Not value = CStr(valuesToMatch(iVal + 1)) Then
               matches = False
               Exit For
            End If
         Next
         If matches Then
            Exit For
         End If
      End If
   Next
   If matches Then
      FindElement = i
   Else
      FindElement = -1
   End If
End Function
Once you have configured your FTP settings, you should have an FTP site that resembles the following in your ApplicationHost.config file:
<site name="ftp.contoso.com" id="2">
   <application path="/">
      <virtualDirectory path="/" physicalPath="c:\inetpub\ftproot" />
   </application>
   <bindings>
      <binding protocol="ftp" bindingInformation="*:21:" />
   </bindings>
   <ftpServer>
      <security>
         <ssl serverCertHash="57686f6120447564652c2049495320526f636b73"  ssl128="false"  controlChannelPolicy="SslRequire"  dataChannelPolicy="SslRequire" />
         <authentication>
            <basicAuthentication enabled="false" />
            <anonymousAuthentication enabled="false" />
            <clientCertAuthentication enabled="true" />
         </authentication>
         <sslClientCertificates  clientCertificatePolicy="CertRequire"  useActiveDirectoryMapping="true" />
      </security>
   </ftpServer>
</site>
More details about these settings can be found in the configuration reference articles that I mentioned in the beginning of this blog post, and additional information about configuring FTP over SSL can be found in the following walkthrough:
Configuring Active Directory Mapping
The next part of this process is kind of tricky; you need to accomplish all of the following:
- Obtain and install a client certificate on the system where your FTP client is installed. Hare some additional notes to consider:
- This may involve setting up your client system to trust the CA that issued your client certificate.
- This may also involve setting up your FTP server to trust the CA that issued both your client certificate and the server certificate that you are using for your FTP site.
- Configure Active Directory to map the client certificate to an Active Directory account.
- Configure your FTP client to use a client certificate when connecting to your FTP server.
That makes it all sound so easy, but it can be very tricky. That being said, as I mentioned earlier, as I was putting together my notes to write this blog, I stumbled across a great blog series by Vivek Kumbhar, where he goes into great detail when describing all of the steps to set up the Active Directory mapping. With that in mind, instead of trying to rewrite what Vivek has already documented, I will include links to his blog series:
- Configure Client Certificate Mapping in FTP 7.5 - Part 1
Describes how to set up your Active Directory server, IIS server, and FTP client systems. - Configure Client Certificate Mapping in FTP 7.5 - Part 2
Walks you through obtaining and installing a server certificate, which you will use later for your FTP site. - Configure Client Certificate Mapping in FTP 7.5 - Part 3
Walks you through setting up an FTP site with SSL. - Configure Client Certificate Mapping in FTP 7.5 - Part 4
Describes how to configure Active Directory mapping for a user account.
I have to give Vivek full credit where it's due - he wrote a truly great blog series, and he included a lot more detail in his blog series than I had originally planned to include in this blog. (In my humble opinion, Vivek's blog series is the best documentation that I have seen for this feature.)
Configuring your FTP Client
To test out client certificates, I used both the SmartFTP GUI-based FTP client and the MOVEit-Freely command-line FTP client; both of which I discussed in my FTP Clients blog series some time ago.
Using the SmartFTP Client
To configure the SmartFTP client, I just needed to enable and specify the correct client certificate in the properties for my connection:

Using the MOVEit-Freely FTP Client
For the MOVEit-Freely FTP client, I just needed to specify the correct parameters on the command line:
ftps.exe -z -e:on -pfxfile:administrator.pfx -pfxpw:"P@ssw0rd" -user:anonymous -password:"someone@contoso.com"
The important settings are the pfxfile and pfxpw values, where pfxfile is the name of the PFX file that holds your client certificate, and pfxpw is the password for the PFX file. (The username and password values will be ignored for the most part, because you will actually be logged in through your client certificate, so you can leave those as anonymous.)
Client Recap
For more information about these two FTP clients, see the following blog posts:
- FTP Clients - Part 8: SmartFTP Client
- FTP Clients - Part 5: MOVEit Freely Command-Line Secure FTP Client
Summary
FTP client certificates are definitely a bit of a challenge to configure correctly, but it's not an impossible task to get this feature working.
Note: This blog was originally posted at http://blogs.msdn.com/robert_mcmurray/
IIS 6: Setting up SSL - Part 3: Installing the Certificate
17 February 2011 • by Bob • IIS, SSL
In part three of my series on setting up SSL on IIS 6, I'll describe the steps that are necessary to install an SSL certificate. Simply out of convenience I broke this process into two sections:
- Installing Your Certificate (Required)
- Verifying Your Certificate (Optional)
Installing Your Certificate
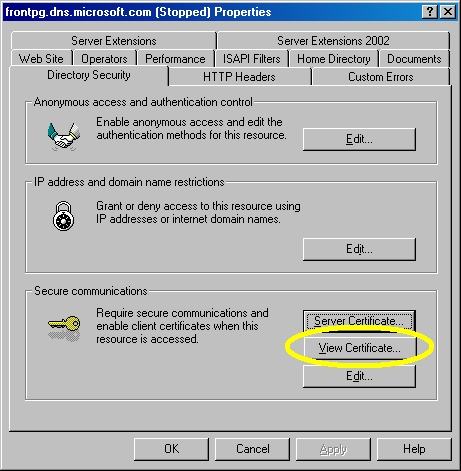
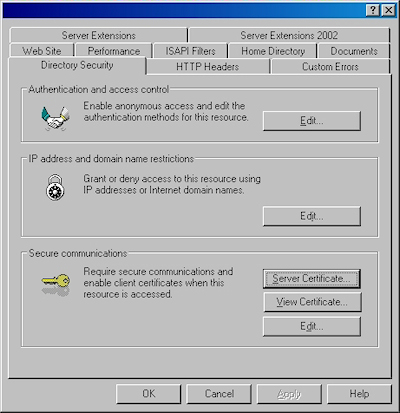
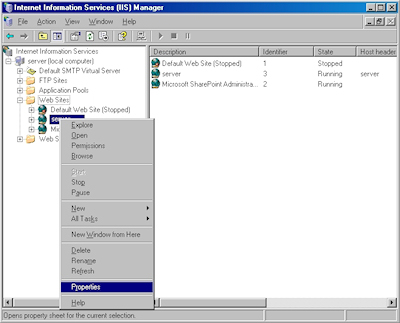
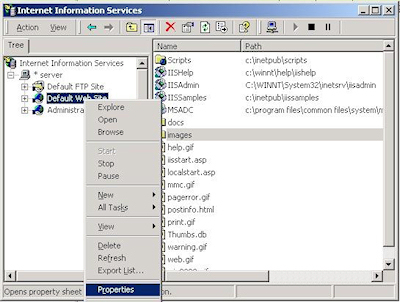
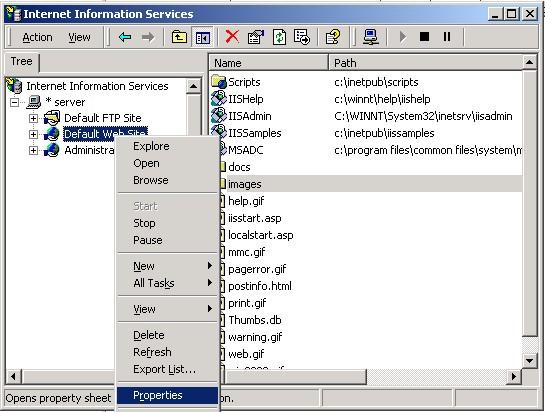
- Bring up the properties for a website:

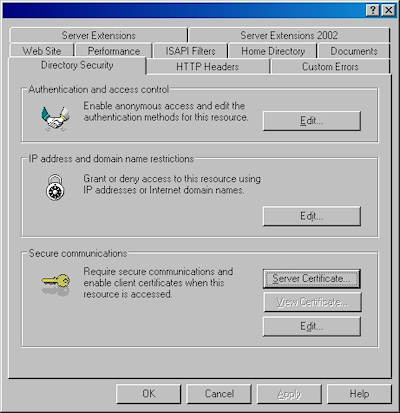
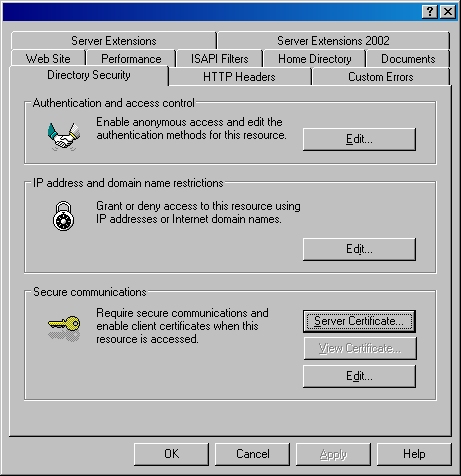
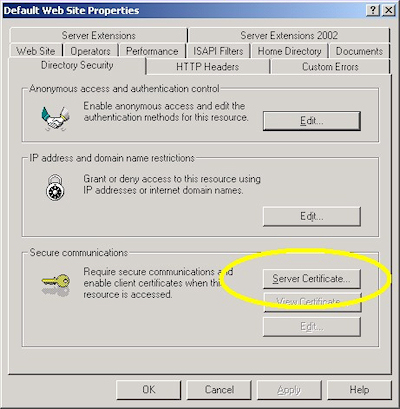
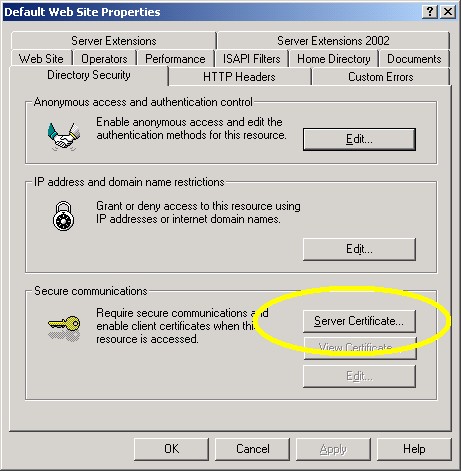
- Switch to the "Directory Security" tab and click "Server Certificate:"

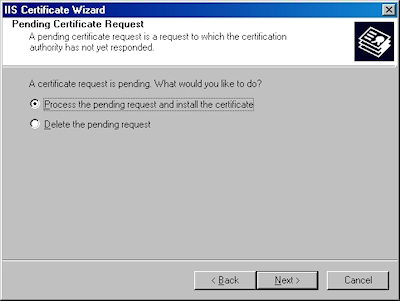
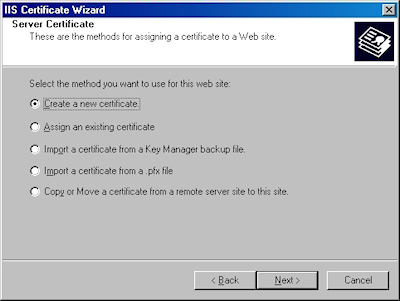
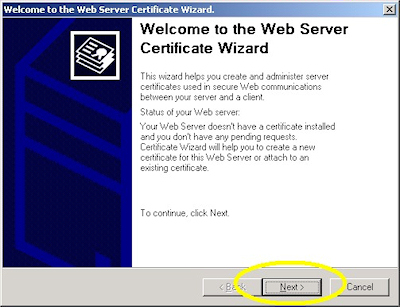
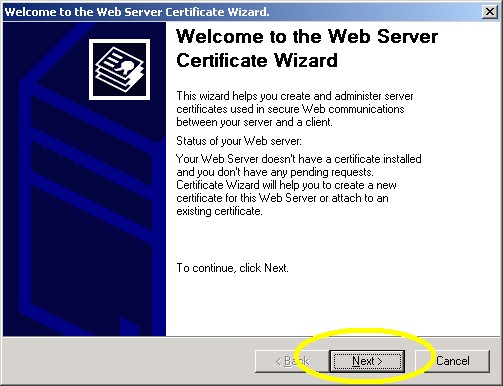
- Click "Next" to bypass the first page:

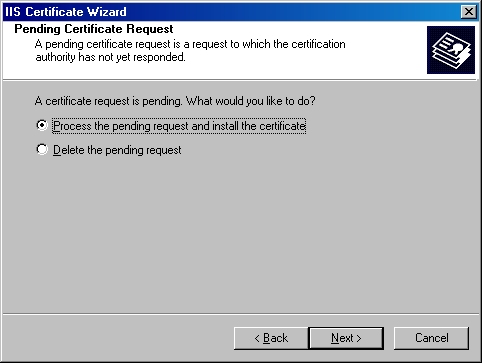
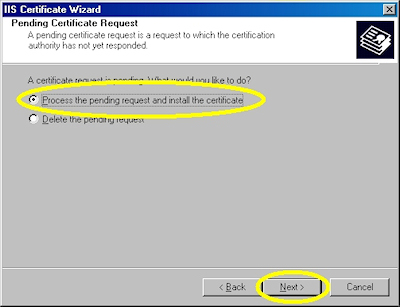
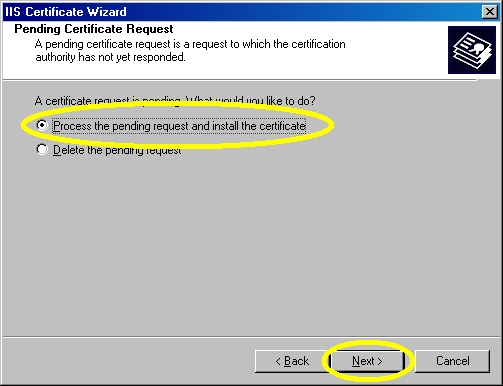
- Choose to process the request and click "Next":
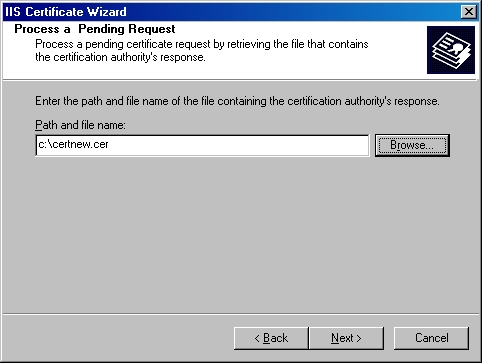
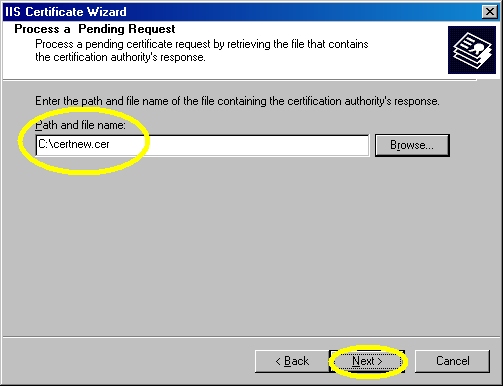
- Click "Browse" to the locate your certificate request:
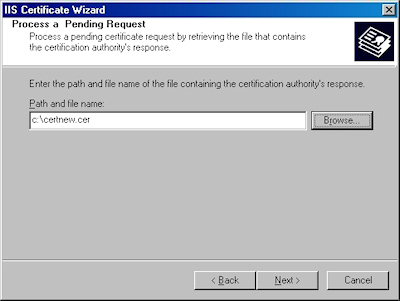
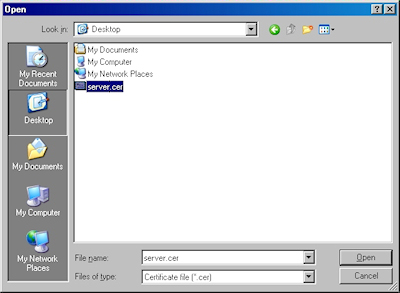
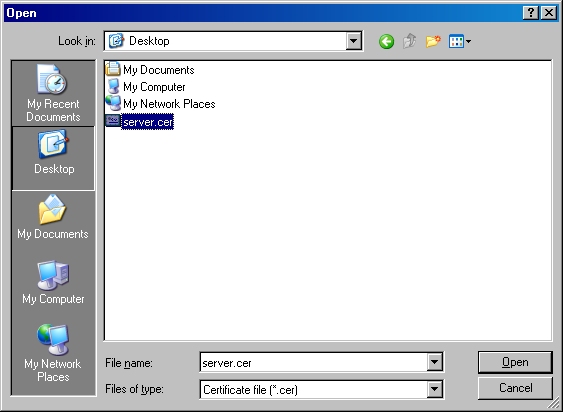
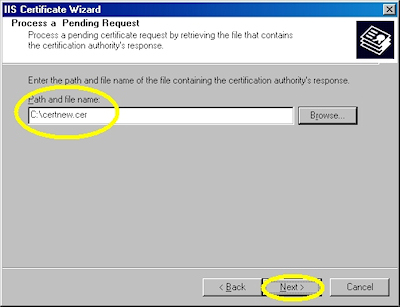
- Browse to the location of your certificate, highlight it, and click "Open":
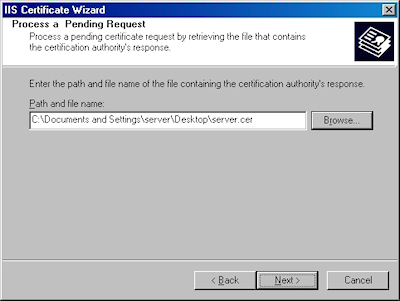
- Verify the location of your certificate and click "Next":
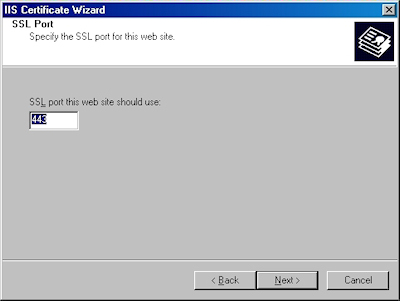
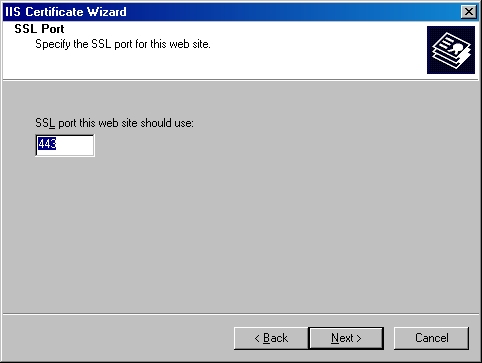
- Choose your SSL port and click "Next":
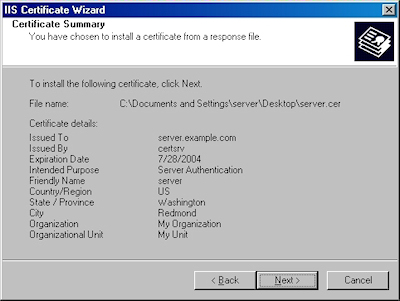
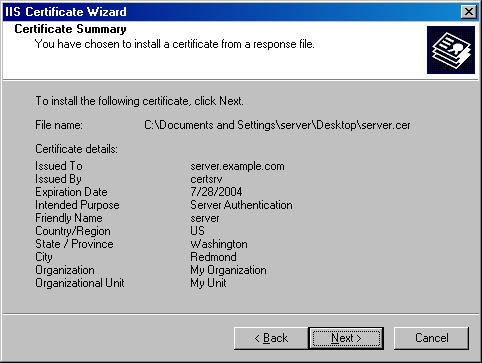
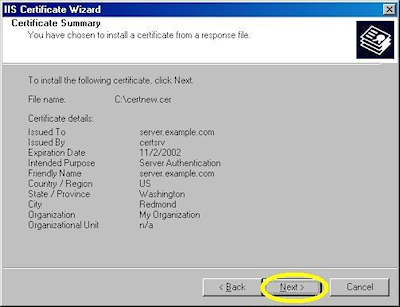
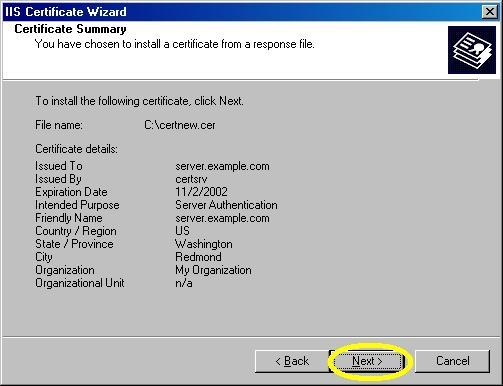
- Review the information to make sure it is correct and click "Next":
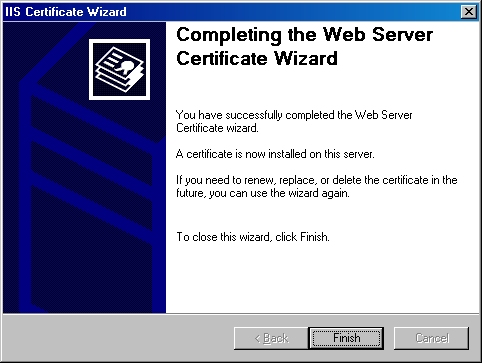
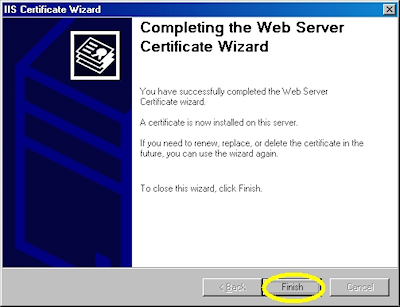
- Click "Finish" to close the wizard:
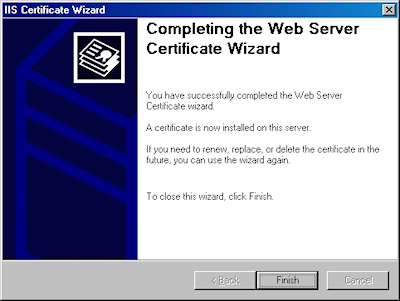
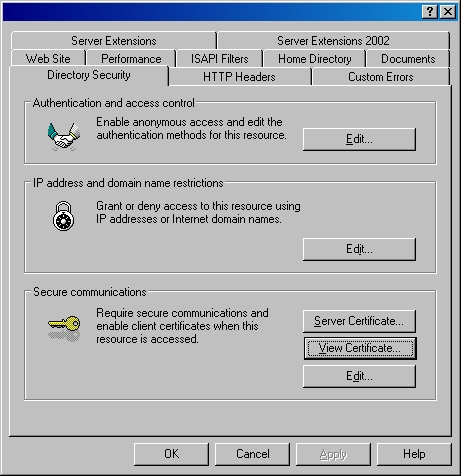
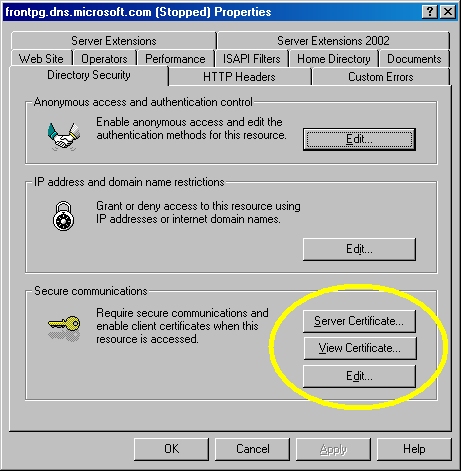
- Notice that you now have all the buttons available for SSL.


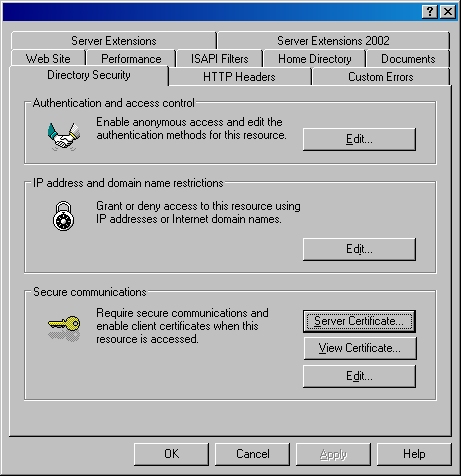
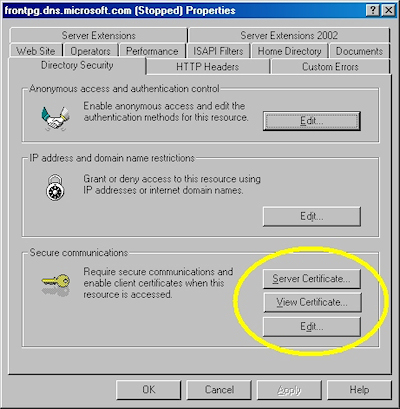
Verifying Your Certificate
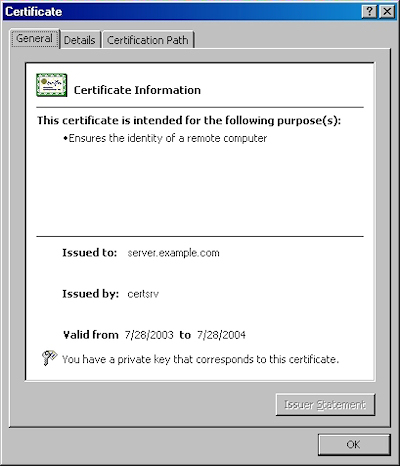
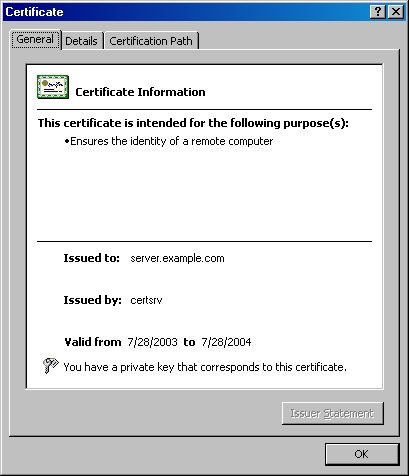
- Click the "View Certificate" button:

- On the "General" tab, if the certificate is good you will see a normal certificate icon. (If no, you will see a warning or error icon.)
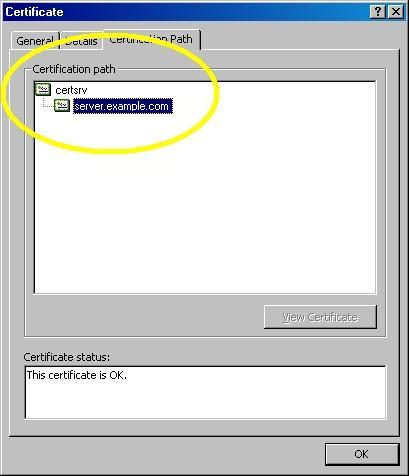
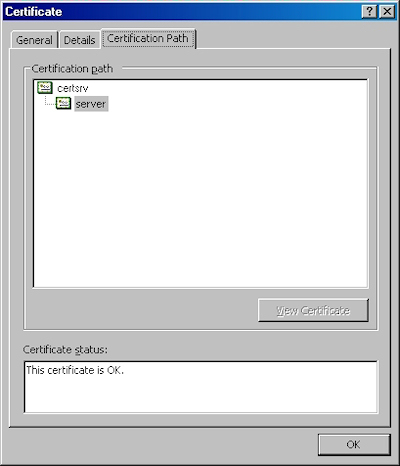
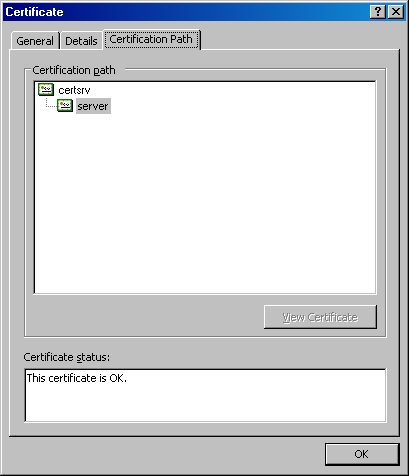
- On the "Certification Path" tab you will see your certificate hierarchy:
That wraps it up for creating, submitting, obtaining, and installing a certificate. In subsequent blogs I'll post some appendices with instructions about setting up Certificate Services on Windows Server 2003.
Note: This blog was originally posted at http://blogs.msdn.com/robert_mcmurray/
IIS 6: Setting up SSL - Part 2: Submitting a Certificate Request and Obtaining a Certificate
16 February 2011 • by Bob • IIS, SSL
In part two of my series on setting up SSL on IIS 6, I'll describe the steps that are necessary to obtain an SSL certificate. Typically you would submit your certificate request to any one of several Certificate Authorities (CA); and there are several that are available. Here are just a few:
- Thawte Digital Certificates
http://www.thawte.com/ - VeriSign Digital Certificates
http://www.verisign.com/
The steps to obtain a certificate differ for each CA, and it would be way outside the scope of my limited blogspace to include the steps for every CA on the Internet. So for my blog series I'm going to show how to use Certificate Services on Windows Server 2003 to obtain a certificate. This part of the process is broken into three steps:
Submit the Certificate Request
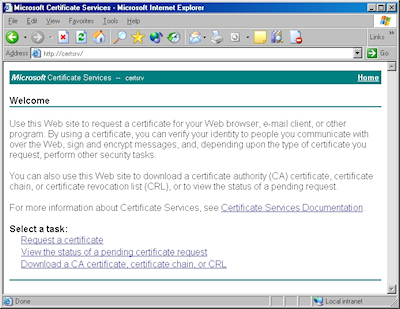
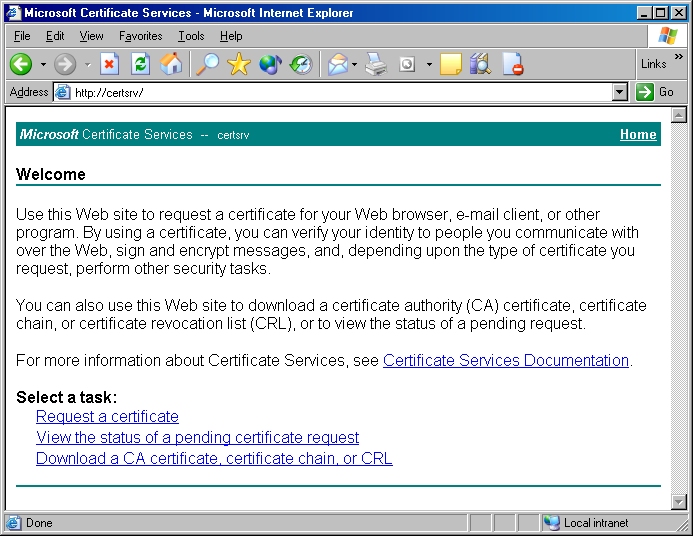
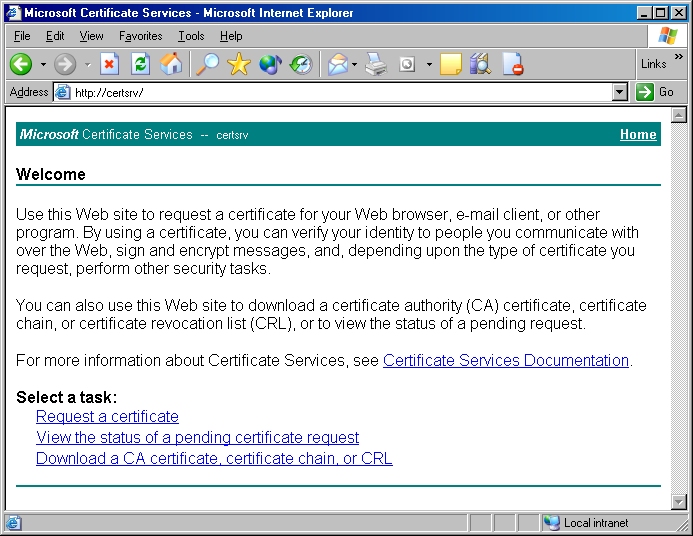
- Browse to the "Certificate Services" website, and then click the link to "Request a Certificate":
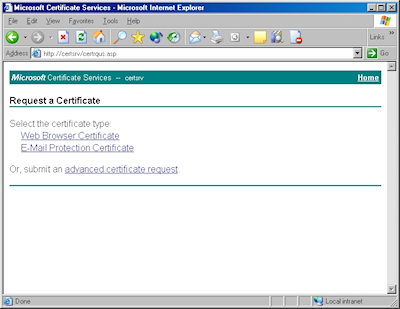
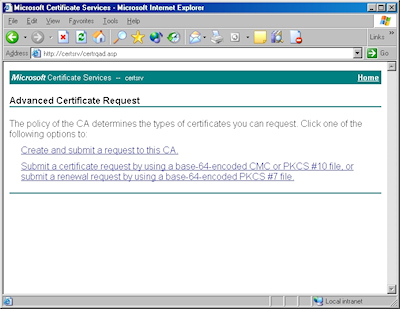
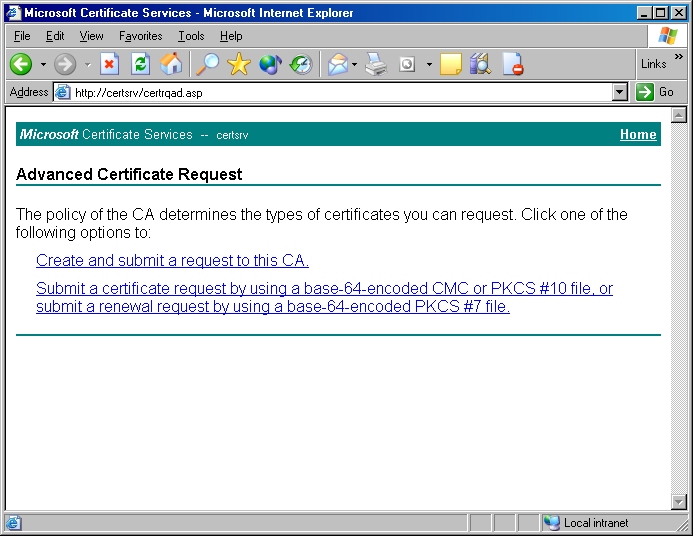
- Click the link to submit an "advanced certificate request":
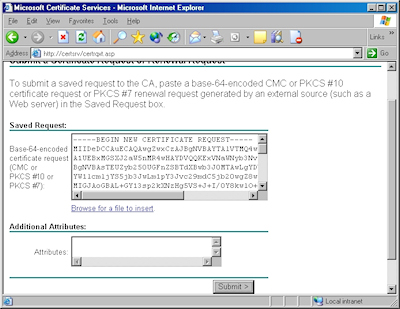
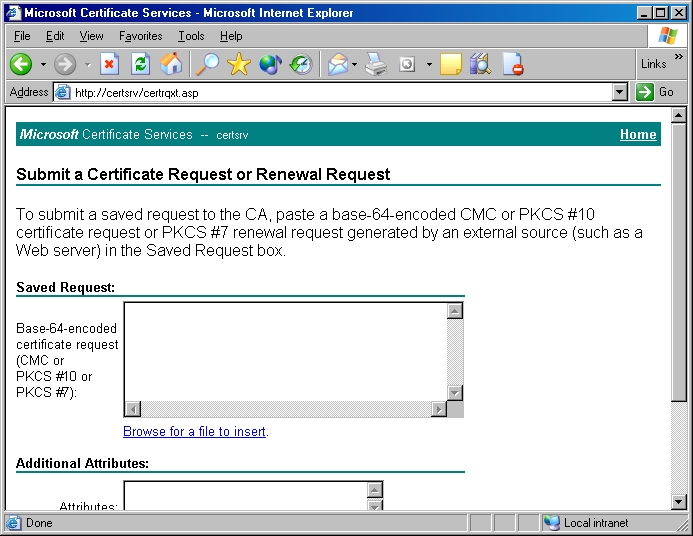
- Click the link to "Submit a certificate request by using a base-64 encoded file":
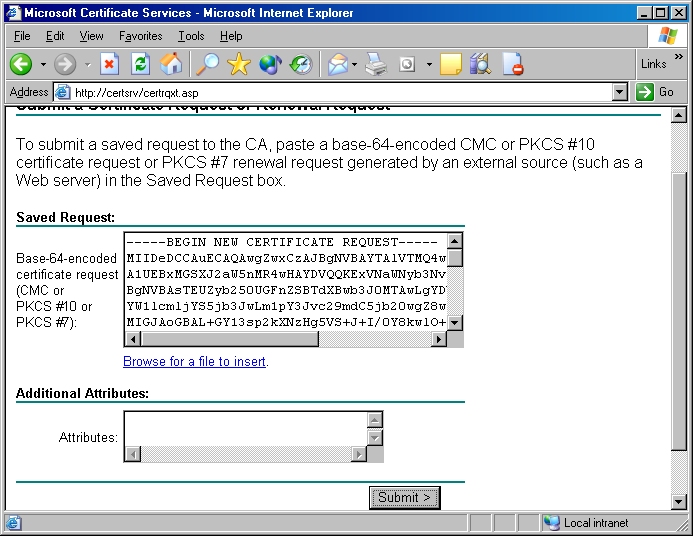
- Copy the text from your certificate request file and paste it into the "Base-64 Encoded Certificate Request" text box, then click "Submit":
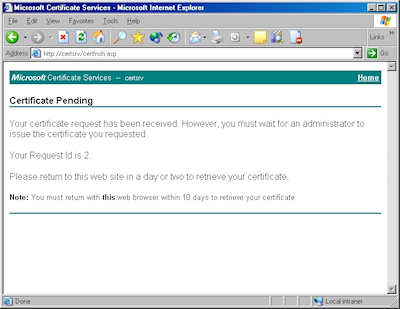
- By default, Certificate Services will return a message stating that your certificate is pending. You will need to notify your Certificate Services administrator that your certificate needs to be approved.


Note: As an alternative to copying the text from your certificate request file, when you are using Certificate Services on Windows Server 2003, you can use the application to read the file for you. To do so, you would need to change the step where you copy and paste the text to the following steps:
- Click the link to "Browse for a file to insert":
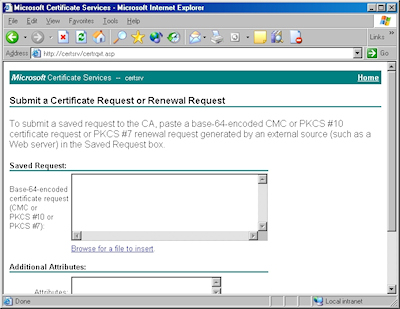
- You may be prompted whether to allow an ActiveX control to run; this warning may appear because the web application uses an ActiveX control to read the certificate request file. In order to continue, you need to click "Yes":

- When the subform appears, click the Browse button:

- Locate your certificate request file, and then click "Open":
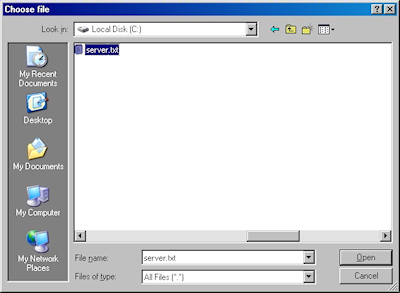
- Click the "Read" button to load the text from your certificate request file, this will insert it into the form:
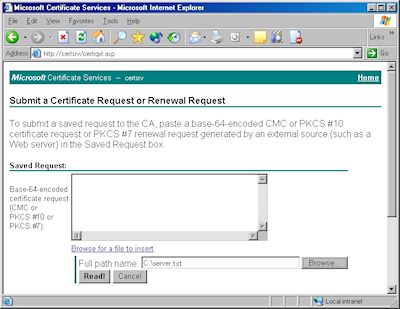
- Once the text from your certificate request file has been inserted, you can submit the form as you would have done if you had copied and pasted the text manually.


Certificate Processing
At this point the Certificate Authority (CA) will consider your request. I'll post a blog later with details about processing a request using Certificate Services on Windows Server 2003.
Obtain the Certificate
When your certificate request has been processed, you need to use the following steps to save your certificate to your system before you can process it.
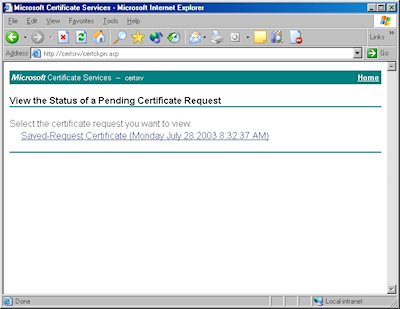
- Browse to the "Certificate Services" website, and then click the link to "View the status of a pending certificate request":

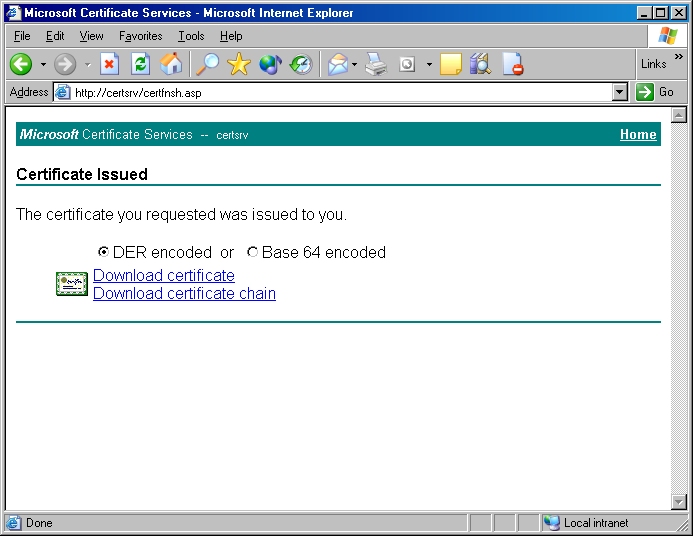
- Click the link for your approved request.
- Click the link to "Download CA certificate":
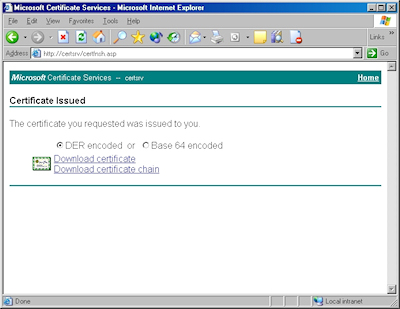
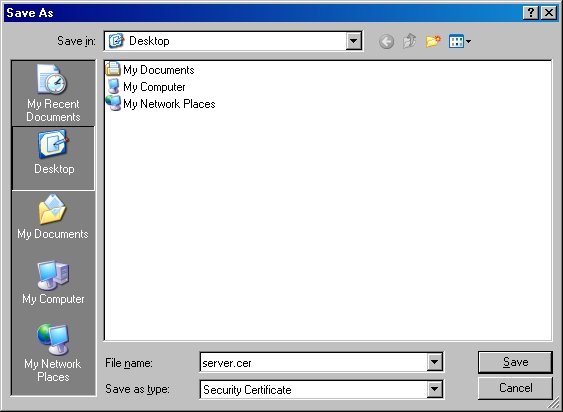
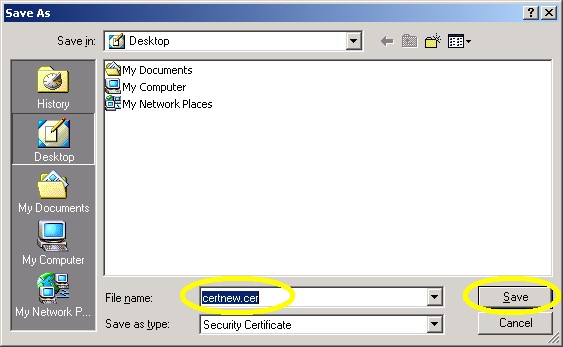
- When prompted, click "Save":
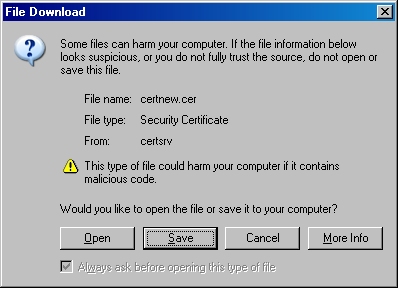
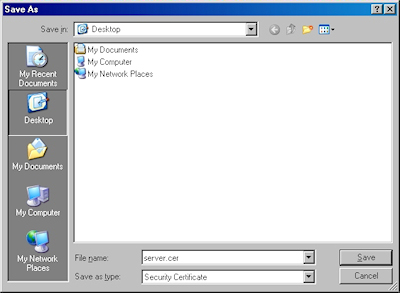
- Save the file to somewhere convenient, like your desktop:

In the next post of this blog series, I'll show you how to install your certificate on IIS 6.
Note: This blog was originally posted at http://blogs.msdn.com/robert_mcmurray/
IIS 6: Setting up SSL - Part 1: Making a Request
14 February 2011 • by Bob • IIS, SSL
In part one of my series on setting up SSL on IIS 6, I'll describe all of the steps that are necessary to request an SSL certificate for a website. Once you have completed your certificate request, you would send that to a Certificate Authority (CA) for approval. In subsequent blog posts I'll discuss submitting a certificate to a CA - specifically Certificate Services on Windows Server 2003 - and then I'll discuss obtaining a certificate and installing it on your IIS server. But for now, let's get started with a creating certificate request. To do so, use the following steps.
- Bring up the properties for a website:
- Switch to the "Directory Security" tab and click "Server Certificate:"
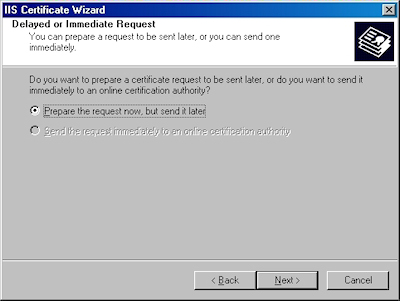
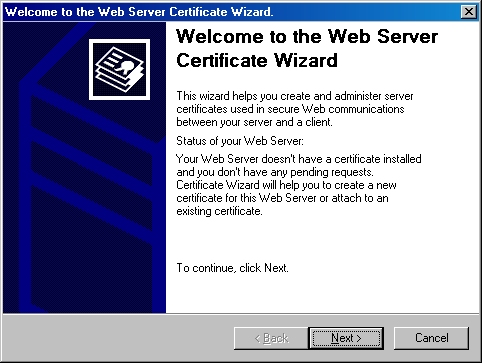
- Click "Next" to bypass the first page:

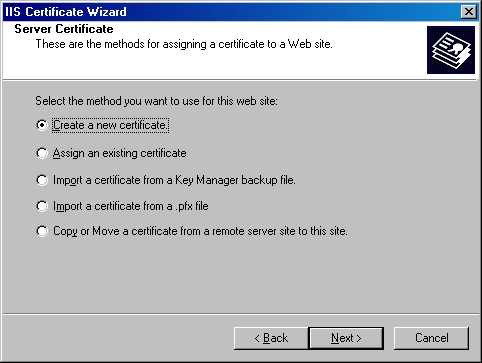
- Choose to "Create a new certificate" and click "Next":
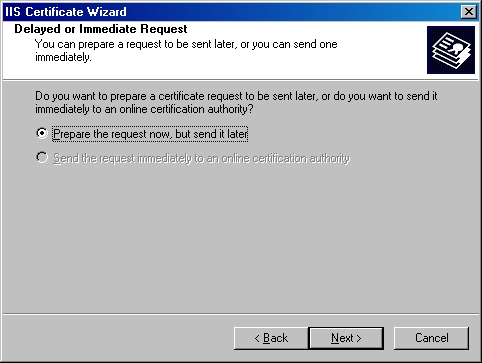
- Choose to "Prepare the request now, but send later" and click "Next":
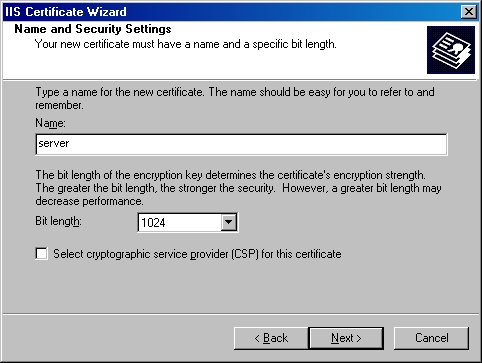
- Enter a friendly "Name" for the request, and your desired "Bit length". Click "Next":

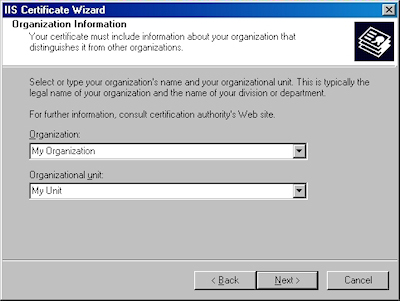
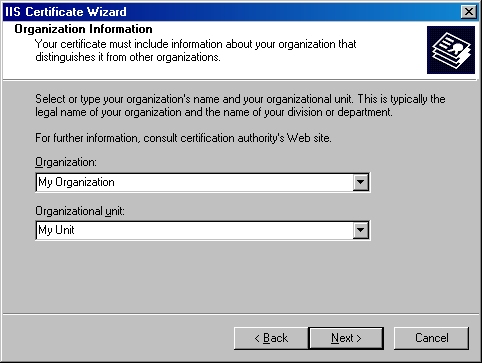
- Enter your "Organization" and "Organization unit", then click "Next":
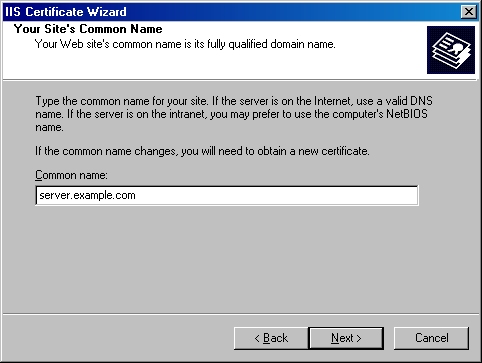
- Enter the "Common name" for your site then click "Next":
Note: This must be the actual web address that users will browse to when they hit your site.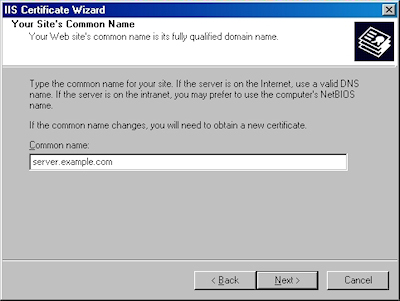
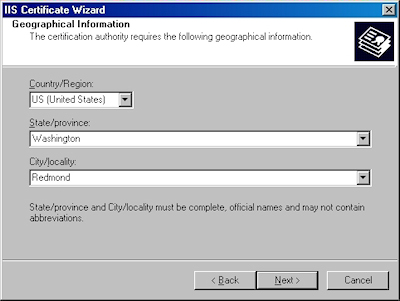
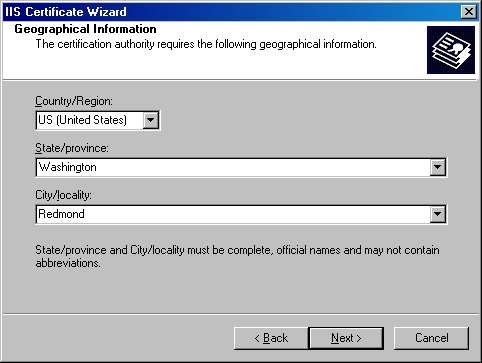
- Enter your "Country", "State", and "City", then click "Next":
- Enter the "File name" for your request, then click Next:
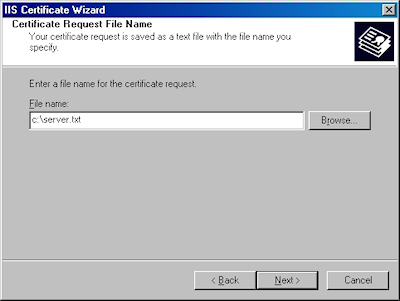
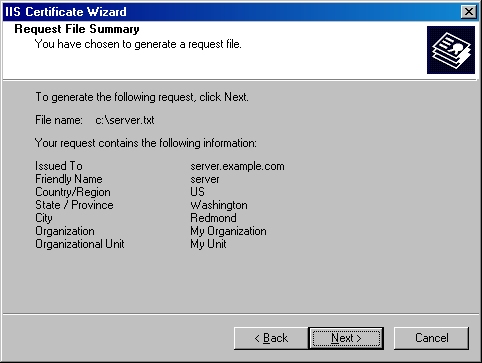
- Review the information for your request, then click Next:
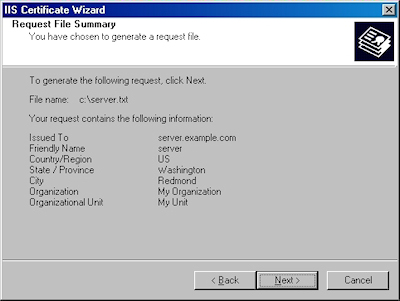
- Click "Finish" to exit the wizard.
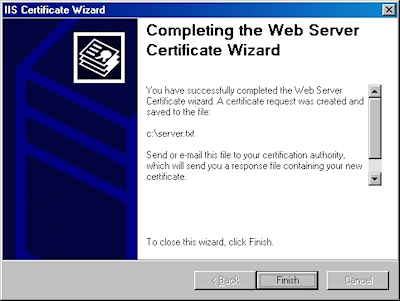


FYI: If you were to open your request file in Notepad, it will look something like the following:

In the next post of my blog series, I'll show you how to use Certificate Services on Windows Server 2003 to obtain a certificate.
Note: This blog was originally posted at http://blogs.msdn.com/robert_mcmurray/
IIS 6: Setting up SSL - Overview
31 January 2011 • by Bob • IIS
Many years ago I wrote a series of instructions that used dozens of screenshots in order to show my coworkers how to set up and enable Secure Sockets Layer (SSL) communications in IIS 5, which I eventually turned into a blog series on one of my personal blog sites. A few years later I wrote a sequel to that series of instructions for my coworkers, and I wanted to turn that into a series of walkthroughs in the IIS.net website. Sometime ago I proposed the idea to Pete Harris, who was in charge of IIS.net at the time, but then I changed jobs and we scrapped the idea. We followed up on the idea a short time ago, but we just couldn't find a place where it made sense to host it on IIS.net, so Pete suggested that I turn it into another blog series. With that in mind, over a series of several blog entries I will show how to configure SSL on IIS 6.
Note: This first post will leverage a lot of the content from the overview that I wrote for my IIS 5 blog series, but subsequent posts will reflect the changes in IIS 6.
Much like IIS 5, setting up SSL on IIS 6 is pretty simple. SSL is a Public Key/Private Key technology, and setting up SSL is essentially obtaining a Public Key from a trusted organization. The basic process for working with SSL is reduced to the following actions:
- Creating a Certificate Request
- Obtaining a Certificate from a Certificate Authority
- Installing the Certificate
While not necessary, installing certificate services on your computer is helpful when troubleshooting SSL issues, and I'll discuss that later in this blog series.
Creating a Certificate Request
This is a series of steps that need to be performed on the web server, and they differ widely depending on the server and version. A web administrator is required to enter information about their organization, their locality, etc. This information will be used to validate the requester.
Obtaining a Certificate from a Certificate Authority
This is when a web administrator submits their request for a certificate to a Certificate Authority (CA), which is a trusted organization like VeriSign or Thawte. For a list of trusted organizations, see the following section in Internet Explorer.
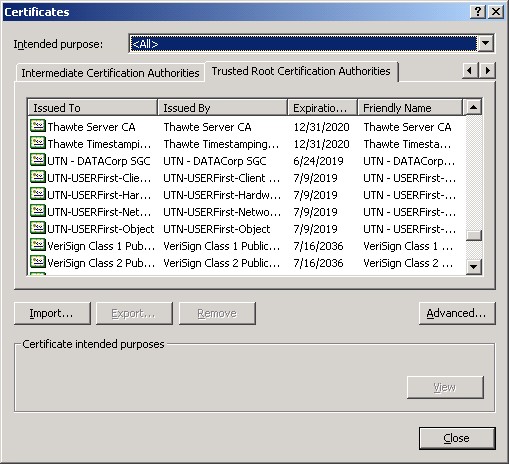
You can choose to trust a new CA by obtaining the Root Certificate from the CA. (I'll post an Obtaining a Root Certificate blog with more information later.)
Installing the Certificate
After a request has been processed by a CA, the web administrator needs to install the certificate on the web server. Once again, this series of steps needs to be performed on the web server, and the steps differ depending on the web server and version.
For the Future...
In future blogs I'll go through the steps for creating certificate requests, obtaining certificates from a CA, and installing certificates. Following that, I'll discuss setting up a CA for testing SSL in your environment.
Note: This blog was originally posted at http://blogs.msdn.com/robert_mcmurray/
IIS 5: Setting up SSL - Appendix C: Processing a Certificate Request
21 September 2001 • by Bob • IIS, SSL, Windows
When you manage a certificate server, you will periodically need to issue certificates to requestors. To to so, use the following steps:
- Open the "Certificate Authority" administrative tool:

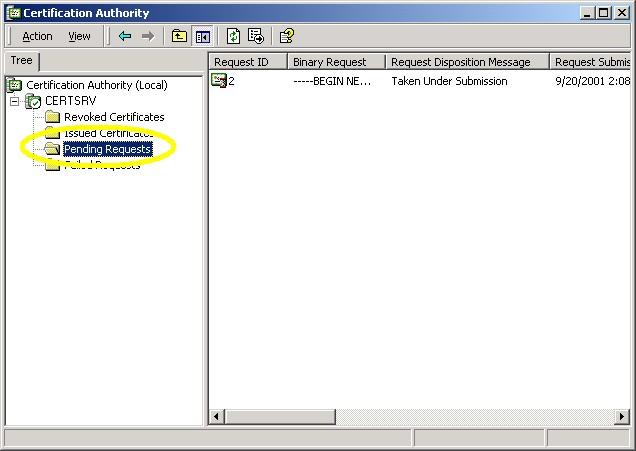
- Click on "Pending Requests":

- Right-click the pending request and choose "All Tasks", then click "Issue":

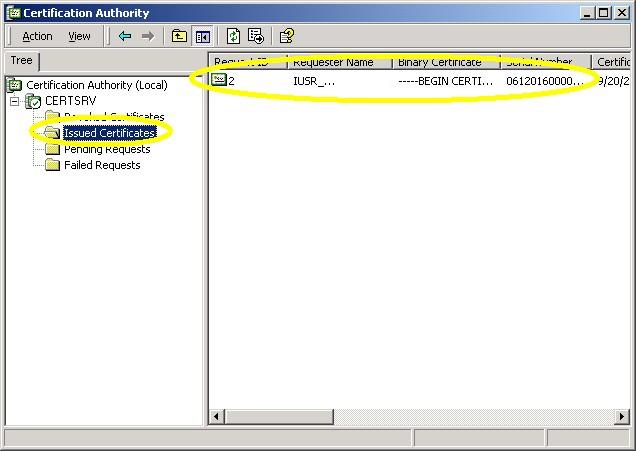
- The certificate will now show up under "Issued Certificates":


IIS 5: Setting up SSL - Appendix B: Obtaining a Root Certificate
21 September 2001 • by Bob • IIS, SSL, Windows
Obtaining a root certificate is one of the most important steps for servers or clients that will use certificates that you issue. While this step is not necessary on the server where you installed Certificate Services, it is absolutely essential on your other servers or clients because it allows those computers to trust you as a Certificate Authority. Without that trust in place, you will either receive error messages or SSL simply won't work.
This process is broken into two steps:
Downloading the Root Certificate
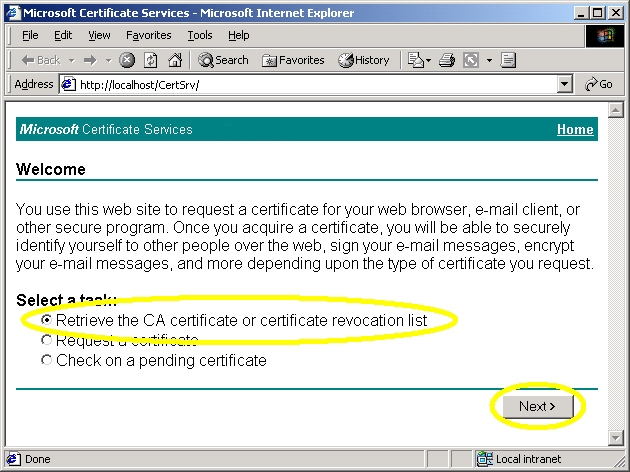
- Browse to your certificate server's address, (e.g. http://<server-name>/certsrv/), and choose to retrieve the CA certificate:
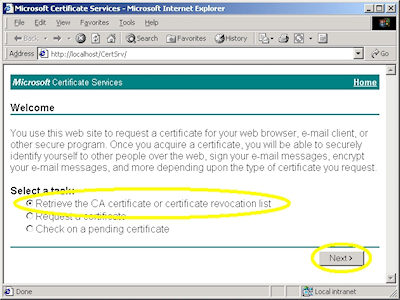
- Click the link to download the CA certificate:
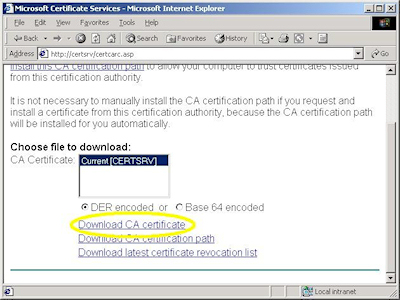
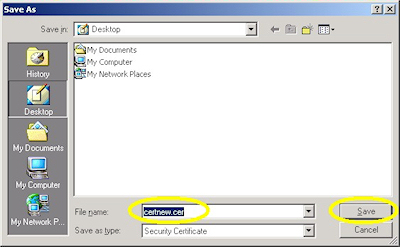
- Choose to save the certificate file to disk:

- Save the file to your desktop:


Installing the Root Certificate
Before using any certificates that you issue on a computer, you need to install the Root Certificate. (This includes web servers and clients.)
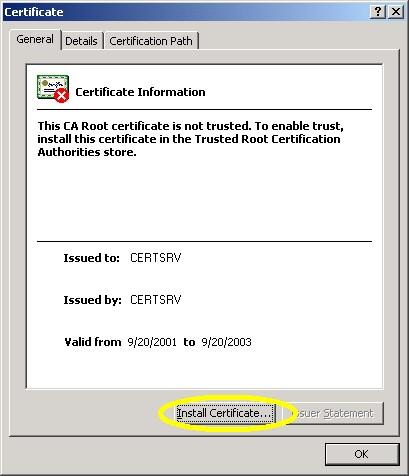
- Double-click the file on your desktop:

- Click the "Install Certificate" button:
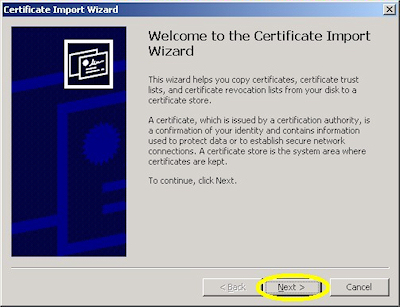
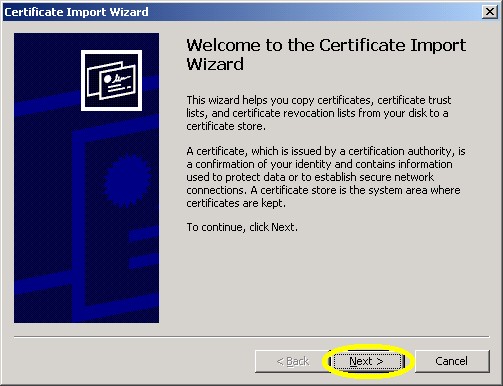
- Click "Next" to start the Certificate Import Wizard:
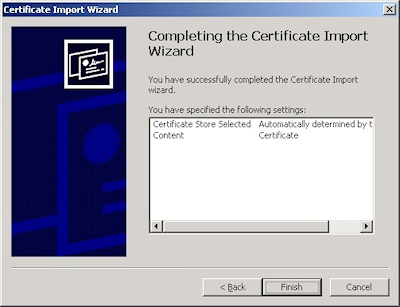
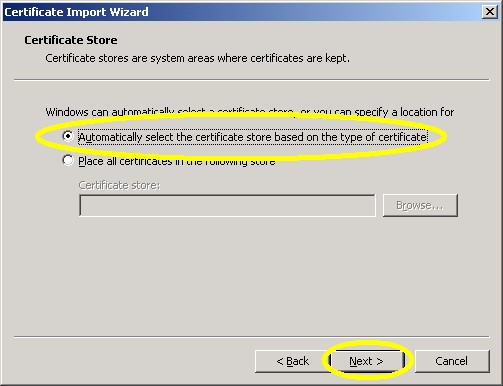
- Choose to automatically choose the store:

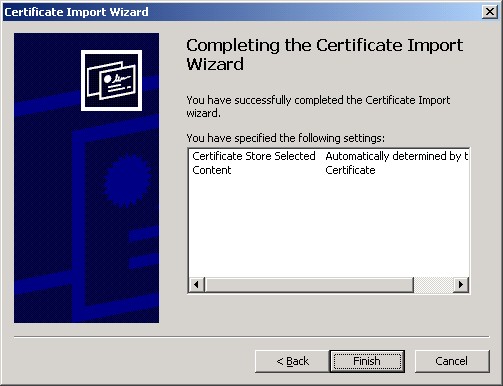
- Click the "Finish" button:
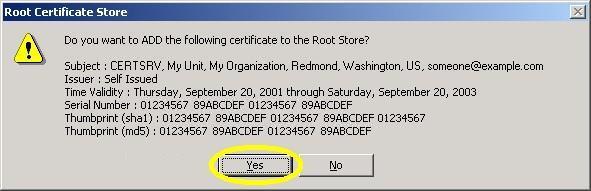
- Click "Yes" when asked if you want to add the certificate:
NOTE: This step is very important. If you do not see this dialog, something went wrong.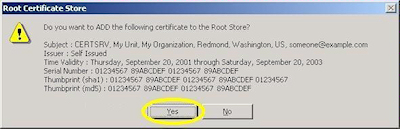
- Click "OK" when informed that the import was successful.
IIS 5: Setting up SSL - Appendix A: Installing Certificate Services
21 September 2001 • by Bob • IIS, SSL, Windows
In this blog post I'll discuss installing Certificate Services for Windows 2000 in order to test SSL in your environment. To install Certificate Services, use the following steps:
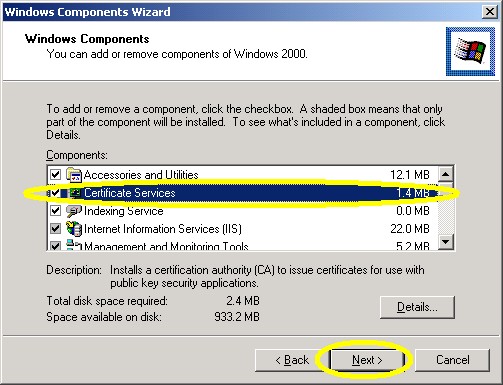
- Run the "Windows Component Wizard" in "Add/Remove Programs", choose "Certificate Services", and click "Next":

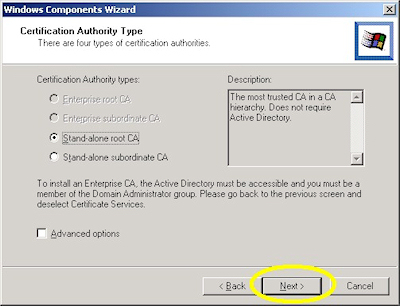
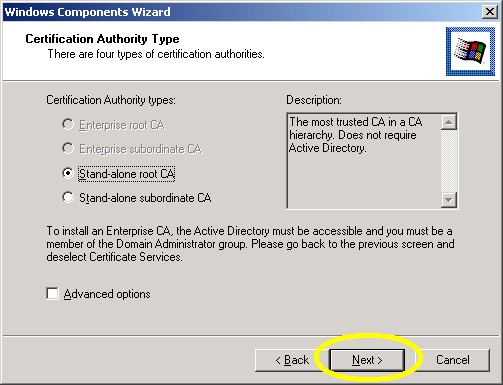
- Choose "Stand-alone root CA", then click "Next":
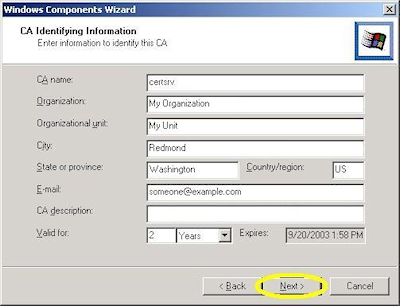
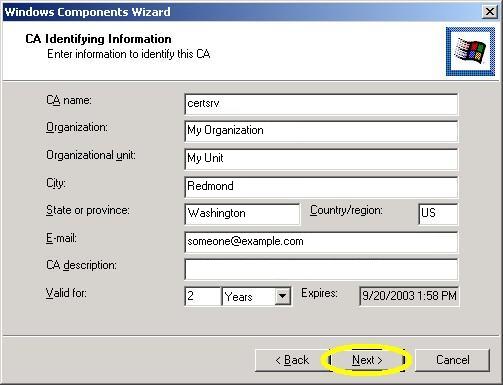
- Enter all requested information, then click "Next":
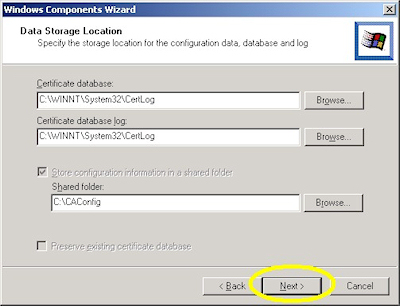
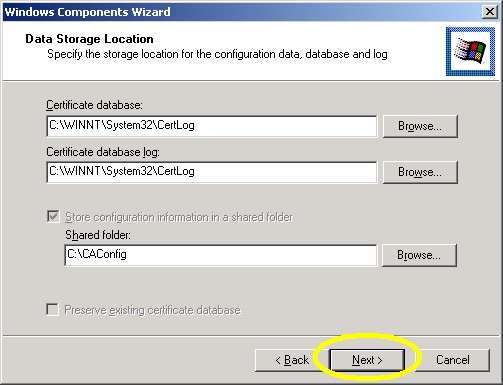
- Accept the defaults for the data locations and click "Next":
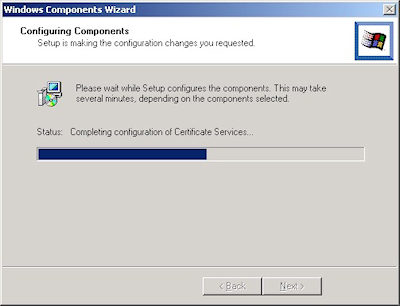
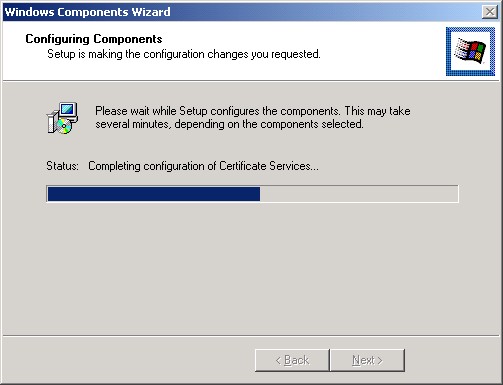
- The wizard will step through installing the services:
- When the wizard has completed, click "Finish" to exit the wizard:


IIS 5: Setting up SSL - Part 3: Installing a Certificate
21 September 2001 • by Bob • IIS, SSL
Installing Your Certificate
- Bring up the properties for a web site:
- Switch to the "Directory Security" tab and click "Server Certificate:"
- Click "Next" to bypass the first page:
- Choose to process the request and click "Next":
- Browse to the location of your certificate and click "Next":
- Review the information to make sure it is correct and click "Next":
- Click "Finish" to close the wizard:
- Notice that you now have all the buttons available for SSL.

Verifying Your Certificate
- Bring up the properties for a web site:
- Switch to the "Directory Security" tab and click "View Certificate":
- On the "General" tab, if the certificate is good you will see a normal certificate icon. (If not, you will see a warning or error icon.)

- On the "Certification Path" tab you will see your certificate hierarchy: