FTP Clients - Part 16: NetDrive
30 November 2014 • by Bob • FTP, SSL
For the next installments in my series about FTP clients, I will be taking a look at two FTP redirectors at the same time. In this specific blog post, I will focus on NetDrive (from Bdrive Inc.), whereas my previous post looked at WebDrive (from South River Technologies).
At the time of this blog's writing, NetDrive is a for-retail FTP client and redirector which is available from the following URL:
For this blog post I will be using NetDrive version 2.3.2.
NetDrive 2.3 Overview
NetDrive is different from many of the other FTP clients that I have reviewed because it is an Internet protocol redirector, meaning that it allows you to map drive letters to a variety of Internet repositories. When you install and open NetDrive, you are presented with the list of supported Internet protocols and repositories which you can use for mapping drives:
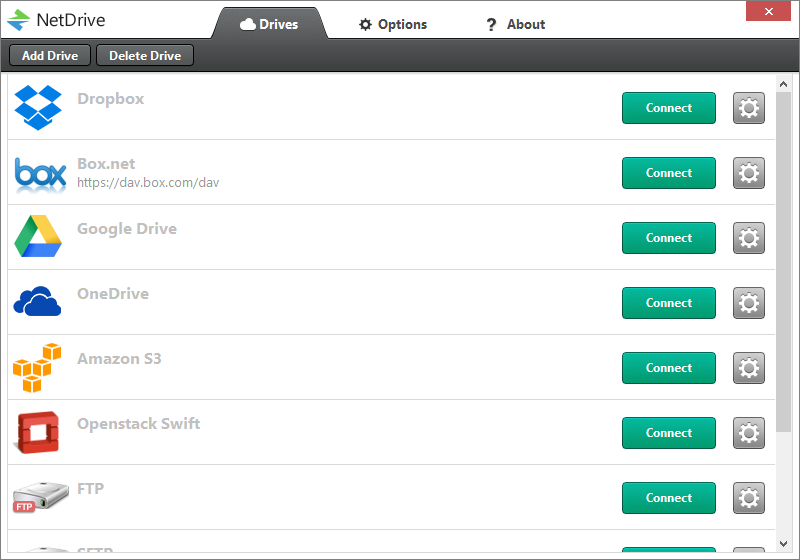
As you can see from the illustration above, NetDrive's list of support technologies is quite extensive: DropBox, Box.net, Google Drive, OneDrive, Amazon S3, Openstack Swift, FTP, SFTP, and WebDAV.
When you add a drive or configure the settings for one of the default drives, you are presented with a dialog box where you can enter the settings for the drive connection; note that there are very few settings for FTP connections:

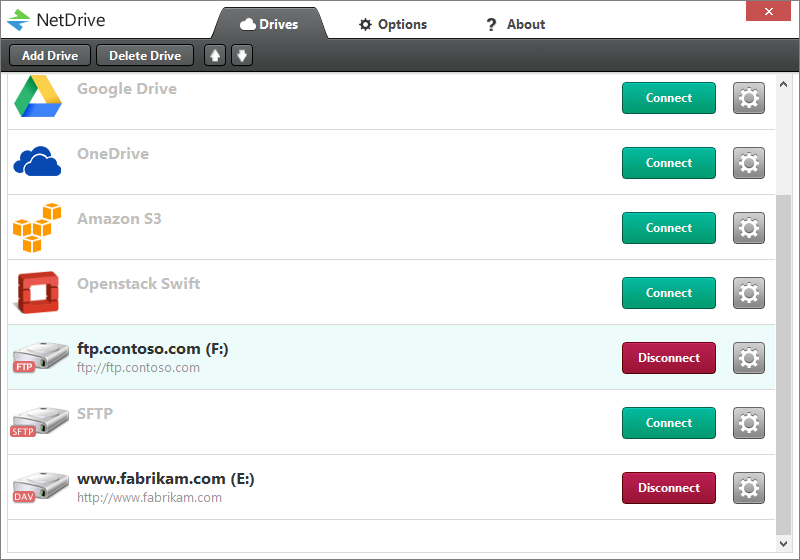
As you add drives, the NetDrive user interface will display the drives and their current connection status:
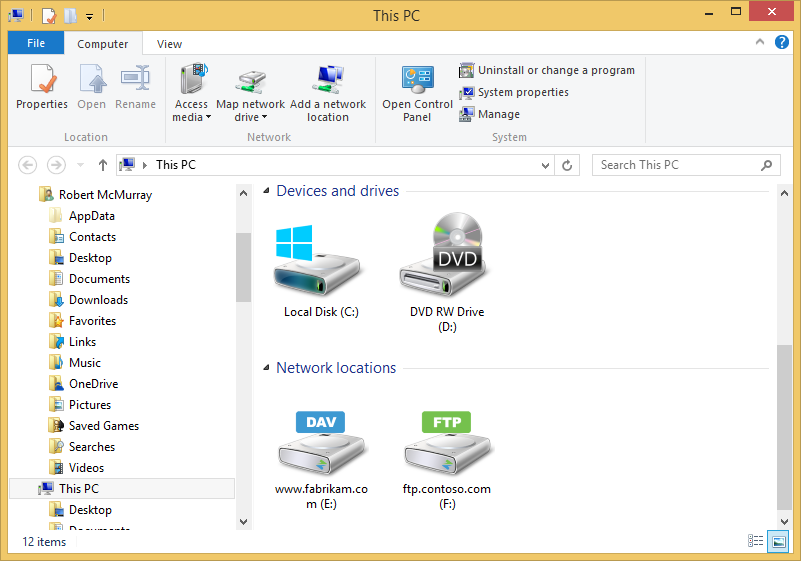
As an added touch, NetDrive customizes its drive icons in Windows Explorer, so you can easily see the type of mapped drive for each connection:
I would love to take an in-depth look at all of the supported protocols in this review, but this series is about FTP clients, so I'll move on to the FTP-specific features that I normally review.
Using NetDrive 2.3 with FTP over SSL (FTPS)
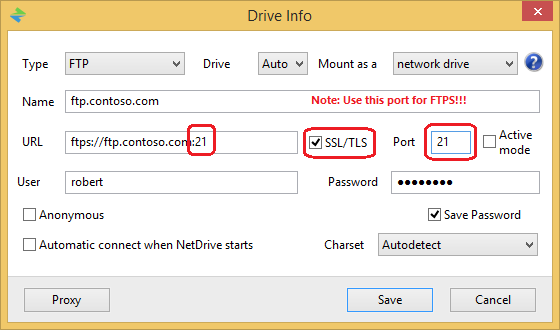
NetDrive 2.3 has built-in support for FTP over SSL (FTPS), although it only appears to support Explicit FTPS - and it does so in a confusing way. When you are editing the settings for an FTP drive connection, you need to check the box for SSL/TLS in order to enable FTPS. Unfortunately, when you do so, the dialog box will change the port to 990, which is the port number for Implicit FTPS; however, in my testing I could not get Implicit FTPS to work:
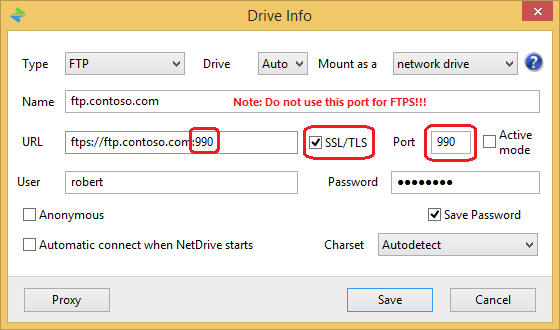
With the above information in mind, I needed to manually change the port number back to 21 in order to use Explicit FTPS with NetDrive:
Using NetDrive 2.3 with True FTP Hosts
True FTP hosts are not supported natively by NetDrive 2.3, and there are no settings which allow you to customize the login environment in order to work around this situation.
Using NetDrive 2.3 with Virtual FTP Hosts
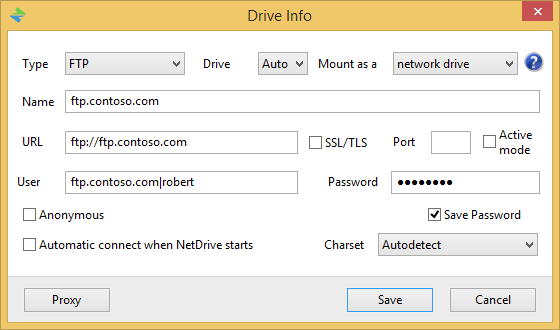
NetDrive 2.3's login settings allow you to specify the virtual host name as part of the user credentials by using syntax like "ftp.example.com|username" or "ftp.example.com\username", so you can use virtual FTP hosts with NetDrive 2.3.
Scorecard for NetDrive 2.3
This concludes my quick look at a few of the FTP features that are available with NetDrive 2.3, and here are the scorecard results:
| Client Name | Directory Browsing | Explicit FTPS | Implicit FTPS | Virtual Hosts | True HOSTs | Site Manager | Extensibility |
|---|---|---|---|---|---|---|---|
| NetDrive 2.3.2 | N/A | Y | N1 | Y | N2 | Y | N/A |
Notes:
|
|||||||
That wraps things up for today's review of NetDrive 2.3. Your key take-aways should be: NetDrive has some nice features, and it supports a wide variety of protocols with a similar user experience; that being said, NetDrive has very few settings for drive connections, so its capabilities are somewhat limited.
Note: This blog was originally posted at http://blogs.msdn.com/robert_mcmurray/
FTP Clients - Part 15: WebDrive
30 November 2014 • by Bob • FTP, SSL
For the next installments in my series about FTP clients, I will be taking a look at two FTP redirectors at the same time. In this specific blog post, I will focus on WebDrive (from South River Technologies), whereas my next post will look at NetDrive (from Bdrive Inc.).
At the time of this blog's writing, WebDrive is a for-retail FTP client and redirector which is available from the following URL:
For this blog post I will be using WebDrive version 12.10.4082.
WebDrive 12 Overview
Before I continue, I would like to begin with some background information: because of my ongoing blog series about FTP clients, one question that I have often been asked is, "Which FTP client do you use?" Usually I have to answer, "That depends." I know that my answer sounds non-committal, but to be honest - I have yet to find an FTP client that does everything that I want, although a few FTP clients have had enough features for me to use them quite often. And with that in mind, I need to point out that I purchased my first license for WebDrive over 12 years ago, and over the years I have periodically renewed my license for later versions. So to partially answer my earlier question - WebDrive is one of the FTP clients that I have used a lot.
That being said, WebDrive is different from many of the other FTP clients that I have reviewed because it is an Internet protocol redirector, meaning that it allows you to map drive letters to a variety of Internet-based repositories. (I'll discuss those various protocols and repositories shortly.)
When you install and open WebDrive, you are presented with a fairly empty user interface:

If you click the App Settings icon, you will be presented with a dialog box that offers dozens of customizable options:

When you click the New icon, you will be presented with a Site Wizard which lists the supported Internet protocols and repositories which you can use for mapping drives:

As you can see from the illustration above, WebDrive's list of support technologies is quite extensive: WebDAV, Secure WebDAV, FTP, Secure FTP, Google Drive, Amazon S3, SFTP, Dropbox, and FrontPage Server Extensions.
When you choose to create an FTP connection, WebDrive launches its Site Wizard, and the initial dialog box is pretty self-explanatory:

However, when you click the Advanced Settings button, you are presented once again with dozens of customizable settings for this specific connection:

As you continue to add sites with WebDrive, their connection types and current statuses are displayed in the user interface:

However, when you view your drives in Windows Explorer, even though network drives which are mapped through WebDrive are displayed with a different icon, you cannot tell the protocol type for mapped drives; this is one of the few times where NetDrive supported a feature that I really missed in WebDrive. (See my next blog entry for more information.)

WebDrive 12 supports command-line scripting, so if you find the features of the built-in Windows FTP client are somewhat limited, you can investigate scripting WebDrive:
WebDrive Command Line Parameters
I would love to take an in-depth look at all of the supported protocols in this review, but this series is about FTP clients, so I'll move on to the FTP-specific features that I normally review.
Using WebDrive 12 with FTP over SSL (FTPS)
WebDrive 12 has built-in support for FTP over SSL (FTPS), and it supports both Explicit and Implicit FTPS. To specify which type of encryption to use for FTPS, you need to choose the appropriate option from the Security Type drop-down menu in the FTP Settings for a site:

Using WebDrive 12 with True FTP Hosts
True FTP hosts are not supported natively by WebDrive 12, and there are no settings that I could find which would allow me to customize the login environment in order to work around this situation.
Using WebDrive 12 with Virtual FTP Hosts
WebDrive 12's login settings allow you to specify the virtual host name as part of the user credentials by using syntax like "ftp.example.com|username" or "ftp.example.com\username", so you can use virtual FTP hosts with WebDrive 12.

Scorecard for WebDrive 12
This concludes my quick look at a few of the FTP features that are available with WebDrive 12, and here are the scorecard results:
| Client Name | Directory Browsing | Explicit FTPS | Implicit FTPS | Virtual Hosts | True HOSTs | Site Manager | Extensibility |
|---|---|---|---|---|---|---|---|
| WebDrive 12.10.4082 | N/A | Y | Y | Y | N1 | Y | N/A |
Notes:
|
|||||||
That wraps things up for today's review of WebDrive 12. Your key take-aways should be: WebDrive is a powerful redirector with support for a wide variety of protocols. What's more, the WebDrive application and each individual connection contain dozens of options which allow you to customize the environment in hundreds of ways. As is the case with many of my reviews, I have barely presented a fraction of the capabilities that are available in WebDrive 12; you might want to try it out and experiment with all of its possibilities.
Note: This blog was originally posted at http://blogs.msdn.com/robert_mcmurray/
Some Useful and Obscure FTP Configuration Settings
30 June 2014 • by Bob • Configuration, FTP, IIS
I get a lot of question about various configuration settings for the IIS FTP service, and most of the settings that I discuss with people can be configured through the FTP features in the IIS Manager. That being said, there are some useful configuration settings for the FTP service which I periodical send to people that have no user interface for setting them. With that in mind, I thought I would write a quick blog to point out a few of these obscure settings that I personally use the most-often or I send to other people.
Using Domain Name Syntax as an FTP Virtual Hostname
I use this setting on all of my FTP servers because it seems a little more natural to me. Here's the scenario: the IIS FTP service supports two kinds of hostnames:
- "Real" FTP hostnames - these are real FTP hostnames that are specified by using the FTP HOST command (as defined in RFC 7151)
- "Virtual" ftp hostnames - these are FTP hostnames that are specified as part of the FTP USER command
Real FTP hostnames are pretty straight-forward: an FTP client specifies the hostname with a HOST command when a user is connecting to the server. Once the IIS FTP service receives that command, the FTP service routes the FTP session to the correct FTP site.
That being said, the FTP HOST command is still rather new, so only a handful of FTP clients currently support it. Because of that, you can use FTP "virtual" hostnames with the IIS FTP service. By default that syntax uses the "vertical line" or "pipe" character to differentiate between the hostname and user name. For example:
- "
ftp.contoso.com|username" - "
ftp.fabrikam.com|username"
When you are specifying your FTP credentials in your FTP client, you would enter your username like the preceding examples. While this syntax is valid for both the IIS FTP service and the underlying FTP protocol, it seems a little odd to most users (including me). With that in mind, we added a configuration setting for the FTP service that will allow you to use the more-familiar domain\username syntax like the following examples:
- "
ftp.contoso.com\username" - "
ftp.fabrikam.com\username"
To enable this feature, use the following steps:
- Open a command prompt as an administrator.
- Type the following commands:
cd /d "%SystemRoot%\System32\Inetsrv"
appcmd.exe set config -section:system.ftpServer/serverRuntime /hostNameSupport.useDomainNameAsHostName:"True" /commit:apphost
net.exe stop FTPSVC
net.exe start FTPSVC - Close the command prompt.
More information about this feature is available in the IIS configuration reference at the following URL:
- FTP Host Name Support <hostNameSupport>
http://www.iis.net/ConfigReference/system.ftpServer/serverRuntime/hostNameSupport
FTP Credential Caching
The FTP service caches user credentials for successfully-authenticated user sessions in order to help improve login performance, and I wrote the following detailed blog about this a couple of years ago:
Credential Caching in FTP 7.0 and FTP 7.5
I don't want to re-post an old blog, but I have sent several people to that blog over the years, so I thought that it was worth mentioning here since it seems to be referenced quite often. The problem that people seem to run into the most is that their old password is still valid for FTP after they have changed it, and this is caused by the FTP service caching their user credentials.
This is especially annoying for me personally when I am working on a development computer where I am creating an authentication provider. Unless I disable credential caching on my development computer, I can never seem to get any work done. To resolve this issue, I disable credential caching for the FTP service by using the following steps:
- Open a command prompt as an administrator.
- Type the following commands:
cd /d "%SystemRoot%\System32\Inetsrv"
appcmd.exe set config -section:system.ftpServer/caching /credentialsCache.enabled:"False" /commit:apphost
net.exe stop FTPSVC
net.exe start FTPSVC - Close the command prompt.
The blog which I mentioned earlier goes into more detail about setting a custom timeout interval for credential caching instead of disabling the feature entirely, and all of the settings for FTP credential caching are in the IIS configuration reference at the following URLs:
- FTP Caching <caching>
http://www.iis.net/ConfigReference/system.ftpServer/caching - FTP Credentials Cache <credentialsCache>
http://www.iis.net/ConfigReference/system.ftpServer/caching/credentialsCache
FTP Client Certificate Authentication
FTP Client Certificate Authentication is an often-overlooked feature of the IIS FTP service, and I think that this is due to two reasons:
- There is no user interface to configure the required settings
- Configuring the required settings is very difficult
My second reason cannot be understated; I usually have to set up FTP Client Certificate Authentication once or twice a year in order to test various scenarios, and each time I do so I am reminded of just how difficult it can be to get everything right, and equally how easy it is to get something wrong.
Fortunately I took the time a couple of years ago to write a blog which documents everything that it takes to configure the FTP service, and I have used my notes in that blog several times. In complement to my blog on the subject, Vivek Kumbhar wrote an excellent blog series with additional steps to configure your Active Directory for certificate authentication. With that in mind, here are all of the requisite blog posts that you would need to set up this feature:
- Configuring FTP Client Certificate Authentication in FTP 7
Describes how to configure your FTP server for FTP Client Certificate Authentication. - Configure Client Certificate Mapping in FTP 7.5 - Part 1
Describes how to set up your Active Directory server, IIS server, and FTP client systems. - Configure Client Certificate Mapping in FTP 7.5 - Part 2
Walks you through obtaining and installing a server certificate, which you will use later for your FTP site. - Configure Client Certificate Mapping in FTP 7.5 - Part 3
Walks you through setting up an FTP site with SSL. - Configure Client Certificate Mapping in FTP 7.5 - Part 4
Describes how to configure Active Directory mapping for a user account.
As I have mentioned before, configuring this feature is not for the faint-of-heart, but it can be very beneficial from a security standpoint.
For more information about the settings that are required for FTP Client Certificate Authentication, see the following articles in the IIS configuration reference:
- FTP Client Certificate Authentication <clientCertAuthentication>
http://www.iis.net/ConfigReference/system.applicationHost/sites/site/ftpServer/security/authentication/clientCertAuthentication - FTP over SSL <ssl>
http://www.iis.net/ConfigReference/system.applicationHost/sites/site/ftpServer/security/ssl - FTP SSL Client Certificates <sslClientCertificates>
http://www.iis.net/ConfigReference/system.applicationHost/sites/site/ftpServer/security/sslClientCertificates
That wraps it up for today's post. ;-]
Note: This blog was originally posted at http://blogs.msdn.com/robert_mcmurray/
How to trust the IIS Express Self-Signed Certificate
15 November 2013 • by Bob • SSL, IIS Express, WebMatrix, Visual Studio, Internet Explorer
I had an interesting question from a coworker today that I thought would make a great blog. Here's the scenario...
Problem Description
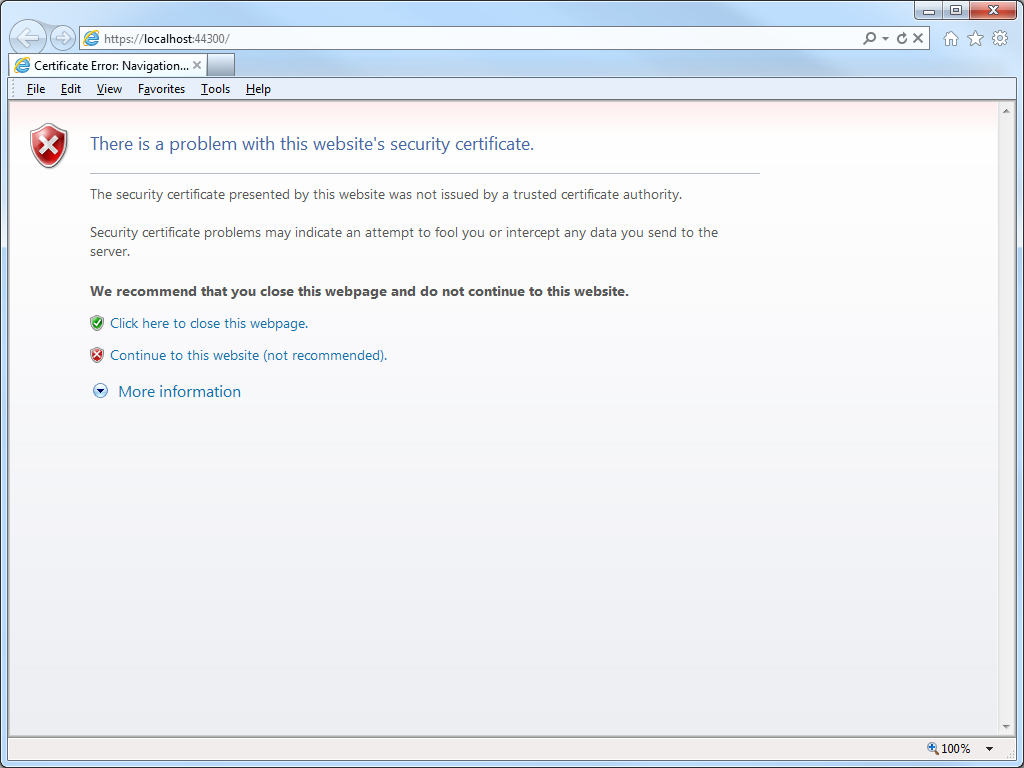
My coworker was using WebMatrix to create a website, although he could have been using Visual Studio and he would have run into the same problem. The problem he was seeing was that his application required HTTPS, but he was greeted with the following error message every time that he used Internet Explorer to browse to his development website at https://localhost:44300/:
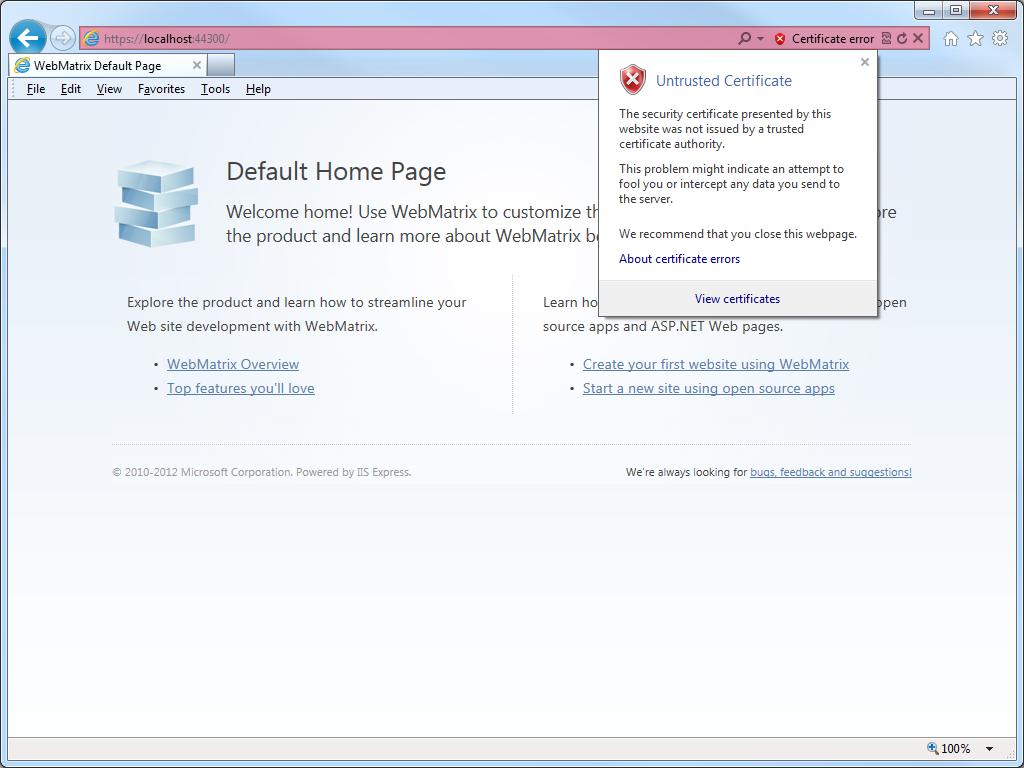
When he clicked the link to Continue to this website, he could click on Certificate error in the address bar, which would inform him that the website was using an Untrusted certificate:
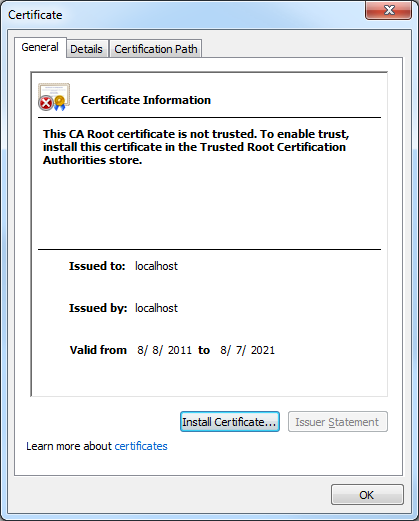
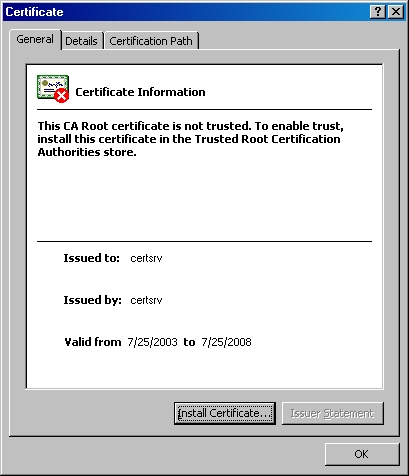
If he clicked View certificates, the Certificate dialog box informed him that the CA Root certificate was not trusted:
Cause
Since my coworker was using WebMatrix with IIS Express, which is the default development web server for WebMatrix and Visual Studio, all HTTPS communication was using the self-signed certificate from IIS Express. Since that certificate is self-signed, it is not trusted as if it was issued from a "Trusted Root Certification Authority," and therefore Internet Explorer (or any other security-conscious web browser) was doing the right thing by warning the end-user that they were using an untrusted certificate for HTTPS.
If you were seeing this error when browsing to an Internet website, this would be "A Very Bad Thing™", because you might be sending your confidential information to an untrusted website.
Resolutions
Fortunately this situation can be easily rectified, and there are two different approaches that you can use, and I will discuss both in the subsequent sections.
Resolution Number #1 - Configure your personal account to trust the IIS Express Certificate
The easiest solution is to configure your user account to trust the self-signed certificate as though it were issued by a trusted root certificate authority. To do so, use the following steps:
- Browse to https://localhost:44300/ (or whatever port IIS Express is using) using Internet Explorer and click Continue to this website:
- Click on Certificate error in the address bar, and then click View certificates:
- When the Certificate dialog box is displayed, click Install Certificate:
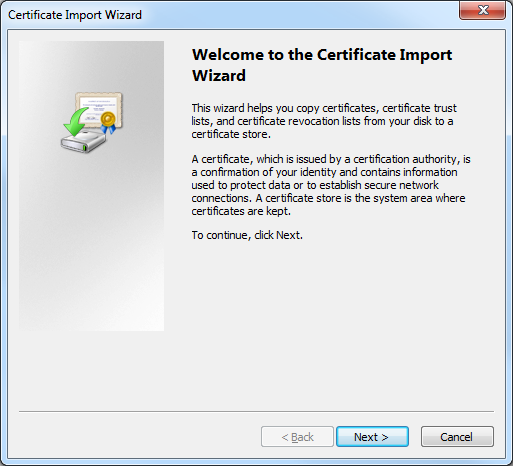
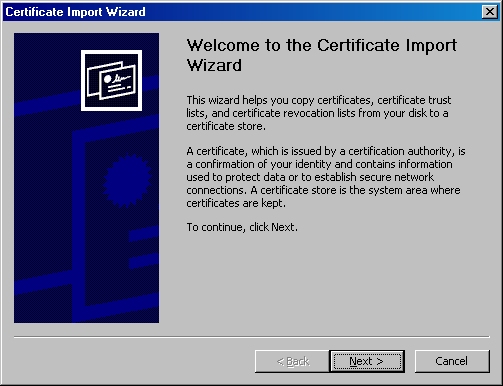
- When the Certificate Import Wizard is displayed, click Next:
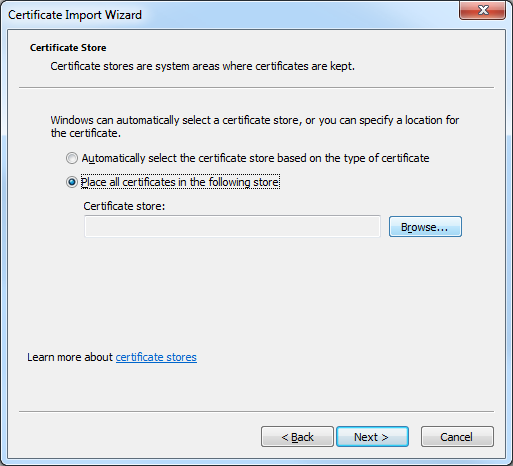
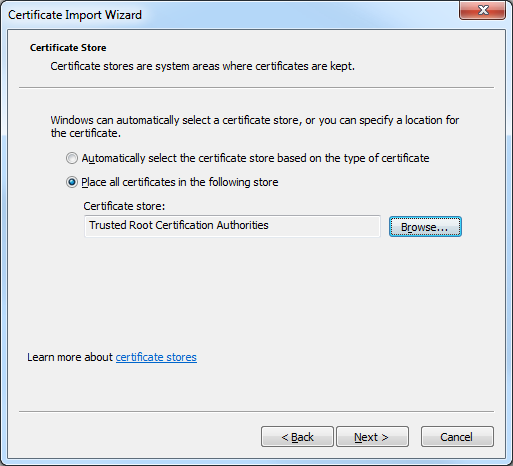
- Click Place all certificates in the following store, and then click Browse:
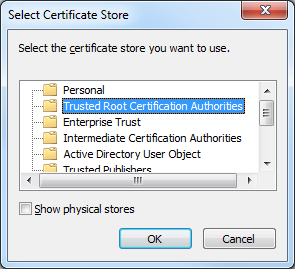
- When the Select Certificate Store dialog box is displayed, click Trusted Root Certification Authorities, and then click OK:
- On the Certificate Import Wizard, click Next:
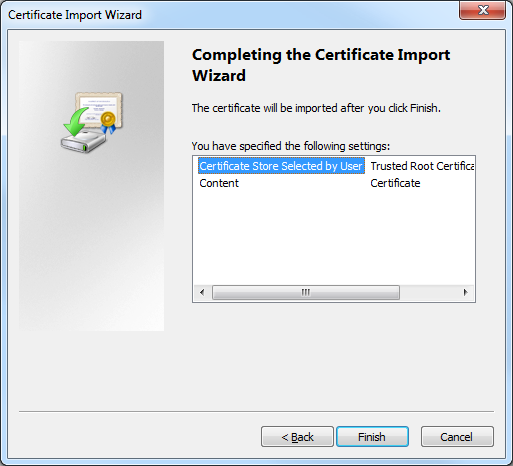
- When the Completing the Certificate Import Wizard page is displayed in the wizard, click Finish:
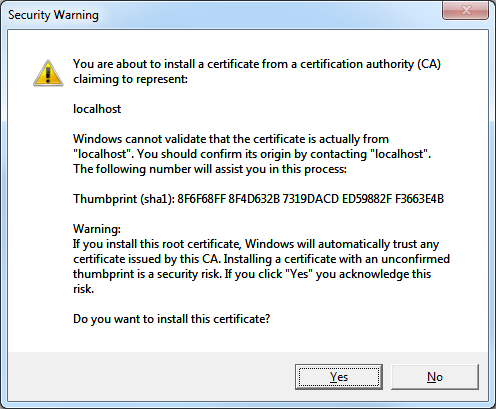
- When the Security Warning dialog box is displayed, click Yes to trust the certificate:
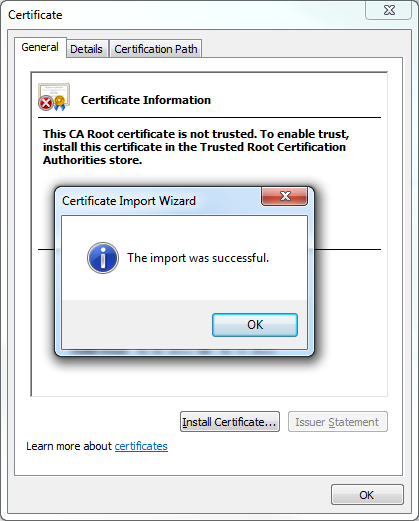
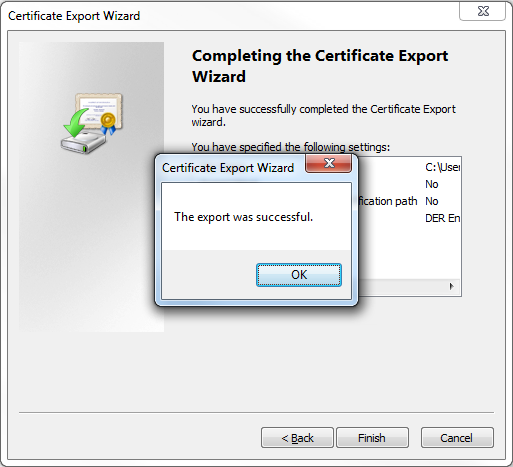
- Click OK when the Certificate Import Wizard informs you that the import was successful:
Resolution Number #2 - Configure your computer to trust the IIS Express Certificate
A more-detailed approach is to configure your computer system to trust the IIS Express certificate, and you might want to do this if your computer is shared by several developers who log in with their individual accounts. To configure your computer to trust the IIS Express certificate, use the following steps:
- Open a blank Microsoft Management Console by clicking Start, then Run, entering "mmc" and clicking OK:
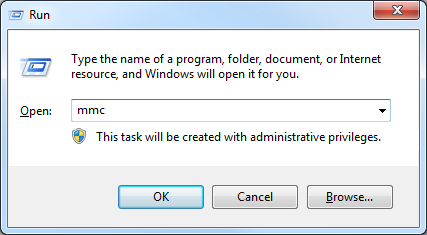
Note: You can also open a blank Microsoft Management Console by typing "mmc" from a command prompt and pressing the Enter key. - Add a snap-in to manage certificates for the local computer:
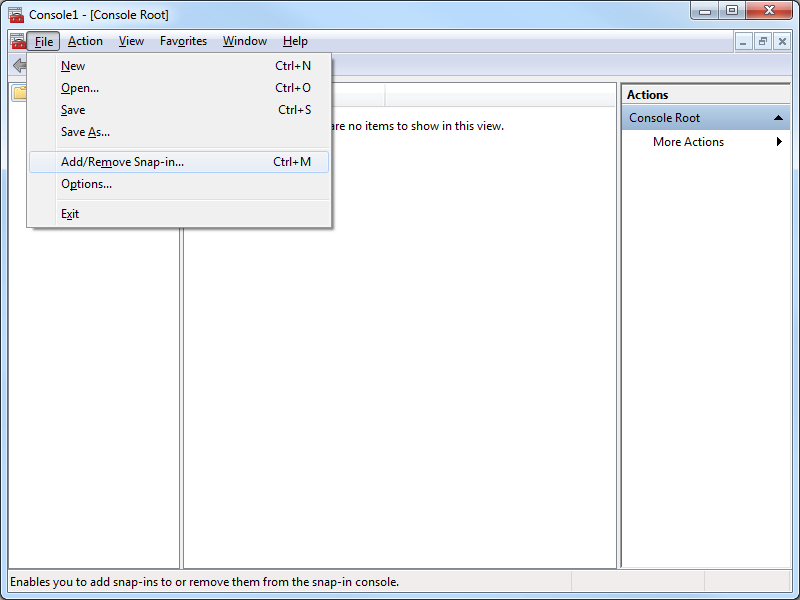
- Click File, and then click Add/Remove Snap-in:
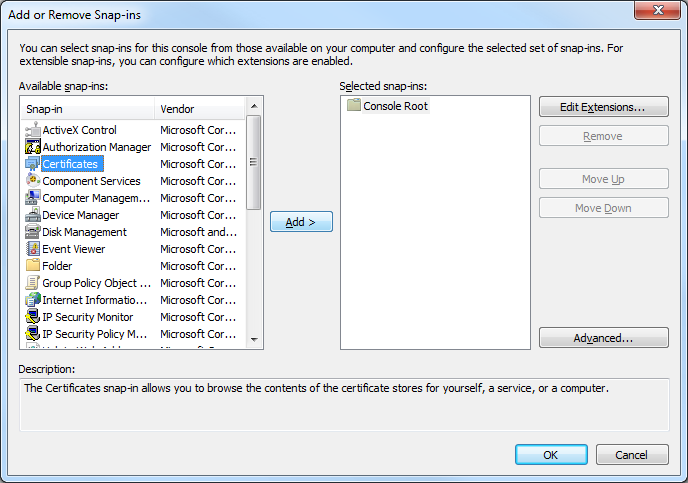
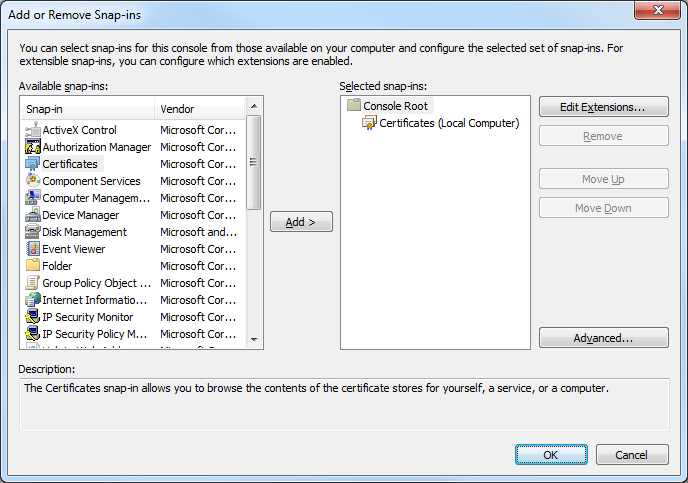
- When the Add or Remove Snap-ins dialog box is displayed, click Certificates, and then click Add:
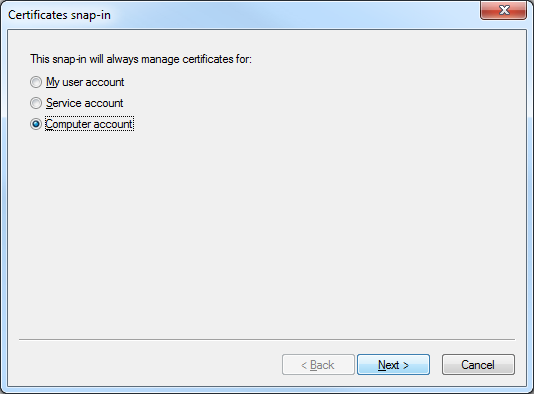
- When the Certificates Snap-ins dialog box is displayed, click Computer account, and then click Next:
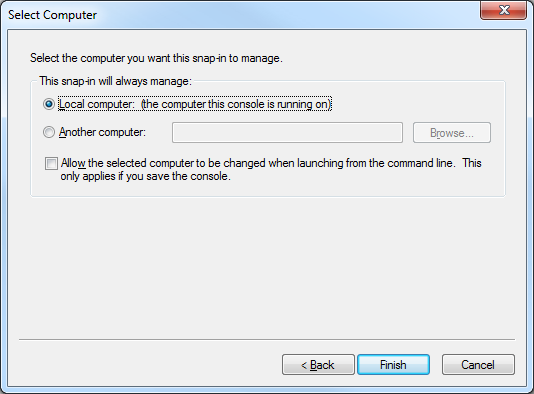
- Click Local computer, and then click Finish:
- Click OK to close the Add or Remove Snap-ins dialog box:
- Click File, and then click Add/Remove Snap-in:
- Export the IIS Express certificate from the computer's personal store:
- In the Console Root, expand Certificates (Local Computer), then expand Personal, and then click Certificates:
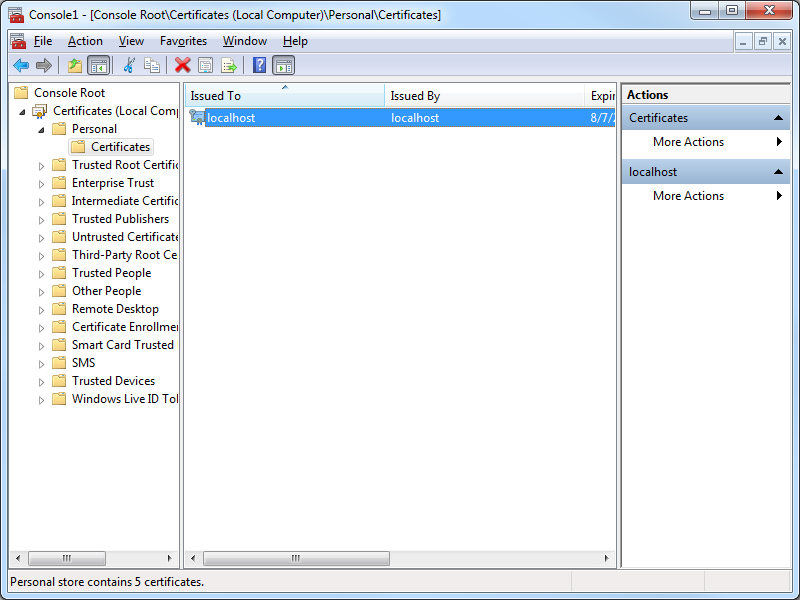
- Select the certificate with the following attributes:
- Issued to = "localhost"
- Issued by = "localhost"
- Friendly Name = "IIS Express Development Certificate"
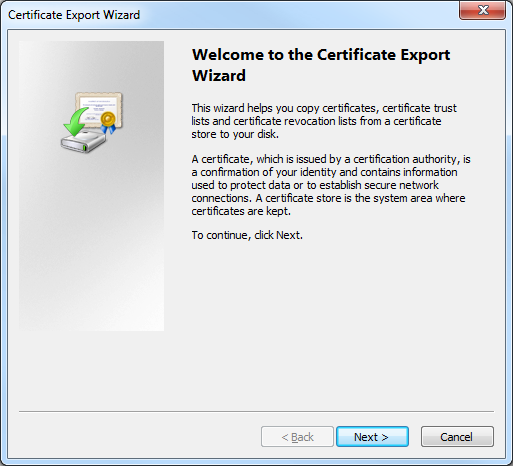
- Click Action, then click All Tasks, and then click Export:

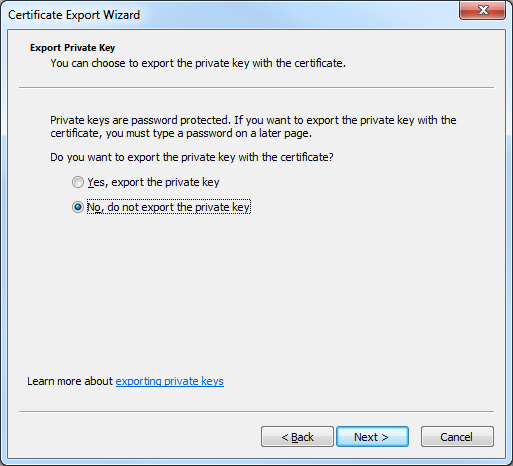
- When the Certificate Export Wizard is displayed, click Next:
- Click No, do not export the private key, and then click Next:
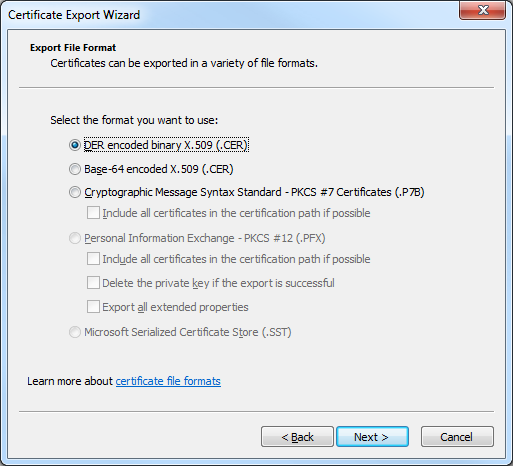
- Click DER encoded binary X.509 (.CER), and then click Next:
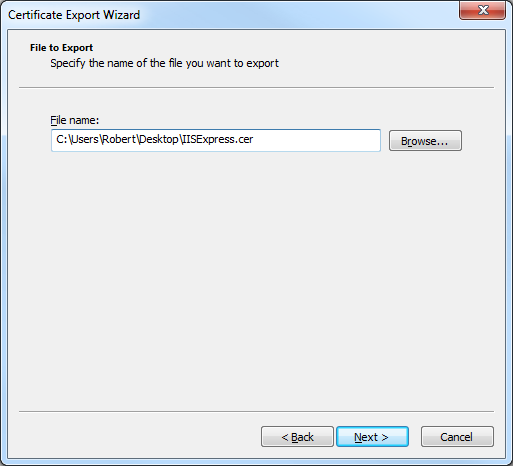
- Enter the path for exported certificate, e.g. "c:\users\robert\desktop\iisexpress.cer", and then click Next:
- Click Finish to export the certificate:
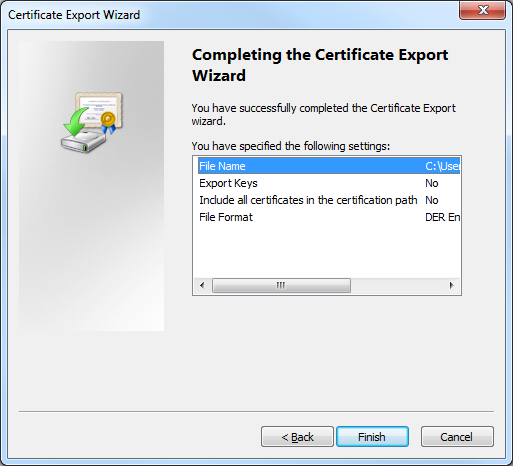
- Click OK when the Certificate Export Wizard displays a dialog box informing you that the export was successful:
- In the Console Root, expand Certificates (Local Computer), then expand Personal, and then click Certificates:
- Import the IIS Express certificate to the computer's Trusted Root Certification Authorities store:
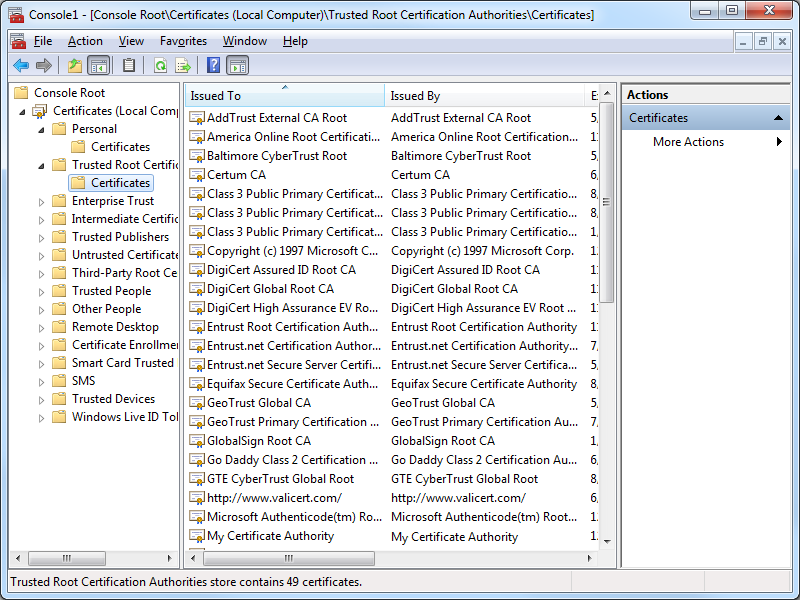
- In the Console Root, expand Certificates (Local Computer), then expand Trusted Root Certification Authorities, and then click Certificates:
- Click Action, then click All Tasks, and then click Import:
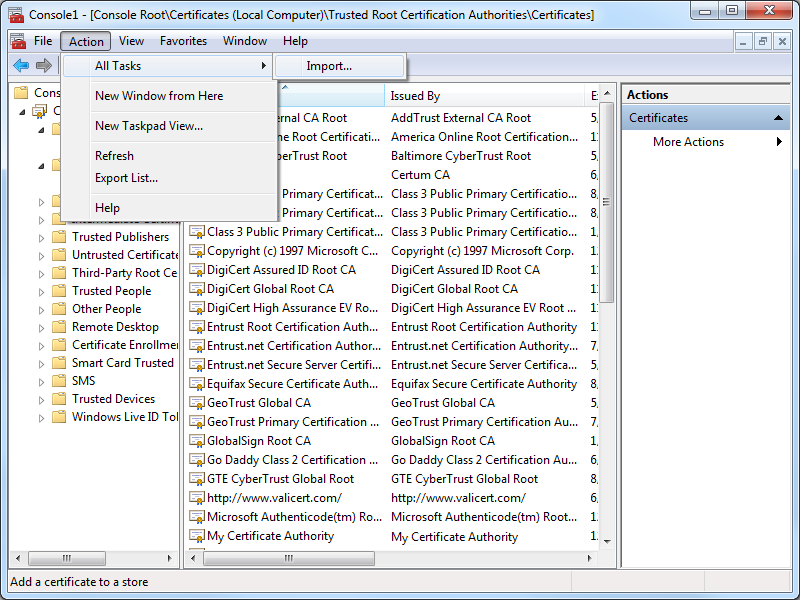
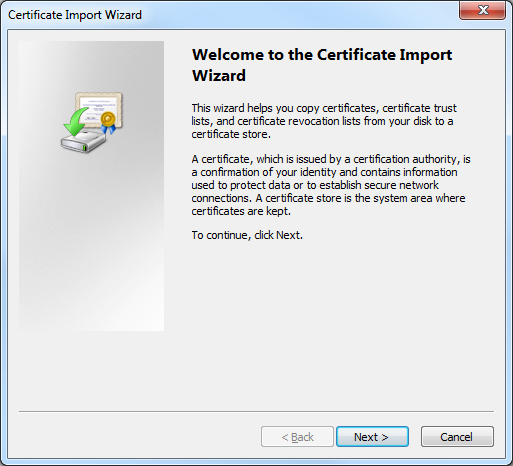
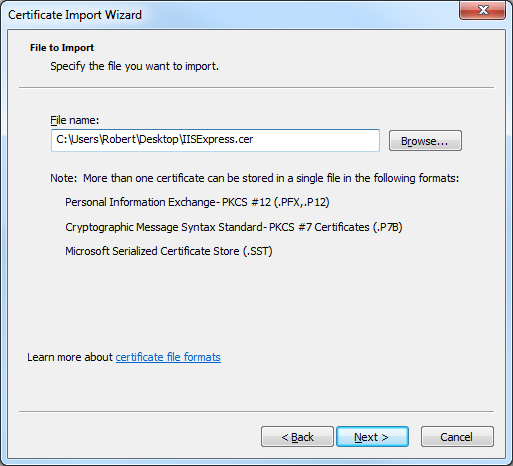
- When the Certificate Import Wizard is displayed, click Next:
- Enter the path to your exported certificate, e.g. "c:\users\robert\desktop\iisexpress.cer", and then click Next:
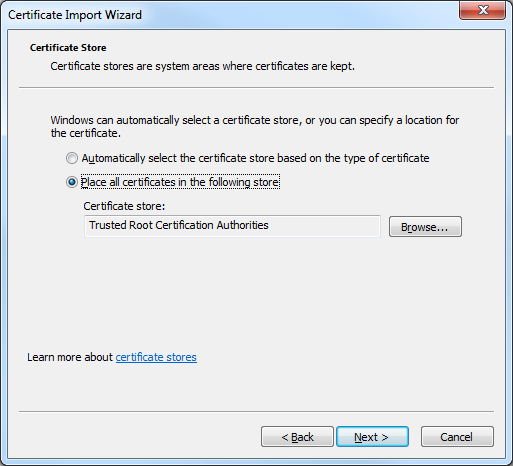
- Ensure that Place all certificates in the following store is checked and verify that the selected Certificate store is set to Trusted Root Certification Authorities, and then click click Next:
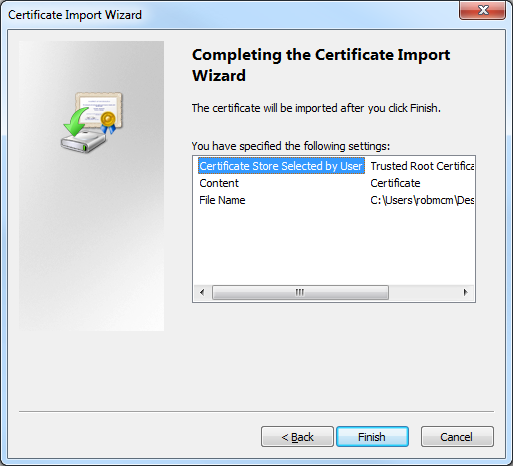
- Click Finish to import the certificate:
- Click OK when the Certificate Import Wizard displays a dialog box informing you that the import was successful:
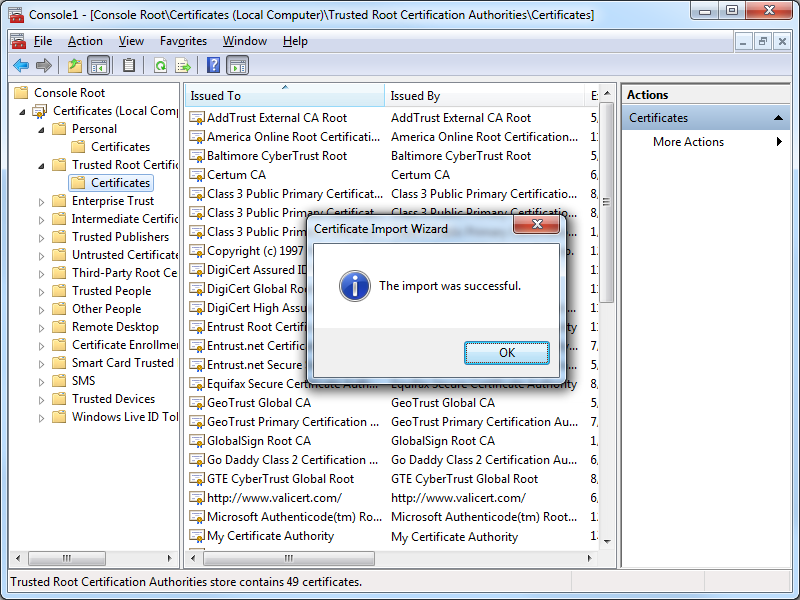
- You IIS Express certificate should now be displayed in the listed of Trusted Root Certification Authorities as "localhost":
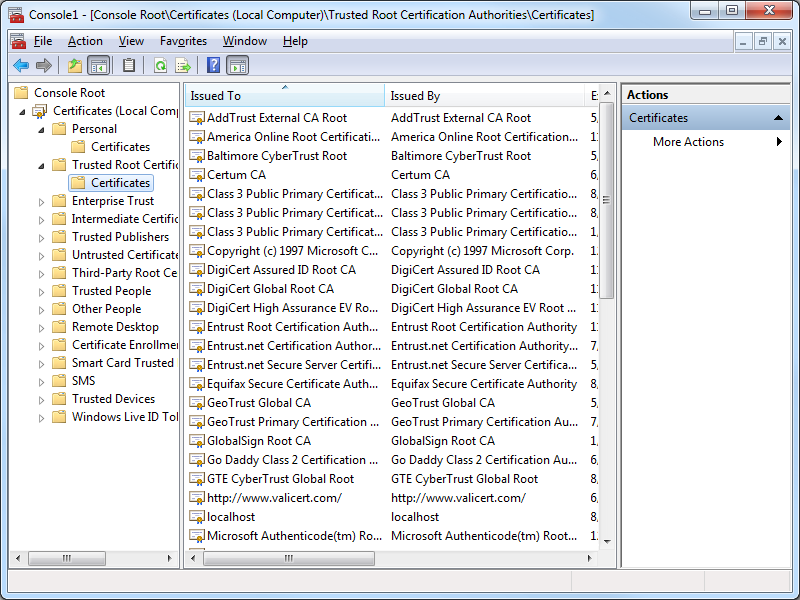
- In the Console Root, expand Certificates (Local Computer), then expand Trusted Root Certification Authorities, and then click Certificates:
Testing the Certificate Installation
Once you have completed all of the steps in one of the resolutions, you should use the following steps to test the installation of your IIS Express certificate as a trusted root certification authority:
- Close all instances of Internet Explorer that you have open.
- Re-open Internet Explorer, then browse to to https://localhost:44300/ (or whatever port IIS Express is using); your website should be displayed without prompting you to verify that you want to continue to the website.
- Click the Security Report icon in the address bar you should see that the website has been identified as localhost:
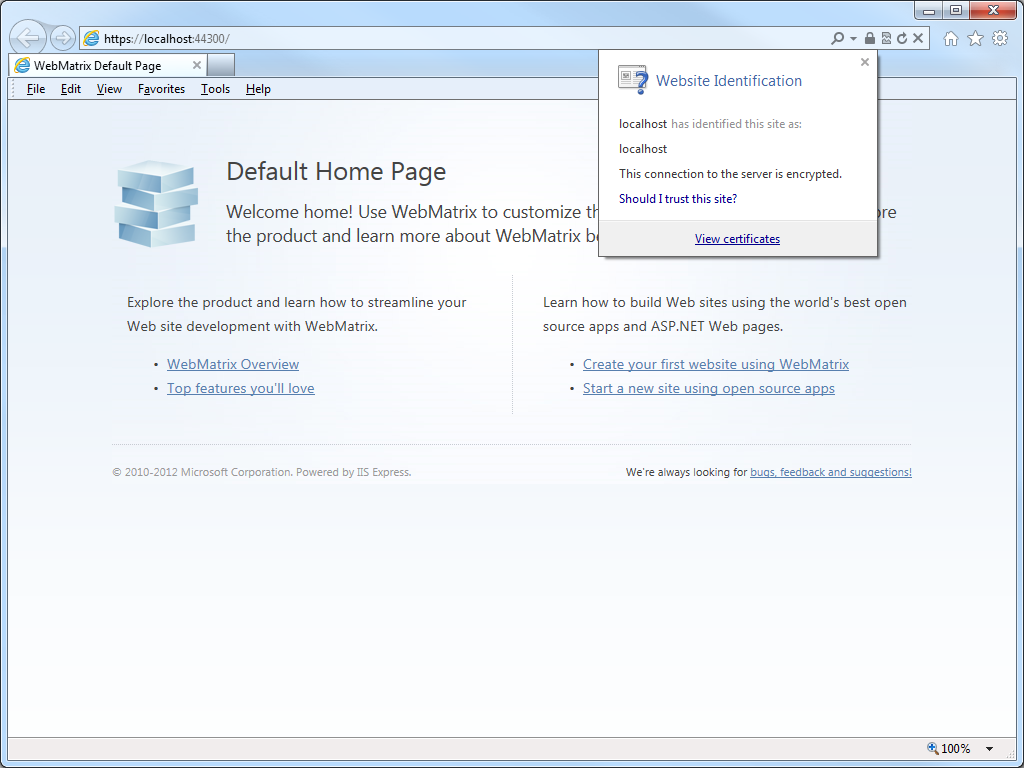
- If you click View certificates, you should now see that the certificate is trusted to ensure the identity of the computer:

In Closing...
This blog was a little longer than some of my past blogs, but it should provide you with the information you need to trust HTTPS-based websites that you are developing with IIS Express.
That wraps it up for today's blog post. ;-]
Note: This blog was originally posted at http://blogs.msdn.com/robert_mcmurray/
FTP Clients - Part 12: BitKinex
31 January 2013 • by Bob • FTP
For this installment in my series about FTP clients, I want to take a look at BitKinex 3, which is an FTP client from Barad-Dur, LLC. For this blog I used BitKinex 3.2.3, and it is available from the following URL:
At the time of this blog post, BitKinex 3 is available for free, and it contains a bunch of features that make it an appealing FTP and WebDAV client.
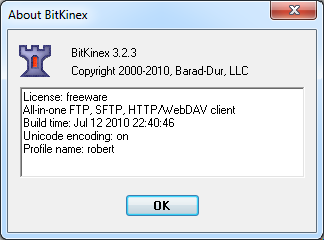 |
| Fig. 1 - The Help/About dialog in BitKinex 3. |
BitKinex 3 Overview
When you open BitKinex 3, it shows four connection types (which it refers to as Data Sources): FTP, HTTP/WebDAV, SFTP/SSH, and My Computer. The main interface is analogous to what you would expect in a Site Manager with other FTP clients - you can define new data sources (connections) to FTP sites and websites:
 |
| Fig. 2 - The main BitKinex 3 window. |
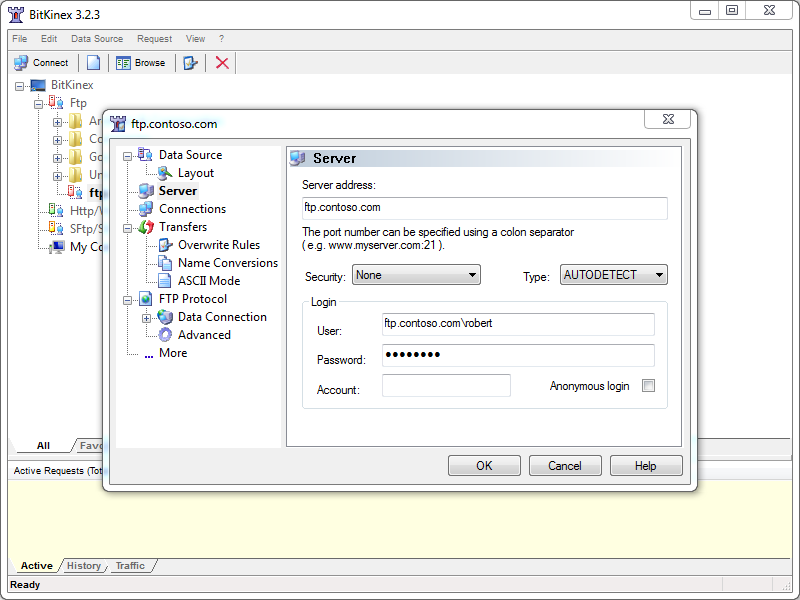
Creating an FTP data source is pretty straight-forward, and there are a fair number of options that you can specify. What's more, data sources can have individual options specified, or they can inherit from a parent note.
 |
| Fig. 3 - Creating a new FTP data source. |
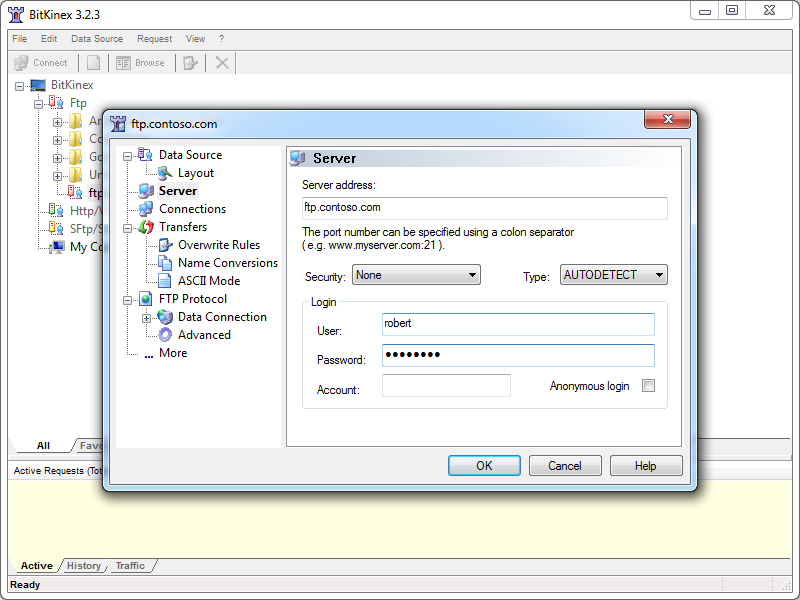 |
| Fig. 4 - Specifying the options for an FTP data source. |
Once a data source has connected, a child window will open and display the folder trees for your local and remote content. (Note: there are several options for customizing how each data source can be displayed.)
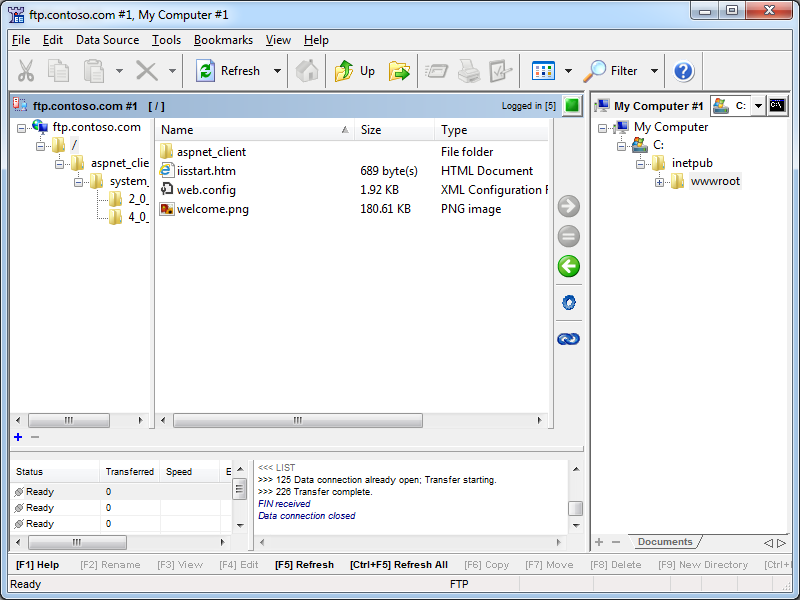 |
| Fig. 5 - An open FTP data source. |
BitKinex 3 has support for command-line automation, which is pretty handy if you do a lot of scripting like I do. Documentation about automating BitKinex 3 from the command line is available on the BitKinex website at the following URL:
BitKinex Command Line Interface
That being said, the documentation is a bit sparse and there are few examples, so I didn't attempt anything ambitious from a command line during my testing.
Using BitKinex 3 with FTP over SSL (FTPS)
BitKinex 3 has built-in support for FTP over SSL (FTPS) supports both Explicit and Implicit FTPS. To specify the FTPS mode, you need to choose the correct mode from the Security drop-down menu for your FTP data source.
 |
| Fig. 6 - Specifying the FTPS mode. |
Once you have established an FTPS connection through BitKinex 3, the user experience is the same as it is for a standard FTP connection.
Using Using BitKinex 3 with True FTP Hosts
True FTP hosts are not supported natively, and even though BitKinex 3 allows you to send a custom command after a data source has been opened, I could not find a way to send a custom command before sending user credentials, so true FTP hosts cannot be used.
Using Using BitKinex 3 with Virtual FTP Hosts
BitKinex 3's login settings allow you to specify the virtual host name as part of the user credentials by using syntax like "ftp.example.com|username" or "ftp.example.com\username", so you can use virtual FTP hosts with BitKinex 3.
 |
| Fig. 7 - Specifying an FTP virtual host. |
Scorecard for BitKinex 3
This concludes my quick look at a few of the FTP features that are available with BitKinex 3, and here are the scorecard results:
| Client Name | Directory Browsing | Explicit FTPS | Implicit FTPS | Virtual Hosts | True HOSTs | Site Manager | Extensibility |
|---|---|---|---|---|---|---|---|
| BitKinex 3.2.3 | Rich | Y | Y | Y | N | Y | N/A |
| Note: I could not find anyway to extend the functionality of BitKinex 3; but as I mentioned earlier, it does support command-line automation. |
|||||||
That wraps it up this blog - BitKinex 3 is pretty cool FTP client with a lot of options, and I think that my next plan of action is to try out the WebDAV features that are available in BitKinex 3. ;-)
Note: This blog was originally posted at http://blogs.msdn.com/robert_mcmurray/
FTP Clients - Part 11: Beyond Compare 3
30 November 2012 • by Bob • FTP, SSL
For this installment in my series about FTP clients, I want to take a look at Beyond Compare 3 from Scooter Software. At its heart, Beyond Compare is a file/folder comparison tool, so it might seem an unlikely candidate for an FTP client, but it has a lot of great FTP features packed into it.
 |
| Fig. 1 - The Help/About dialog in Beyond Compare 3. |
Note: For this blog I used Beyond Compare version 3.3.5.
Beyond Compare 3 Overview
Like many self-proclaimed computer geeks, over the years I have collected a lot of various utilities that perform specific actions that I need to take care of. Sometimes I discover these tools when Binging my way through the Internet, and other times they come highly recommended from other people. In this specific situation, Beyond Compare falls into the latter category - dozens of people had recommended Beyond Compare to me before I tried it out, and after falling in love with it I have recommended it to dozens of my friends. At the time I was using Microsoft WinDiff to compare files, which is still a great application to do simple comparisons, but Beyond Compare does so much more.
 |
| Fig. 2 - The Start New Session screen. |
 |
| Fig. 3 - Comparing the files within two folders. |
 |
| Fig. 4 - Comparing the HTML content of two files. |
I could go on about Beyond Compare as a comparison tool, but that's really outside the scope of this blog since I am supposed to be talking about FTP features. Needless to say, if you're looking for a good comparison tool, you might want to download the trial edition of Beyond Compare 3 and give it a try.
That being said, let's get back to the business at hand. Beyond Compare 3 has a collection of FTP Profiles, which you can think of as analogous to a site manager in more traditional FTP clients.
 |
| Fig. 5 - Opening Beyond Compare 3's FTP Profiles. |
Inside the FTP Profiles dialog, you can specify a wealth of connection options for remote FTP sites that you would expect to find in any other FTP client.
 |
| Fig. 6 - Specifying FTP connection options. |
Once you have established an FTP connection through Beyond Compare 3, you can view your local files and the files in your remote FTP site side-by-side, and then you can perform comparisons, updates, merges, etc.
 |
| Fig. 7 - Viewing local and remote files. |
Using Beyond Compare 3 with FTP over SSL (FTPS)
Beyond Compare 3 has built-in support for Explicit FTP over SSL (FTPS), which you specify when you are creating the FTP profile for a site.
 |
| Fig. 8 - Specifying an Explicit FTPS connection. |
Once you have established an Explicit FTPS connection through Beyond Compare 3, the user experience is the same as it is for a standard FTP connection.
|
| Fig. 9 - Comparing files over FTPS. |
That being said, at first glance Beyond Compare 3 did not appear to support Implicit FTPS. For me this was not a deal-breaker by any stretch of the imagination since Explicit FTPS is preferred. (Even though Implicit FTPS is supported by IIS7 through IIS8, it is really an outdated protocol.)
10 January 2013 Update: I heard from Craig Peterson at Scooter Software that Beyond Compare 3 does support Implicit FTPS, but it does so implicitly. (No pun intended. ;-]) When you connect using FTP over SSL on port 990, it will automatically use implicit FTPS.
Using Using Beyond Compare 3 with True FTP Hosts
Beyond Compare 3 has built-in support for the HOST command, so you can use true FTP host names when using Beyond Compare 3 to connect to FTP7 and FTP8 sites that are configured with host names. This feature is enabled by default, but if you needed to disable it for some reason, that feature can be accessed on the Connection tab of Beyond Compare 3's FTP Profiles dialog.
 |
| Fig. 10 - Specifying support for the FTP HOST command. |
Using Using Beyond Compare 3 with Virtual FTP Hosts
Beyond Compare 3's login settings allow you to specify the virtual host name as part of the user credentials by using syntax like "ftp.example.com|username" or "ftp.example.com\username", but since Beyond Compare 3 allows you to use true FTP hosts this is really a moot point. Just the same, there's nothing to stop you from disabling the HOST command for a connection and specifying an FTP virtual host as part of your username, although I'm not sure why you would want to do that.
 |
| Fig. 11 - Specifying a virtual FTP host. |
Scorecard for Beyond Compare 3
This concludes our quick look at some of the FTP features that are available with Beyond Compare 3, and here are the scorecard results:
| Client Name | Directory Browsing | Explicit FTPS | Implicit FTPS | Virtual Hosts | True HOSTs | Site Manager | Extensibility |
|---|---|---|---|---|---|---|---|
| Beyond Compare 3.3.5 | Rich | Y | Y | Y | Y | Y | N/A 1 |
| As noted earlier, Beyond Compare 3 supports the FTP HOST command, and is enabled by default for new connections. 1 Note: I could not find anyway to extend the functionality of Beyond Compare 3, but it does have a scripting interface; see their Automating with Scripts and Scripting Reference pages for more details. |
|||||||
So there you have it - Beyond Compare 3 contains many of the features that would make up a great GUI-based FTP client with first-class support for all of the features that I have been examining in detail throughout my blog series about FTP clients. And as I have done with all of my blogs thus far, I included the following disclaimer in all of my preceding posts: there are a great number of additional features that Beyond Compare 3 provides - but once again I only focused on a few specific topic areas that apply to FTP7 and FTP8. For example, one particular feature that I might to experiment with in the future is Beyond Compare 3's support for FTP SSL Client Certificates. But I'll leave that for another day. ;-]
Note: This blog was originally posted at http://blogs.msdn.com/robert_mcmurray/
Working with the Different IIS Express Modes and HTTPS
03 July 2012 • by Bob • IIS Express, Scripting
I had another great question from a customer the other day, and I thought that his question was the perfect impetus for me to write blog that explained the different modes of IIS Express.
The customer's issue was that he was trying to run IIS Express from a command-line by specifying the path to a folder and he wanted to use that with SSL. He couldn't find a way to accomplish that, so he asked Scott Hanselman if there was a switch that he was missing, and Scott sent him my way. In the meantime, he was copying one of the IIS Express template ApplicationHost.config files and configuring SSL by modifying the XML programmatically.
First of all, the short answer is that there isn't some form of "/https" switch for IIS Express that the customer was asking about.
But that being said, this seemed like a great occasion for me to explain a little bit of design architecture for IIS Express, which might help everyone understand a little bit about what's going on behind the scenes when you run IIS Express.
In case you weren't aware, there are actually two modes that you can use with IIS Express:
- Personal Web Server Mode
- Application Server Mode
Having said that, I'll explain what both of those fancy titles actually mean, and how you can use IIS Express with SSL.
Personal Web Server Mode
When you are using Personal Web Server Mode, one ApplicationHost.config file is created per user by default, (unless an alternate file is specified on the command-line), and by default that ApplicationHost.config file is kept in your "%UserProfile%\Documents\IISExpress\config" folder.
In this mode, websites are persistent like they are with the full version of IIS, and the template that is used to create the per-user ApplicationHost.config file is located at:
"%ProgramFiles%\IIS Express\config\templates\PersonalWebServer\ApplicationHost.config"
Note: When you are using Personal Web Server Mode, your default website is named "WebSite1".
The general syntax for Personal Web Server Mode is:
iisexpress.exe [/config:config-file] [/site:site-name] [/systray:true|false] [/siteid:site-id] [/userhome:user-home]
If you are using IIS Express from a command-line with no parameters, or you are using IIS Express with WebMatrix or Visual Studio, then you are using Personal Web Server Mode. You can use SSL by enabling HTTPS in either WebMatrix or Visual Studio, or you can modify your ApplicationHost.config file directly and add an HTTPS binding to a website.
Application Server Mode
When you are using "Application Server Mode," a temporary ApplicationHost.config file generated when IIS Express starts in the user's "%TEMP%\iisexpress" folder.
In this mode, sites are transient like they are with Cassini, and the template that is used to create the temporary ApplicationHost.config file is located at:
"%ProgramFiles%\IIS Express\AppServer\ApplicationHost.config"
Note: When you are using Application Server Mode, your default website is named "Development Web Site".
The general syntax for Application Server Mode is:
iisexpress.exe /path:app-path [/port:port-number] [/clr:clr-version] [/systray:true|false]
If you are using IIS Express from a command-line by specifying the path to a folder, then you are using Application Server Mode, and unfortunately you can't use SSL with this mode.
Using SSL with IIS Express
As I have already mentioned, if you are using Personal Web Server Mode, you can use SSL by enabling HTTPS in WebMatrix or Visual Studio if you are using either of those tools, or you can modify your ApplicationHost.config file directly and add an HTTPS binding to a website.
However, there is no way to specify HTTPS for Application Server Mode; but that being said, there are definitely workarounds that you can use.
Copying the template file like the customer was doing is a good place to start. But I need to state an important warning: you should never modify the actual template files that are installed with IIS Express! However, if you copy the template files somewhere else on your system, you can modify the copied files as much as you want.
If you are using IIS 8 Express, we've made it possible to use AppCmd.exe with any ApplicationHost.config file by using the "/apphostconfig" switch. So instead of modifying the XML directly, you can use AppCmd.exe to make your changes for you.
For example, the following batch file creates a temporary website and sets it up for use with HTTPS:
@echo off
pushd "%~dp0"
REM Create the website's folders.
md %SystemDrive%\myhttpstemp
md %SystemDrive%\myhttpstemp\wwwroot
md %SystemDrive%\myhttpstemp\config
REM Copy the template configuration file.
copy "%ProgramFiles%\IIS Express\AppServer\ApplicationHost.config" %SystemDrive%\myhttpstemp\config
REM Configure the website's home directory.
"%ProgramFiles%\IIS Express\appcmd.exe" set config -section:system.ApplicationHost/sites /"[name='Development Web Site'].[path='/'].[path='/'].physicalPath:%SystemDrive%\myhttpstemp\wwwroot" /commit:apphost /apphostconfig:%SystemDrive%\myhttpstemp\config\ApplicationHost.config
REM Configure the website for SSL.
"%ProgramFiles%\IIS Express\appcmd.exe" set config -section:system.ApplicationHost/sites /+"[name='Development Web Site'].bindings.[protocol='https',bindingInformation='127.0.0.1:8443:']" /commit:apphost /apphostconfig:%SystemDrive%\myhttpstemp\config\ApplicationHost.config
REM Enable directory browsing so this example works without a home page.
"%ProgramFiles%\IIS Express\appcmd.exe" set config "Development Web Site" -section:system.webServer/directoryBrowse /enabled:"True" /commit:apphost /apphostconfig:%SystemDrive%\myhttpstemp\config\ApplicationHost.config
REM Run the website with IIS Express.
"%ProgramFiles%\IIS Express\iisexpress.exe" /config:%SystemDrive%\myhttpstemp\config\ApplicationHost.config /siteid:1 /systray:false
REM Clean up the website folders.
rd /q /s %SystemDrive%\myhttpstemp
popd
As you can see in the above example, this is a little more involved than simply invoking Application Server Mode with a switch to enable HTTPS, but it's still very easy to do. The changes that we've made in IIS 8 Express make it easy to script Personal Web Server Mode in order to enable SSL for a temporary website.
In Closing...
I hope this information makes using the various IIS Express modes and SSL a little clearer, and you can get IIS 8 Express by following the link in the following blog post:
Note: This blog was originally posted at http://blogs.msdn.com/robert_mcmurray/
IIS 6: Setting up SSL - Appendix C: Processing a Certificate Request using Windows 2003 Certificate Services
03 August 2011 • by Bob • IIS, SSL
In this last appendix for my blog series about using SSL with IIS 6, I'll discuss processing a certificate request by using Windows 2003 Certificate Services. When you are running a certificate server for your network environment, you will need to physically issue the certificates that clients will request from your certificate server. There is a way that you can configure certificate services to automatically issue certificates, but I'd advise against that, unless you are only issuing certificates for testing purposes. If so, then you should read the Set the default action upon receipt of a certificate request topic on Microsoft's TechNet website.
That being said, the procedure to approve and issue a certificate is relatively easy; to do so, use the following steps:
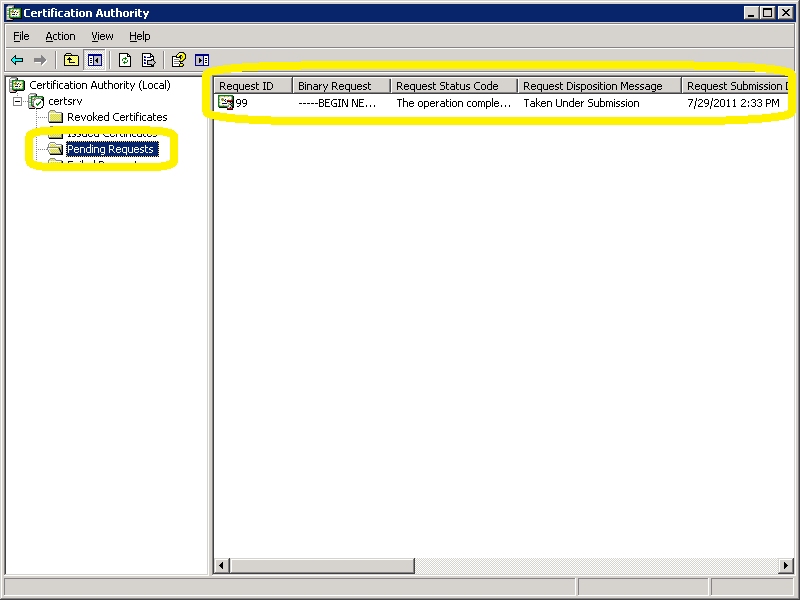
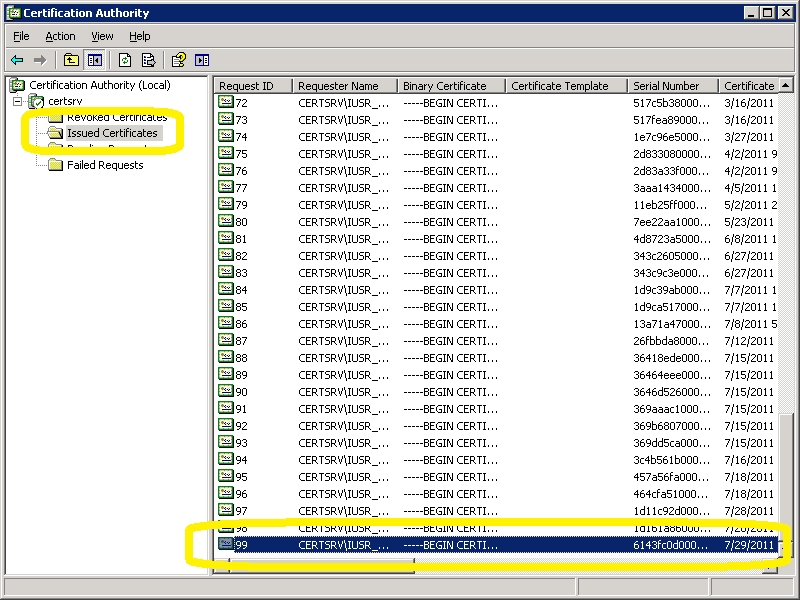
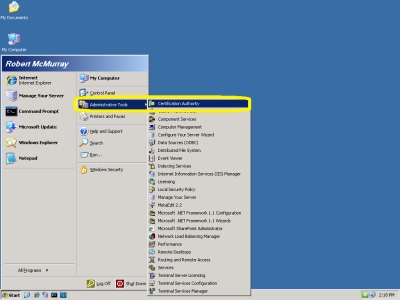
- Open the "Certificate Authority" administrative tool:
- Click on "Pending Requests":

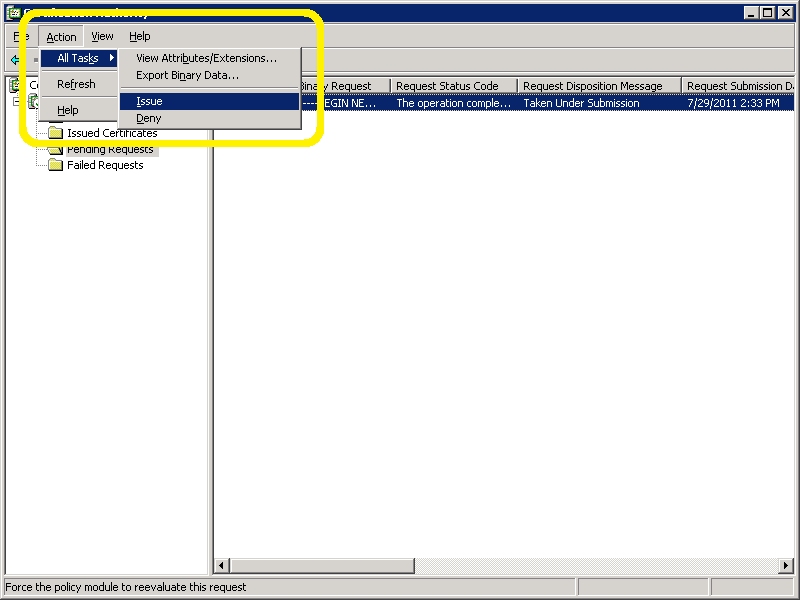
- Right-click the pending request and choose "All Tasks", then click "Issue":

- The certificate will now show up under "Issued Certificates":

That wraps up the last post in this blog series about using Secure Sockets Layer (SSL) with IIS 6.0, as well as some related information about using Windows 2003 Certificate Services. I hope this information helps administrators that have yet to upgrade to Windows Server 2008 or Windows Server 2008 R2. ;-]
Note: This blog was originally posted at http://blogs.msdn.com/robert_mcmurray/
IIS 6: Setting up SSL - Appendix B: Obtaining a Root Certificate from Windows Server 2003 Certificate Services
29 July 2011 • by Bob • IIS, SSL
In this second appendix for my blog series about using SSL with IIS 6, I'm going to discuss obtaining the root certificate from Windows Server 2003 Certificate Services. By way of explanation, obtaining a root certificate is one of the most important steps for servers or clients that will use certificates that you issue. While this step is not necessary on the server where you installed Certificate Services, it is absolutely essential on your other servers or clients, because this step will allow those computers to trust your certificate server as a Certificate Authority (CA). Without that trust in place, you will either receive error messages or SSL simply won't work.
I've broken this process into two steps:
Downloading the Root Certificate
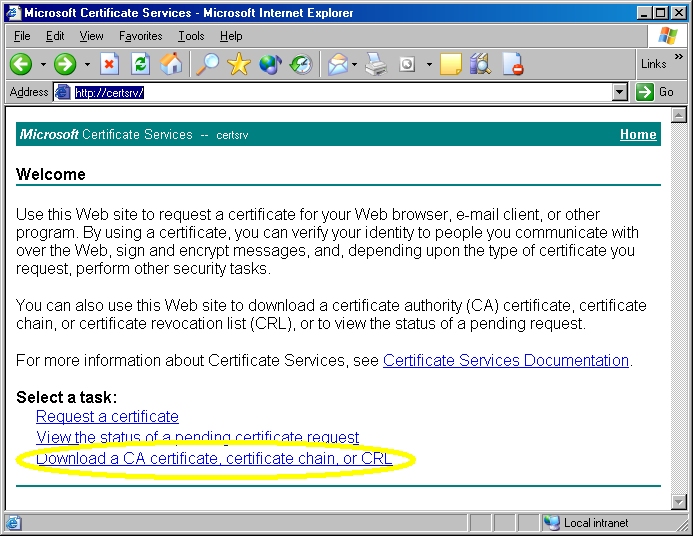
- Browse to your certificate server's address, (e.g. http://<server-name>/certsrv/), and choose to retrieve the CA certificate:

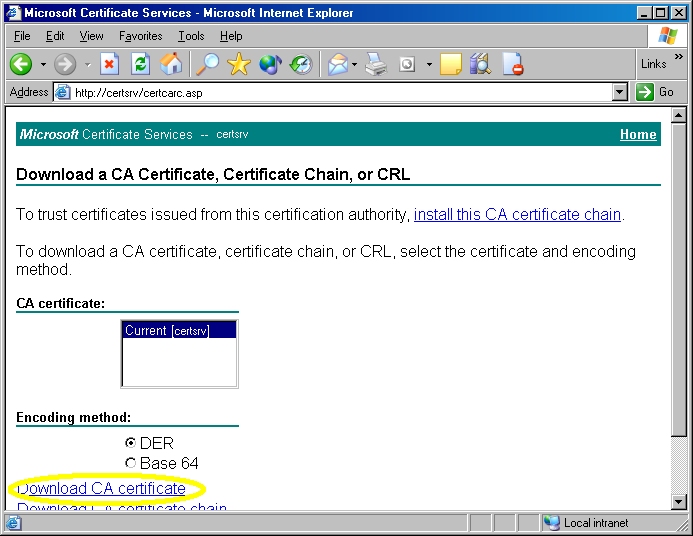
- Click the link to download the CA certificate:

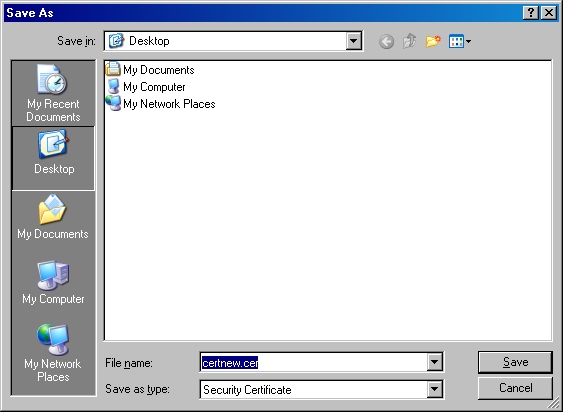
- Choose to save the certificate file to disk:

- Save the file to your desktop:

Note: If you were to bring up the properties for the root certificate, the certificate's icon should show an error; this is because the certificate has not been imported.
Installing the Root Certificate
Before using any certificates that you issue on a computer, you need to install the Root Certificate. (This includes web servers and clients.)
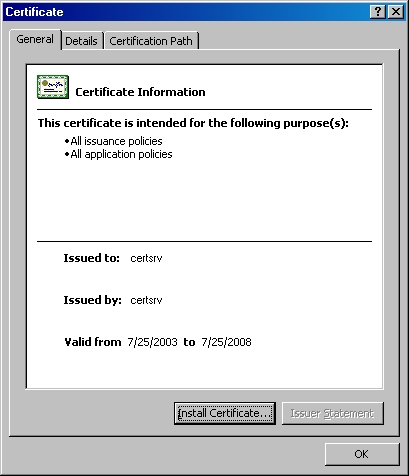
- Double-click the file on your desktop:

- Click the "Install Certificate" button:

- Click "Next" to start the Certificate Import Wizard:

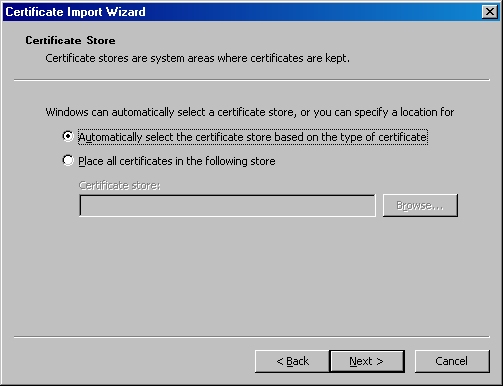
- Choose to automatically choose the store:

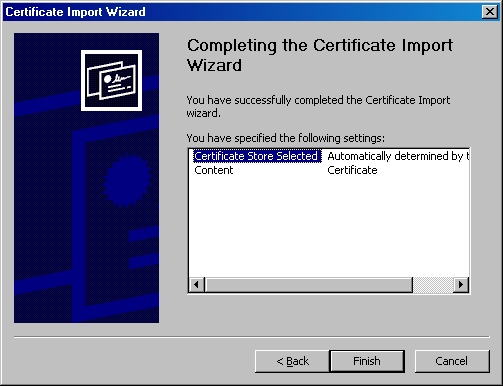
- Click the "Finish" button:

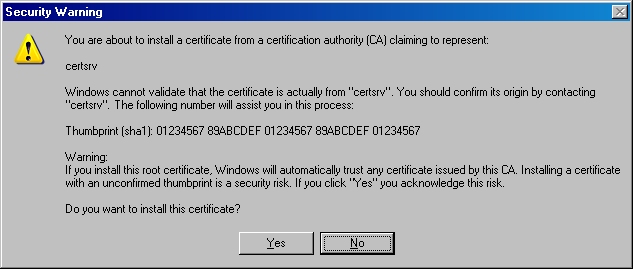
- Click "Yes" when asked if you want to add the certificate:
NOTE: This step is very important. If you do not see this dialog, something went wrong, and you may need to manually place the certificate in the correct store.
- Click "OK" when informed that the import was successful.

Note: If you were to bring up the properties for the root certificate after you have installed it on your computer, you should see that the icon for the certificate no longer shows an error.
That's it for this post. In my next blog post, I'll discuss processing a certificate request.
Note: This blog was originally posted at http://blogs.msdn.com/robert_mcmurray/
IIS 6: Setting up SSL - Appendix A: Installing Windows Server 2003 Certificate Services
28 July 2011 • by Bob • IIS, SSL
I needed to take a short break from my blog series about using SSL with IIS 6 in order to work on some other projects, but I wanted to finish the series by giving you a few appendices that give you some additional details that you might want to know if you are using SSL with IIS 6.
In this first appendix, I'll discuss how to install Certificate Services for Windows Server 2003. Installing Certificate Services will allow you to have your own Certificate Authority (CA), and thereby you will be able to issue certificates for your organization. It should be noted that Internet clients that are not part of your organization will not inherently trust your certificates - you will need to export your Root CA certificate, which I will describe in a later appendix for this blog series.
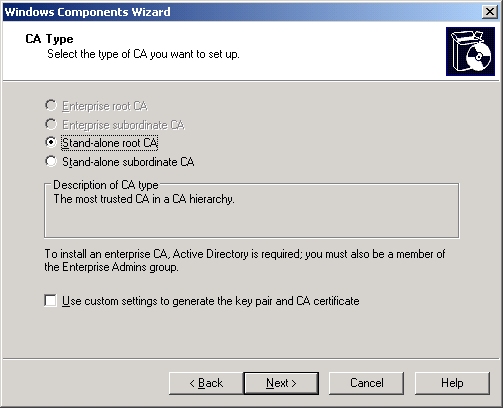
There are four different configurations that you can choose from when you are installing Certificate Services:
| Enterprise root CA | Integrated with Active Directory Acts as the root CA for your organization |
|---|---|
| Enterprise subordinate CA | Integrated with Active Directory Child of your organization's root CA |
| Stand-alone root CA | Not integrated with Active Directory Acts as the root CA for your certificate chain |
| Stand-alone subordinate CA | Not integrated with Active Directory Child of your certificate chain's root CA |
Note: More information about these options is available at http://technet.microsoft.com/en-us/library/cc756989.aspx
For this blog, I will discuss setting up a Stand-alone root CA.
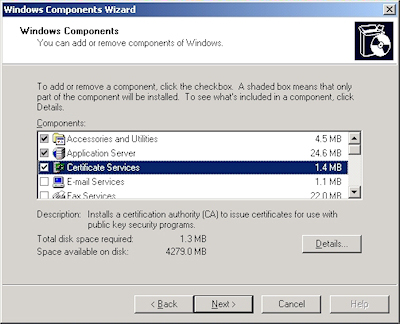
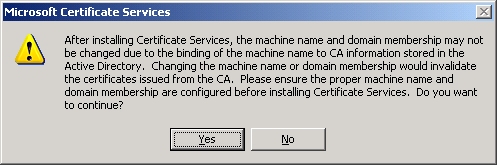
- Run the "Windows Component Wizard" in "Add/Remove Programs", choose "Certificate Services", and click "Next":
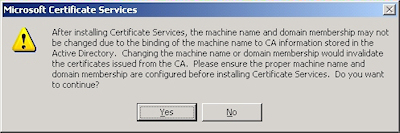
- Click "Yes" when prompted to continue:
- Accept the defaults, then click "Next":

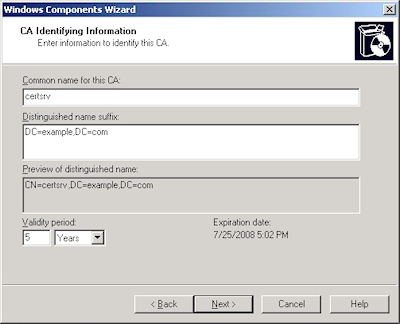
- Enter all requested information, then click "Next":
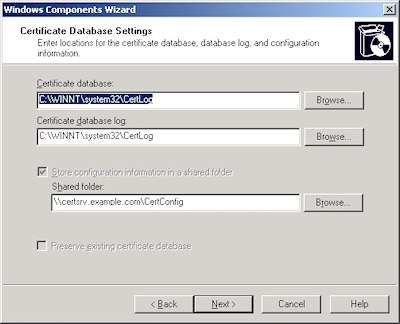
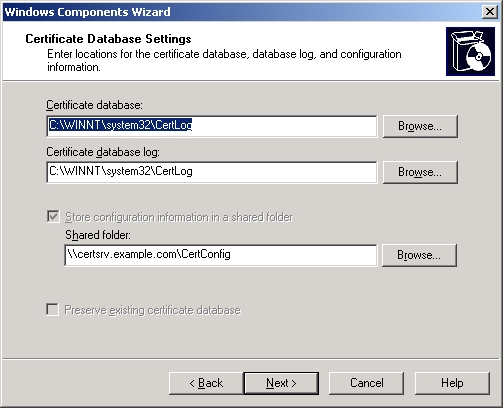
- Accept the defaults for the data locations and click "Next":
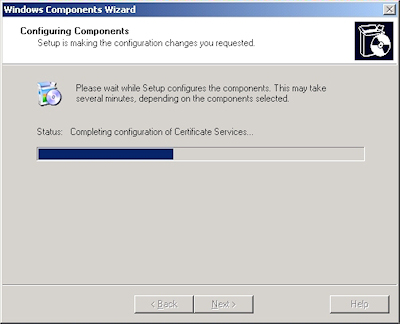
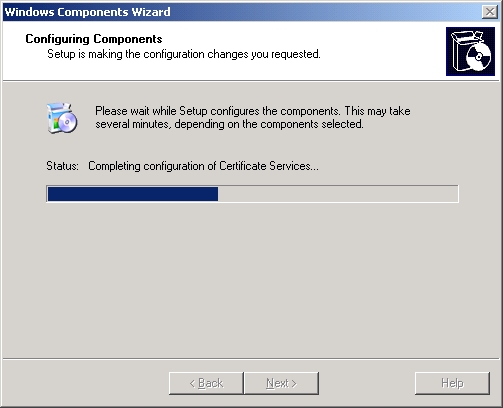
- The wizard will step through installing the services:
- When the wizard has completed, click "Finish" to exit the wizard:


That wraps up this blog post. In my next post I'll discuss obtaining the root certificate for your certificate server so you can install it on a client computer or an IIS server; this will allow other computers to trust the certificates that you issue.
Note: This blog was originally posted at http://blogs.msdn.com/robert_mcmurray/