Working with the Different IIS Express Modes and HTTPS
03 July 2012 • by Bob • IIS Express, Scripting
I had another great question from a customer the other day, and I thought that his question was the perfect impetus for me to write blog that explained the different modes of IIS Express.
The customer's issue was that he was trying to run IIS Express from a command-line by specifying the path to a folder and he wanted to use that with SSL. He couldn't find a way to accomplish that, so he asked Scott Hanselman if there was a switch that he was missing, and Scott sent him my way. In the meantime, he was copying one of the IIS Express template ApplicationHost.config files and configuring SSL by modifying the XML programmatically.
First of all, the short answer is that there isn't some form of "/https" switch for IIS Express that the customer was asking about.
But that being said, this seemed like a great occasion for me to explain a little bit of design architecture for IIS Express, which might help everyone understand a little bit about what's going on behind the scenes when you run IIS Express.
In case you weren't aware, there are actually two modes that you can use with IIS Express:
- Personal Web Server Mode
- Application Server Mode
Having said that, I'll explain what both of those fancy titles actually mean, and how you can use IIS Express with SSL.
Personal Web Server Mode
When you are using Personal Web Server Mode, one ApplicationHost.config file is created per user by default, (unless an alternate file is specified on the command-line), and by default that ApplicationHost.config file is kept in your "%UserProfile%\Documents\IISExpress\config" folder.
In this mode, websites are persistent like they are with the full version of IIS, and the template that is used to create the per-user ApplicationHost.config file is located at:
"%ProgramFiles%\IIS Express\config\templates\PersonalWebServer\ApplicationHost.config"
Note: When you are using Personal Web Server Mode, your default website is named "WebSite1".
The general syntax for Personal Web Server Mode is:
iisexpress.exe [/config:config-file] [/site:site-name] [/systray:true|false] [/siteid:site-id] [/userhome:user-home]
If you are using IIS Express from a command-line with no parameters, or you are using IIS Express with WebMatrix or Visual Studio, then you are using Personal Web Server Mode. You can use SSL by enabling HTTPS in either WebMatrix or Visual Studio, or you can modify your ApplicationHost.config file directly and add an HTTPS binding to a website.
Application Server Mode
When you are using "Application Server Mode," a temporary ApplicationHost.config file generated when IIS Express starts in the user's "%TEMP%\iisexpress" folder.
In this mode, sites are transient like they are with Cassini, and the template that is used to create the temporary ApplicationHost.config file is located at:
"%ProgramFiles%\IIS Express\AppServer\ApplicationHost.config"
Note: When you are using Application Server Mode, your default website is named "Development Web Site".
The general syntax for Application Server Mode is:
iisexpress.exe /path:app-path [/port:port-number] [/clr:clr-version] [/systray:true|false]
If you are using IIS Express from a command-line by specifying the path to a folder, then you are using Application Server Mode, and unfortunately you can't use SSL with this mode.
Using SSL with IIS Express
As I have already mentioned, if you are using Personal Web Server Mode, you can use SSL by enabling HTTPS in WebMatrix or Visual Studio if you are using either of those tools, or you can modify your ApplicationHost.config file directly and add an HTTPS binding to a website.
However, there is no way to specify HTTPS for Application Server Mode; but that being said, there are definitely workarounds that you can use.
Copying the template file like the customer was doing is a good place to start. But I need to state an important warning: you should never modify the actual template files that are installed with IIS Express! However, if you copy the template files somewhere else on your system, you can modify the copied files as much as you want.
If you are using IIS 8 Express, we've made it possible to use AppCmd.exe with any ApplicationHost.config file by using the "/apphostconfig" switch. So instead of modifying the XML directly, you can use AppCmd.exe to make your changes for you.
For example, the following batch file creates a temporary website and sets it up for use with HTTPS:
@echo off
pushd "%~dp0"
REM Create the website's folders.
md %SystemDrive%\myhttpstemp
md %SystemDrive%\myhttpstemp\wwwroot
md %SystemDrive%\myhttpstemp\config
REM Copy the template configuration file.
copy "%ProgramFiles%\IIS Express\AppServer\ApplicationHost.config" %SystemDrive%\myhttpstemp\config
REM Configure the website's home directory.
"%ProgramFiles%\IIS Express\appcmd.exe" set config -section:system.ApplicationHost/sites /"[name='Development Web Site'].[path='/'].[path='/'].physicalPath:%SystemDrive%\myhttpstemp\wwwroot" /commit:apphost /apphostconfig:%SystemDrive%\myhttpstemp\config\ApplicationHost.config
REM Configure the website for SSL.
"%ProgramFiles%\IIS Express\appcmd.exe" set config -section:system.ApplicationHost/sites /+"[name='Development Web Site'].bindings.[protocol='https',bindingInformation='127.0.0.1:8443:']" /commit:apphost /apphostconfig:%SystemDrive%\myhttpstemp\config\ApplicationHost.config
REM Enable directory browsing so this example works without a home page.
"%ProgramFiles%\IIS Express\appcmd.exe" set config "Development Web Site" -section:system.webServer/directoryBrowse /enabled:"True" /commit:apphost /apphostconfig:%SystemDrive%\myhttpstemp\config\ApplicationHost.config
REM Run the website with IIS Express.
"%ProgramFiles%\IIS Express\iisexpress.exe" /config:%SystemDrive%\myhttpstemp\config\ApplicationHost.config /siteid:1 /systray:false
REM Clean up the website folders.
rd /q /s %SystemDrive%\myhttpstemp
popd
As you can see in the above example, this is a little more involved than simply invoking Application Server Mode with a switch to enable HTTPS, but it's still very easy to do. The changes that we've made in IIS 8 Express make it easy to script Personal Web Server Mode in order to enable SSL for a temporary website.
In Closing...
I hope this information makes using the various IIS Express modes and SSL a little clearer, and you can get IIS 8 Express by following the link in the following blog post:
Note: This blog was originally posted at http://blogs.msdn.com/robert_mcmurray/
Advanced Log Parser Charts Part 4 - Adding Custom Input Formats
25 May 2012 • by Bob • IIS, LogParser
In Part 4 of this series, I'll show you how you can do a couple of cool things:
- Create a new input format for Log Parser (and I'll use FTP RSCA data as an example)
- Create charts from your custom input format
For the data source for my custom plug-in, I thought that it would be cool to consume the data from FTP 7's Runtime Status (RSCA). If you've followed some of my old blogs, you would have seen that around five years ago I wrote the following pair of blogs about programmatically viewing FTP 7 sessions:
I'm going to recycle some of the FTP RSCA concepts from those blogs in order to create my COM plug-in.
Log Parser Input Formats
If you're like me, you already realize that the existing features of Log Parser simply rock. But what most people don't realize is that Log Parser lets you extend the functionality by adding new input formats, so you can consume the data from any place where you feel compelled to sit down and write your own Log Parser module.
As a quick reminder, Log Parser supports the following built-in input formats:
- IIS Log File Input Formats
- IISW3C: parses IIS log files in the W3C Extended Log File Format.
- IIS: parses IIS log files in the Microsoft IIS Log File Format.
- BIN: parses IIS log files in the Centralized Binary Log File Format.
- IISODBC: returns database records from the tables logged to by IIS when configured to log in the ODBC Log Format.
- HTTPERR: parses HTTP error log files generated by Http.sys.
- URLSCAN: parses log files generated by the URLScan IIS filter.
- Generic Text File Input Formats
- CSV: parses comma-separated values text files.
- TSV: parses tab-separated and space-separated values text files.
- XML: parses XML text files.
- W3C: parses text files in the W3C Extended Log File Format.
- NCSA: parses web server log files in the NCSA Common, Combined, and Extended Log File Formats.
- TEXTLINE: returns lines from generic text files.
- TEXTWORD: returns words from generic text files.
- System Information Input Formats
- EVT: returns events from the Windows Event Log and from Event Log backup files (.evt files).
- FS: returns information on files and directories.
- REG: returns information on registry values.
- ADS: returns information on Active Directory objects.
- Special-purpose Input Formats
- NETMON: parses network capture files created by NetMon.
- ETW: parses Enterprise Tracing for Windows trace log files and live sessions.
- COM: provides an interface to Custom Input Format COM plug-ins.
This last input format, COM, is how you interface with Log Parser in order to create your own input formats. When you install Log Parser, there are a few COM-based samples in the Log Parser directory, and you can take a look at those when you get the chance.
A Brief Introduction to Creating a COM plug-ins for Log Parser
To start with, your COM plug-in has to support a few public methods - and each of these will be more clear when I create my plug-in later:
| Method Name | Description |
|---|---|
OpenInput |
Opens your data source and sets up any initial environment settings. |
GetFieldCount |
Returns the number of fields that your plug-in will provide. |
GetFieldName |
Returns the name of a specified field. |
GetFieldType |
Returns the datatype of a specified field. |
GetValue |
Returns the value of a specified field. |
ReadRecord |
Reads the next record from your data source. |
CloseInput |
Closes your data source and cleans up any environment settings. |
After you've created and registered your COM plug-in, you will call it by using something like the following syntax:
logparser "SELECT * FROM FOO" -i:COM -iProgID:BAR
In this example, FOO is some data source that makes sense to your plug-in, and BAR is the COM class name for your plug-in.
Creating the COM plug-in for FTP RSCA Data
I'm going to demonstrate how to create a COM component as a scriptlet, and then I'll call that from Log Parser to process the data. I chose to use a scriptlet for this demo because they are quick to design and they're easily portable. Since no compilation is required, updates take place on the fly. All of that being said, if I were writing a real COM plug-in for Log Parser, I would use C# or C++.
To create the sample COM plug-in, copy the following code into a text file, and save that file as "MSUtil.LogQuery.FtpRscaScriptlet.sct" to your computer. (Note: The *.SCT file extension tells Windows that this is a scriptlet file.)
<SCRIPTLET>
  <registration
    Description="FTP RSCA for Log Parser Scriptlet"
    Progid="MSUtil.LogQuery.FtpRscaScriptlet"
    Classid="{4e616d65-6f6e-6d65-6973-526f62657274}"
    Version="1.00"
    Remotable="False" />
  <comment>
  EXAMPLE 1: logparser "SELECT * FROM ftp.example.com" -i:COM -iProgID:MSUtil.LogQuery.FtpRscaScriptlet
  EXAMPLE 2: logparser "SELECT * FROM 1" -i:COM -iProgID:MSUtil.LogQuery.FtpRscaScriptlet
  </comment>
  <implements id="Automation" type="Automation">
    <method name="OpenInput">
      <parameter name="strValue"/>
    </method>
    <method name="GetFieldCount" />
    <method name="GetFieldName">
      <parameter name="intFieldIndex"/>
    </method>
    <method name="GetFieldType">
      <parameter name="intFieldIndex"/>
    </method>
    <method name="ReadRecord" />
    <method name="GetValue">
      <parameter name="intFieldIndex"/>
    </method>
    <method name="CloseInput">
      <parameter name="blnAbort"/>
    </method>
  </implements>
  <SCRIPT LANGUAGE="VBScript">

Option Explicit

Dim objAdminManager,objSessionDictionary
Dim objSitesSection,objSitesCollection
Dim objSiteElement,objFtpServerElement
Dim objSessionsElement,objSessionElement
Dim intSiteElementPos,intSession,intRecordIndex
Dim clsSession

intRecordIndex = -1

' --------------------------------------------------------------------------------
' Open an input session that reads FTP RSCA data and stores it in a dictionary object.
' --------------------------------------------------------------------------------

Public Function OpenInput(strValue)
  Set objSessionDictionary = CreateObject("Scripting.Dictionary")
  Set objAdminManager = CreateObject("Microsoft.ApplicationHost.WritableAdminManager")
  objAdminManager.CommitPath = "MACHINE/WEBROOT/APPHOST"
  Set objSitesSection = objAdminManager.GetAdminSection("system.applicationHost/sites", "MACHINE/WEBROOT/APPHOST")
  Set objSitesCollection = objSitesSection.Collection
  If IsNumeric(strValue) Then
    intSiteElementPos = FindElement(objSitesCollection, "site", Array("id", strValue))
  Else
    intSiteElementPos = FindElement(objSitesCollection, "site", Array("name", strValue))
  End If
  If intSiteElementPos > -1 Then
    Set objSiteElement = objSitesCollection.Item(intSiteElementPos)
    Set objFtpServerElement = objSiteElement.ChildElements.Item("ftpServer")
    Set objSessionsElement = objFtpServerElement.ChildElements.Item("sessions").Collection
    For intSession = 0 To CLng(objSessionsElement.Count)-1
       Set objSessionElement = objSessionsElement.Item(intSession)
       Set clsSession = New Session
       clsSession.CurrentDateTime = GetUtcDate()
       clsSession.ClientIp = objSessionElement.GetPropertyByName("clientIp").Value
       clsSession.SessionId = objSessionElement.GetPropertyByName("sessionId").Value
       clsSession.SessionStartTime = objSessionElement.GetPropertyByName("sessionStartTime").Value
       clsSession.UserName = objSessionElement.GetPropertyByName("userName").Value
       clsSession.CurrentCommand = objSessionElement.GetPropertyByName("currentCommand").Value
       clsSession.PreviousCommand = objSessionElement.GetPropertyByName("previousCommand").Value
       clsSession.CommandStartTime = objSessionElement.GetPropertyByName("commandStartTime").Value
       clsSession.BytesSent = objSessionElement.GetPropertyByName("bytesSent").Value
       clsSession.BytesReceived = objSessionElement.GetPropertyByName("bytesReceived").Value
       clsSession.LastErrorStatus = objSessionElement.GetPropertyByName("lastErrorStatus").Value
       objSessionDictionary.Add intSession,clsSession
    Next
  End If
End Function

' --------------------------------------------------------------------------------
' Close the input session.
' --------------------------------------------------------------------------------

Public Function CloseInput(blnAbort)
  intRecordIndex = -1
  objSessionDictionary.RemoveAll
End Function

' --------------------------------------------------------------------------------
' Return the count of fields.
' --------------------------------------------------------------------------------

Public Function GetFieldCount()
  GetFieldCount = 11
End Function

' --------------------------------------------------------------------------------
' Return the specified field's name.
' --------------------------------------------------------------------------------

Public Function GetFieldName(intFieldIndex)
  Select Case intFieldIndex
    Case 0
      GetFieldName = "currentDateTime"
    Case 1
      GetFieldName = "clientIp"
    Case 2
      GetFieldName = "sessionId"
    Case 3
      GetFieldName = "sessionStartTime"
    Case 4
      GetFieldName = "userName"
    Case 5
      GetFieldName = "currentCommand"
    Case 6
      GetFieldName = "previousCommand"
    Case 7
      GetFieldName = "commandStartTime"
    Case 8
      GetFieldName = "bytesSent"
    Case 9
      GetFieldName = "bytesReceived"
    Case 10
      GetFieldName = "lastErrorStatus"
  End Select
End Function

' --------------------------------------------------------------------------------
' Return the specified field's type.
' --------------------------------------------------------------------------------

Public Function GetFieldType(intFieldIndex)
  Const TYPE_INTEGER   = 1
  Const TYPE_REAL      = 2
  Const TYPE_STRING    = 3
  Const TYPE_TIMESTAMP = 4
  Const TYPE_NULL      = 5

  Select Case intFieldIndex
    Case 0
      GetFieldType = TYPE_STRING
    Case 1
      GetFieldType = TYPE_STRING
    Case 2
      GetFieldType = TYPE_STRING
    Case 3
      GetFieldType = TYPE_STRING
    Case 4
      GetFieldType = TYPE_STRING
    Case 5
      GetFieldType = TYPE_STRING
    Case 6
      GetFieldType = TYPE_STRING
    Case 7
      GetFieldType = TYPE_STRING
    Case 8
      GetFieldType = TYPE_INTEGER
    Case 9
      GetFieldType = TYPE_INTEGER
    Case 10
      GetFieldType = TYPE_INTEGER
  End Select
End Function

' --------------------------------------------------------------------------------
' Return the specified field's value.
' --------------------------------------------------------------------------------

Public Function GetValue(intFieldIndex)
  If objSessionDictionary.Count > 0 Then
    Select Case intFieldIndex
      Case 0
        GetValue = objSessionDictionary(intRecordIndex).CurrentDateTime
      Case 1
        GetValue = objSessionDictionary(intRecordIndex).ClientIp
      Case 2
        GetValue = objSessionDictionary(intRecordIndex).SessionId
      Case 3
        GetValue = objSessionDictionary(intRecordIndex).SessionStartTime
      Case 4
        GetValue = objSessionDictionary(intRecordIndex).UserName
      Case 5
        GetValue = objSessionDictionary(intRecordIndex).CurrentCommand
      Case 6
        GetValue = objSessionDictionary(intRecordIndex).PreviousCommand
      Case 7
        GetValue = objSessionDictionary(intRecordIndex).CommandStartTime
      Case 8
        GetValue = objSessionDictionary(intRecordIndex).BytesSent
      Case 9
        GetValue = objSessionDictionary(intRecordIndex).BytesReceived
      Case 10
        GetValue = objSessionDictionary(intRecordIndex).LastErrorStatus
    End Select
  End If
End Function

' --------------------------------------------------------------------------------
' Read the next record, and return true or false if there is more data.
' --------------------------------------------------------------------------------

Public Function ReadRecord()
  If objSessionDictionary.Count > 0 Then
    If intRecordIndex < (objSessionDictionary.Count-1) Then
      intRecordIndex = intRecordIndex + 1
      ReadRecord = True
    Else
      ReadRecord = False
    End If
  End If
End Function

' --------------------------------------------------------------------------------
' Return the current UTC date/time.
' --------------------------------------------------------------------------------

Private Function GetUtcDate()
  Dim dtmNow,dtmUtc,strUtc
  Dim objShell,lngActiveTimeBias
  dtmNow = Now()
  Set objShell = CreateObject("WScript.Shell")
  lngActiveTimeBias = CLng(objShell.RegRead("HKEY_LOCAL_MACHINE\System\CurrentControlSet\Control\TimeZoneInformation\ActiveTimeBias"))
  dtmUtc = DateAdd("n",lngActiveTimeBias,dtmNow)
  strUtc = Year(dtmUtc) & "-" & _
    Right("0" & Month(dtmUtc),2) & "-" & _
    Right("0" & Day(dtmUtc),2) & "T" & _
    Right("0" & Hour(dtmUtc),2) & ":" & _
    Right("0" & Minute(dtmUtc),2) & ":" & _
    Right("0" & Second(dtmUtc),2) & ".000Z"
  GetUtcDate = strUtc
End Function

' --------------------------------------------------------------------------------
' Return an element's position in a collection.
' --------------------------------------------------------------------------------

Private Function FindElement(objCollection, strElementTagName, arrValuesToMatch)
  Dim i,elem,matches,j,prop,value
  For i = 0 To CInt(objCollection.Count) - 1
    Set elem = objCollection.Item(i)
    If elem.Name = strElementTagName Then
      matches = True
      For j = 0 To UBound(arrValuesToMatch) Step 2
        Set prop = elem.GetPropertyByName(arrValuesToMatch(j))
        value = prop.Value
        If Not IsNull(value) Then
          value = CStr(value)
        End If
        If Not value = CStr(arrValuesToMatch(j + 1)) Then
          matches = False
          Exit For
        End If
      Next
      If matches Then
        Exit For
      End If
    End If
  Next
  If matches Then
    FindElement = i
  Else
    FindElement = -1
  End If
End Function

' --------------------------------------------------------------------------------
' Define a generic class for holding session data.
' --------------------------------------------------------------------------------

Class Session
  Public CurrentDateTime
  Public ClientIp
  Public SessionId
  Public SessionStartTime
  Public UserName
  Public CurrentCommand
  Public PreviousCommand
  Public CommandStartTime
  Public BytesSent
  Public BytesReceived
  Public LastErrorStatus
End Class

  </SCRIPT>

</SCRIPTLET>
After you've saved the scriptlet code to your computer, you will register it by using the following syntax:
regsvr32 MSUtil.LogQuery.FtpRscaScriptlet.sct
At the very minimum, you can now use the COM plug-in with Log Parser by using syntax like the following:
logparser "SELECT * FROM ftp.example.com" -i:COM -iProgID:MSUtil.LogQuery.FtpRscaScriptlet
Next, we'll analyze what the scriptlet does.
Examining the COM plug-in in Detail
Here are the different parts of the scriptlet and what they do:
- The <registration> section of the scriptlet sets up the COM registration information; you'll notice the COM component class name and GUID, as well as version information and a general description.
- The <implements> section declares the public methods that the COM plug-in has to support.
- The <script> section contains the actual implementation:
- The first part of the script section declares the global variables that will be used.
- The second part of the script contains the required methods:
- The
OpenInput()method opens the FTP RSCA data for a specific FTP site:- The site will be specified in your Log Parser query, and the COM plug-in supports using either the site name or the site's numeric ID:
- "
SELECT * FROM ftp.example.com" - "
SELECT * FROM 1"
- "
- All of the RSCA data for the site in stored in classes that will be cached in a global dictionary for quick access
- The site will be specified in your Log Parser query, and the COM plug-in supports using either the site name or the site's numeric ID:
- The
CloseInput()method doesn't do much in this script, but your COM plug-ins may require more clean up depending on your data source. - The
GetFieldCount()method simply returns the number of data fields in each record of your data. - The
GetFieldName()method returns the name of a field that is passed to the method as a number. - The
GetFieldType()method returns the data type of a field that is passed to the method as a number; Log Parser supports the following five data types for COM plug-ins:TYPE_INTEGERTYPE_REALTYPE_STRINGTYPE_TIMESTAMPTYPE_NULL
- The
GetValue()method returns the data value of a field that is passed to the method as a number. - The
ReadRecord()method moves to the next record in your data set; this method returns True if there is data to read, or False when the end of data is reached.
- The
- The third part of the script contains some helper features:
- The
GetUtcDate()method returns the current date and time in Universal Coordinated Time (UTC) format. - The
FindElement()method locates a specified element's position within an IIS collection, or -1 if the element cannot be found. This method is used to determine the specified FTP site within the IIS configuration. - The
Sessionclass is a generic construct to hold the information for a single FTP RSCA data record.
- The
This wraps up the description of how the scriptlet works as a COM plug-in, in the next part of my blog we'll look at how to actually use it.
Using the COM plug-in with Log Parser
Earlier I showed you how you can use the COM plug-in with Log Parser by using syntax like the following:
logparser "SELECT * FROM ftp.example.com" -i:COM -iProgID:MSUtil.LogQuery.FtpRscaScriptlet
This will return output that resembles something like the following:
currentDateTime |
clientIp |
sessionId |
sessionStartTime |
userName |
currentCommand |
previousCommand |
commandStartTime |
bytesSent |
bytesReceived |
lastErrorStatus |
|---|---|---|---|---|---|---|---|---|---|---|
---------------- |
-------- |
--------- |
---------------- |
-------- |
-------------- |
--------------- |
---------------- |
--------- |
------------- |
--------------- |
2012-05-25T11:42:11.000Z |
10.121.75.26 |
3950d1e5-3e94-4734-a89a-9768c52aa924 |
2012-05-25T10:08:09.861Z |
robert |
PASS |
USER |
2012-05-25T11:42:06.080Z |
6049 |
1193 |
0 |
2012-05-25T11:42:11.000Z |
10.121.75.26 |
d1591fa8-3b09-4afd-b2c0-950421ba79fe |
2012-05-25T10:08:18.184Z |
robert |
RETR |
NLST |
2012-05-25T11:42:07.172Z |
5887 |
1169 |
0 |
2012-05-25T11:42:11.000Z |
10.121.75.26 |
0f92b5ed-920a-441d-a15d-39056a36f2a4 |
2012-05-25T10:08:22.327Z |
robert |
NOOP |
NLST |
2012-05-25T11:41:40.917Z |
5857 |
1163 |
0 |
2012-05-25T11:42:11.000Z |
10.121.75.26 |
16925f0d-1fc5-4cb7-be19-ab33face2da9 |
2012-05-25T10:08:48.756Z |
NLST |
SYST |
2012-05-25T11:41:44.770Z |
6026 |
1192 |
0 |
|
2012-05-25T11:42:11.000Z |
10.121.75.26 |
aeb68389-869b-4afc-8c81-47b578e74824 |
2012-05-25T10:08:54.214Z |
USER |
HOST |
2012-05-25T11:41:42.087Z |
5864 |
1168 |
0 |
|
2012-05-25T11:42:11.000Z |
10.121.75.26 |
4ed55569-ee25-47d1-8388-12cdb90a1c07 |
2012-05-25T10:12:31.555Z |
alice |
RETR |
NLST |
2012-05-25T11:42:01.789Z |
5780 |
1138 |
0 |
2012-05-25T11:42:11.000Z |
10.121.75.26 |
d6b16bb4-cb65-492d-a9fa-fbd6b72de0f3 |
2012-05-25T10:12:54.591Z |
bob |
NOOP |
NLST |
2012-05-25T11:41:46.563Z |
5748 |
1130 |
0 |
Statistics: |
||||||||||
----------- |
||||||||||
Elements processed: |
7 |
|||||||||
Elements output: |
7 |
|||||||||
Execution time: |
0.12 seconds |
That information is something of a jumbled mess, and we can clean that up a bit by simply choosing the fields that we might be interested in:
userName |
currentCommand |
commandStartTime |
|---|---|---|
-------- |
-------------- |
---------------- |
robert |
PASS |
2012-05-25T11:42:06.080Z |
robert |
RETR |
2012-05-25T11:42:07.172Z |
robert |
NOOP |
2012-05-25T11:41:40.917Z |
NLST |
2012-05-25T11:41:44.770Z |
|
USER |
2012-05-25T11:41:42.087Z |
|
alice |
RETR |
2012-05-25T11:42:01.789Z |
bob |
NOOP |
2012-05-25T11:41:46.563Z |
Statistics: |
||
----------- |
||
Elements processed: |
7 |
|
Elements output: |
7 |
|
Execution time: |
0.12 seconds |
Now let's look at some interesting data - one of the main focuses for this blog series is charting with Log Parser, so let's look at doing something useful with the data. To start with, here's how to create a pie chart that counts the number of sessions by user name:
logparser "SELECT
This will generate a chart like the following:

Here's a variation on that script that illustrates how to create a pie chart that counts the number of authenticated sessions versus anonymous sessions:
logparser "SELECT
This will generate a chart like the following:
We can also do line, bar, and column charts with the data:
logparser "SELECT
The above code sample will generate a chart like the following:
There's a lot more that we could do with this, but eventually I have to get some sleep, so I think that's enough fun for the day.
Summary
In this blog post, I've shown you how to add your own custom input format to Log Parser by creating scriptlet as a COM plug-in. I hope that you take this information and create some great Log Parser plug-ins of your own.
;-]
Advanced Log Parser Charts Part 3 - Missing Office Web Components for Charting
25 May 2012 • by Bob • IIS, LogParser
In Part 3 of this series, I'll explain what to do when you're missing the Office Web Components that are required for creating the charts that I have been demonstrating in this series.
Here's a brief explanation of the symptoms: you try a simple query that will create a chart like the following example:
logparser.exe "SELECT Date,
And you get the following error message:
Error creating output format "CHART": This output format requires a licensed Microsoft Office Chart Web Component to be installed on the local machine
More often than not, this simply means that you have Office 2007 or Office 2010, which do not contain the Office Web Components that are used by Log Parser to create charts. Fortunately, you can download the missing components from the following URL on Microsoft's website:
Office 2003 Add-in: Office Web Components
http://www.microsoft.com/en-us/download/details.aspx?id=22276
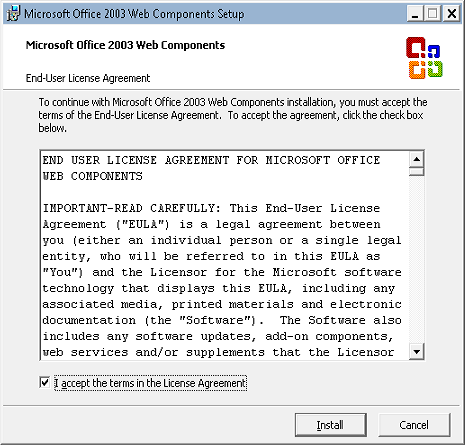
When you run the installation, you will see the following license agreement:
When you check the box to accept the license agreement and click Install, you will eventually receive the following dialog box to let you know that the Office 2003 Web Components have been installed:
Once you have the Office 2003 Web Components installed, you can run the same query successfully:
logparser.exe "SELECT Date,
Statistics:
-----------
Note: The above query generates the following somewhat uninteresting chart:
That being said, the point of this blog was to let you know how to get charting back, not how to make pretty charts. I'll save pretty charts for a future blog. ;-]
Note: This blog was originally posted at http://blogs.msdn.com/robert_mcmurray/
Configuring FTP Client Certificate Authentication in FTP 7
26 April 2012 • by Bob • FTP, Scripting
We had a customer question the other day about configuring FTP Client Certificate Authentication in FTP 7.0 and in FTP 7.5. It had been a while since the last time that I had configured those settings on an FTP server, so I thought that it would be great to re-familiarize myself with that feature. To my initial dismay, it was a little more difficult than I had remembered, because there are a lot of parts to be configured.
That being said, there are a few primary activities that you need to know about and configure correctly:
I will explain each of those in this blog, although I will defer some of the details for Active Directory mapping to an excellent blog series that I discovered by Vivek Kumbhar.
Configuring the FTP Service
There are several settings that you need to configure for the FTP server; unfortunately there is no user interface for those settings, so you might want to familiarize yourself with the following settings:
- FTP Client Certificate Authentication <clientCertAuthentication>
- FTP over SSL <ssl>
- FTP SSL Client Certificates <sslClientCertificates>
At first I had made a batch file that was configuring these settings by using AppCmd, but I eventually abandoned that script and wrote the following VBScript code to configure all of the settings at one time - the only parts that you need to change is your site name and the hash value your SSL certificate, which are highlighted in yellow:
Set adminManager = CreateObject("Microsoft.ApplicationHost.WritableAdminManager")
adminManager.CommitPath = "MACHINE/WEBROOT/APPHOST"
Set sitesSection = adminManager.GetAdminSection("system.applicationHost/sites", "MACHINE/WEBROOT/APPHOST")
Set sitesCollection = sitesSection.Collection

siteElementPos = FindElement(sitesCollection, "site", Array("name", "ftp.contoso.com"))
If (addElementPos = -1) Then
   WScript.Echo "Element not found!"
   WScript.Quit
End If
Set siteElement = sitesCollection.Item(siteElementPos)

Set ftpServerElement = siteElement.ChildElements.Item("ftpServer")
Set securityElement = ftpServerElement.ChildElements.Item("security")

Set sslClientCertificatesElement = securityElement.ChildElements.Item("sslClientCertificates")
sslClientCertificatesElement.Properties.Item("clientCertificatePolicy").Value = "CertRequire"
sslClientCertificatesElement.Properties.Item("useActiveDirectoryMapping").Value = True

Set authenticationElement = securityElement.ChildElements.Item("authentication")
Set clientCertAuthenticationElement = authenticationElement.ChildElements.Item("clientCertAuthentication")
clientCertAuthenticationElement.Properties.Item("enabled").Value = True

Set sslElement = securityElement.ChildElements.Item("ssl")
sslElement.Properties.Item("serverCertHash").Value = "57686f6120447564652c2049495320526f636b73"
sslElement.Properties.Item("controlChannelPolicy").Value = "SslRequire"
sslElement.Properties.Item("dataChannelPolicy").Value = "SslRequire"

adminManager.CommitChanges

Function FindElement(collection, elementTagName, valuesToMatch)
   For i = 0 To CInt(collection.Count) - 1
      Set element = collection.Item(i)
      If element.Name = elementTagName Then
         matches = True
         For iVal = 0 To UBound(valuesToMatch) Step 2
            Set property = element.GetPropertyByName(valuesToMatch(iVal))
            value = property.Value
            If Not IsNull(value) Then
               value = CStr(value)
            End If
            If Not value = CStr(valuesToMatch(iVal + 1)) Then
               matches = False
               Exit For
            End If
         Next
         If matches Then
            Exit For
         End If
      End If
   Next
   If matches Then
      FindElement = i
   Else
      FindElement = -1
   End If
End Function
Once you have configured your FTP settings, you should have an FTP site that resembles the following in your ApplicationHost.config file:
<site name="ftp.contoso.com" id="2">
   <application path="/">
      <virtualDirectory path="/" physicalPath="c:\inetpub\ftproot" />
   </application>
   <bindings>
      <binding protocol="ftp" bindingInformation="*:21:" />
   </bindings>
   <ftpServer>
      <security>
         <ssl serverCertHash="57686f6120447564652c2049495320526f636b73"  ssl128="false"  controlChannelPolicy="SslRequire"  dataChannelPolicy="SslRequire" />
         <authentication>
            <basicAuthentication enabled="false" />
            <anonymousAuthentication enabled="false" />
            <clientCertAuthentication enabled="true" />
         </authentication>
         <sslClientCertificates  clientCertificatePolicy="CertRequire"  useActiveDirectoryMapping="true" />
      </security>
   </ftpServer>
</site>
More details about these settings can be found in the configuration reference articles that I mentioned in the beginning of this blog post, and additional information about configuring FTP over SSL can be found in the following walkthrough:
Configuring Active Directory Mapping
The next part of this process is kind of tricky; you need to accomplish all of the following:
- Obtain and install a client certificate on the system where your FTP client is installed. Hare some additional notes to consider:
- This may involve setting up your client system to trust the CA that issued your client certificate.
- This may also involve setting up your FTP server to trust the CA that issued both your client certificate and the server certificate that you are using for your FTP site.
- Configure Active Directory to map the client certificate to an Active Directory account.
- Configure your FTP client to use a client certificate when connecting to your FTP server.
That makes it all sound so easy, but it can be very tricky. That being said, as I mentioned earlier, as I was putting together my notes to write this blog, I stumbled across a great blog series by Vivek Kumbhar, where he goes into great detail when describing all of the steps to set up the Active Directory mapping. With that in mind, instead of trying to rewrite what Vivek has already documented, I will include links to his blog series:
- Configure Client Certificate Mapping in FTP 7.5 - Part 1
Describes how to set up your Active Directory server, IIS server, and FTP client systems. - Configure Client Certificate Mapping in FTP 7.5 - Part 2
Walks you through obtaining and installing a server certificate, which you will use later for your FTP site. - Configure Client Certificate Mapping in FTP 7.5 - Part 3
Walks you through setting up an FTP site with SSL. - Configure Client Certificate Mapping in FTP 7.5 - Part 4
Describes how to configure Active Directory mapping for a user account.
I have to give Vivek full credit where it's due - he wrote a truly great blog series, and he included a lot more detail in his blog series than I had originally planned to include in this blog. (In my humble opinion, Vivek's blog series is the best documentation that I have seen for this feature.)
Configuring your FTP Client
To test out client certificates, I used both the SmartFTP GUI-based FTP client and the MOVEit-Freely command-line FTP client; both of which I discussed in my FTP Clients blog series some time ago.
Using the SmartFTP Client
To configure the SmartFTP client, I just needed to enable and specify the correct client certificate in the properties for my connection:

Using the MOVEit-Freely FTP Client
For the MOVEit-Freely FTP client, I just needed to specify the correct parameters on the command line:
ftps.exe -z -e:on -pfxfile:administrator.pfx -pfxpw:"P@ssw0rd" -user:anonymous -password:"someone@contoso.com"
The important settings are the pfxfile and pfxpw values, where pfxfile is the name of the PFX file that holds your client certificate, and pfxpw is the password for the PFX file. (The username and password values will be ignored for the most part, because you will actually be logged in through your client certificate, so you can leave those as anonymous.)
Client Recap
For more information about these two FTP clients, see the following blog posts:
- FTP Clients - Part 8: SmartFTP Client
- FTP Clients - Part 5: MOVEit Freely Command-Line Secure FTP Client
Summary
FTP client certificates are definitely a bit of a challenge to configure correctly, but it's not an impossible task to get this feature working.
Note: This blog was originally posted at http://blogs.msdn.com/robert_mcmurray/
Programmatically Flushing FTP Logs
03 February 2012 • by Bob • IIS, Scripting, FTP, Extensibility
I had a great question from Scott Forsyth earlier today about programmatically flushing the logs for an FTP site. Scott had noticed that there was a FlushLog method listed on the following page in the IIS Configuration Reference:
http://www.iis.net/ConfigReference/system.applicationHost/sites/site/ftpServer
Unfortunately there wasn't a code sample for that method; but as luck would have it, I had already written some code to do just that. (I love synchronicity...) With that in mind, I though that I'd post the code in a blog. In keeping with the cross-language samples that I wrote for the topics in the Configuration Reference, I thought that's I'd include several languages in this blog to make it easier for someone else to copy and paste.
C#
using System;
using System.Text;
using Microsoft.Web.Administration;

internal static class Sample
{
   private static void Main()
   {
      using (ServerManager serverManager = new ServerManager())
      {
         Configuration config = serverManager.GetApplicationHostConfiguration();
         // Retrieve the sites collection.
         ConfigurationSection sitesSection = config.GetSection("system.applicationHost/sites");
         ConfigurationElementCollection sitesCollection = sitesSection.GetCollection();

         // Locate a specific site.
         ConfigurationElement siteElement = FindElement(sitesCollection,"site","name",@"ftp.contoso.com");
         if (siteElement == null) throw new InvalidOperationException("Element not found!");

         // Create an object for the ftpServer element.
         ConfigurationElement ftpServerElement = siteElement.GetChildElement("ftpServer");
         // Create an instance of the FlushLog method.
         ConfigurationMethodInstance FlushLog = ftpServerElement.Methods["FlushLog"].CreateInstance();
         // Execute the method to flush the logs for the FTP site.
         FlushLog.Execute();
      }
   }

   // Locate and return the index for a specific element in a collection.
   private static ConfigurationElement FindElement(ConfigurationElementCollection collection, string elementTagName, params string[] keyValues)
   {
      foreach (ConfigurationElement element in collection)
      {
         if (String.Equals(element.ElementTagName, elementTagName, StringComparison.OrdinalIgnoreCase))
         {
            bool matches = true;
            for (int i = 0; i < keyValues.Length; i += 2)
            {
               object o = element.GetAttributeValue(keyValues[i]);
               string value = null;
               if (o != null)
               {
                  value = o.ToString();
               }
               if (!String.Equals(value, keyValues[i + 1], StringComparison.OrdinalIgnoreCase))
               {         matches = false;
                  break;
               }
            }
            if (matches)
            {
               return element;
            }
         }
      }
      return null;
   }
}
VB.NET
Imports System
Imports System.Text
Imports Microsoft.Web.Administration

Module Sample
   Sub Main()
      Dim serverManager As ServerManager = New ServerManager
      Dim config As Configuration = serverManager.GetApplicationHostConfiguration
      ' Retrieve the sites collection.
      Dim sitesSection As ConfigurationSection = config.GetSection("system.applicationHost/sites")
      Dim sitesCollection As ConfigurationElementCollection = sitesSection.GetCollection

      ' Locate a specific site.
      Dim siteElement As ConfigurationElement = FindElement(sitesCollection,"site","name","ftp.contoso.com")
      If (siteElement Is Nothing) Then
         Throw New InvalidOperationException("Element not found!")
      End If

      ' Create an object for the ftpServer element.
      Dim ftpServerElement As ConfigurationElement = siteElement.GetChildElement("ftpServer")
      ' Create an instance of the FlushLog method.
      Dim FlushLog As ConfigurationMethodInstance = ftpServerElement.Methods("FlushLog").CreateInstance()
      ' Execute the method to flush the logs for the FTP site.
      FlushLog.Execute()

   End Sub

   ' Locate and return the index for a specific element in a collection.
   Private Function FindElement(ByVal collection As ConfigurationElementCollection, ByVal elementTagName As String, ByVal ParamArray keyValues() As String) As ConfigurationElement
      For Each element As ConfigurationElement In collection
         If String.Equals(element.ElementTagName, elementTagName, StringComparison.OrdinalIgnoreCase) Then
            Dim matches As Boolean = True
            Dim i As Integer
            For i = 0 To keyValues.Length - 1 Step 2
               Dim o As Object = element.GetAttributeValue(keyValues(i))
               Dim value As String = Nothing
               If (Not (o) Is Nothing) Then
                  value = o.ToString
               End If
               If Not String.Equals(value, keyValues((i + 1)), StringComparison.OrdinalIgnoreCase) Then
                  matches = False
                  Exit For
               End If
            Next
            If matches Then
               Return element
            End If
         End If
      Next
      Return Nothing
   End Function

End Module
JavaScript
// Create a Writable Admin Manager object.
var adminManager = new ActiveXObject('Microsoft.ApplicationHost.WritableAdminManager');
adminManager.CommitPath = "MACHINE/WEBROOT/APPHOST";

// Retrieve the sites collection.
var sitesSection = adminManager.GetAdminSection("system.applicationHost/sites","MACHINE/WEBROOT/APPHOST");
var sitesCollection = sitesSection.Collection;

// Locate a specific site.
var siteElementPos = FindElement(sitesCollection,"site",["name","ftp.contoso.com"]);
if (siteElementPos == -1) throw "Element not found!";

// Retrieve the site element.
var siteElement = sitesCollection.Item(siteElementPos);
// Create an object for the ftpServer element.
var ftpServerElement = siteElement.ChildElements.Item("ftpServer");
// Create an instance of the FlushLog method.
var FlushLog = ftpServerElement.Methods.Item("FlushLog").CreateInstance();
// Execute the method to flush the logs for the FTP site.
FlushLog.Execute();

// Locate and return the index for a specific element in a collection.
function FindElement(collection, elementTagName, valuesToMatch) {
   for (var i = 0; i < collection.Count; i++) {
      var element = collection.Item(i);
      if (element.Name == elementTagName) {
         var matches = true;
         for (var iVal = 0; iVal < valuesToMatch.length; iVal += 2) {
            var property = element.GetPropertyByName(valuesToMatch[iVal]);
            var value = property.Value;
            if (value != null) {
               value = value.toString();
            }
            if (value != valuesToMatch[iVal + 1]) {
               matches = false;
               break;
            }
         }
         if (matches) {
            return i;
         }
      }
   }
   return -1;
}
VBScript
' Create a Writable Admin Manager object.
Set adminManager = CreateObject("Microsoft.ApplicationHost.WritableAdminManager")
adminManager.CommitPath = "MACHINE/WEBROOT/APPHOST"

' Retrieve the sites collection.
Set sitesSection = adminManager.GetAdminSection("system.applicationHost/sites","MACHINE/WEBROOT/APPHOST")
Set sitesCollection = sitesSection.Collection

' Locate a specific site.
siteElementPos = FindElement(sitesCollection,"site",Array("name","ftp.contoso.com"))
If siteElementPos = -1 Then
   WScript.Echo "Element not found!"
   WScript.Quit
End If

' Retrieve the site element.
Set siteElement = sitesCollection.Item(siteElementPos)
' Create an object for the ftpServer element.
Set ftpServerElement = siteElement.ChildElements.Item("ftpServer")
' Create an instance of the FlushLog method.
Set FlushLog = ftpServerElement.Methods.Item("FlushLog").CreateInstance()
' Execute the method to flush the logs for the FTP site.
FlushLog.Execute()

' Locate and return the index for a specific element in a collection.
Function FindElement(collection, elementTagName, valuesToMatch)
   For i = 0 To CInt(collection.Count) - 1
      Set element = collection.Item(i)
      If element.Name = elementTagName Then
         matches = True
         For iVal = 0 To UBound(valuesToMatch) Step 2
            Set property = element.GetPropertyByName(valuesToMatch(iVal))
            value = property.Value
            If Not IsNull(value) Then
               value = CStr(value)
            End If
            If Not value = CStr(valuesToMatch(iVal + 1)) Then
               matches = False
               Exit For
            End If
         Next
         If matches Then
            Exit For
         End If
      End If
   Next
   If matches Then
      FindElement = i
   Else
      FindElement = -1   End If
End Function
Summary
Hopefully this gives you an idea of how to call the FlushLog method. You can also use these examples to call the Start and Stop methods for FTP sites; you just need to substitute the correct method in place of the FlushLog method.
Note: This blog was originally posted at http://blogs.msdn.com/robert_mcmurray/
Using URL Rewrite to Insert Different Scripts Based on Browser Type
03 February 2012 • by Bob • IIS, Scripting
I just stumbled across a piece of sample code that I had written several months ago for a coworker, and I thought that I'd share it with everyone.
Here's the scenario: my coworker asked me if it was possible to have different client-side scripts inserted dynamically depending on the type of web browser that is being used. If the application was written in ASP.NET or some other dynamic language, then it would be trivial to determine the browser type and return the correct HTML <script> block to the client. Unfortunately, he needed the script for both static and dynamic pages, and he didn't want to modify all of his pages unless absolutely necessary.
This sounded to me like a job for a pair of outbound rules in URL Rewrite.
With the above design requirements in mind, I wrote the following sample configuration for URL Rewrite that accomplishes the following tasks:
- If you’re using Internet Explorer, it inserts VBScript to display a popup message.
- If you’re not using Internet Explorer, it inserts JavaScript to display a different popup message.
In order to use this sample code, you need to open the web.config file for your application and add the following code for the URL Rewrite rules. (Note: You need to disable compression in order to avoid an HTTP 500.52 error, and the following sample code does just that.)
<system.webServer>
<rewrite>
<outboundRules>
<rule name="Add JavaScript" preCondition="IsNotInternetExplorer" patternSyntax="ExactMatch">
<match filterByTags="None" pattern="</body>" />
<action type="Rewrite" value="<script language="javascript">alert('You are not using Internet Explorer!');</script></body>" />
</rule>
<rule name="Add VBScript" preCondition="IsInternetExplorer" patternSyntax="ExactMatch">
<match filterByTags="None" pattern="</body>" />
<action type="Rewrite" value="<script language="vbscript">MsgBox "You are using Internet Explorer!"</script></body>" />
</rule>
<preConditions>
<preCondition name="IsInternetExplorer">
<add input="{RESPONSE_CONTENT_TYPE}" pattern="^text/html" />
<add input="{HTTP_USER_AGENT}" pattern=".*MSIE" negate="false" />
</preCondition>
<preCondition name="IsNotInternetExplorer">
<add input="{RESPONSE_CONTENT_TYPE}" pattern="^text/html" />
<add input="{HTTP_USER_AGENT}" pattern=".*MSIE" negate="true" />
</preCondition>
</preConditions>
</outboundRules>
</rewrite>
<urlCompression doStaticCompression="false" doDynamicCompression="false" />
</system.webServer>
The above example is what I sent to my coworker, and I intended it as an easy place to start when you just want a simple chunk of script to be inserted. It works well, but a better example would be to have it dynamically insert code for an external script file based on the browser type. This is illustrated in the following example:
<system.webServer>
<rewrite>
<outboundRules>
<rule name="For Other Browsers" preCondition="IsNotInternetExplorer" patternSyntax="ExactMatch">
<match filterByTags="None" pattern="</body>" />
<action type="Rewrite" value="<script language="javascript" src="other.js"></script></body>" />
</rule>
<rule name="For Internet Explorer" preCondition="IsInternetExplorer" patternSyntax="ExactMatch">
<match filterByTags="None" pattern="</body>" />
<action type="Rewrite" value="<script language="javascript" src="msie.js"></script></body>" />
</rule>
<preConditions>
<preCondition name="IsInternetExplorer">
<add input="{RESPONSE_CONTENT_TYPE}" pattern="^text/html" />
<add input="{HTTP_USER_AGENT}" pattern=".*MSIE" negate="false" />
</preCondition>
<preCondition name="IsNotInternetExplorer">
<add input="{RESPONSE_CONTENT_TYPE}" pattern="^text/html" />
<add input="{HTTP_USER_AGENT}" pattern=".*MSIE" negate="true" />
</preCondition>
</preConditions>
</outboundRules>
</rewrite>
<urlCompression doStaticCompression="false" doDynamicCompression="false" />
</system.webServer>
The above sample dynamically inserts an HTML <script> block, and specifies one script file ("msie.js") for Internet Explorer a different script file ("other.js") for all other browsers.
A simple script for a simple task - just the way I like it. ;-]
Note: This blog was originally posted at http://blogs.msdn.com/robert_mcmurray/
Advanced Log Parser Charts Part 2 - Using Gradient Colors for Area Charts
29 January 2012 • by Bob • IIS, LogParser, Scripting
In Part 2 of this series, I'll show you how to customize the area chart from Part 1 to show the chart area with a gradient. More specifically, there are three different chart gradient methods that we'll take a look at in this blog post:
Before I continue, there is one quick Log Parser convention that you should realize: there are two objects that Log Parser will create and pass to your script. As you look at the sample scripts in this post, you will see these objects in use:
| Object Name | Description | Example |
|---|---|---|
chartSpace |
This is the base chart workspace object. |
// Set the border style for the chart. |
chart |
This is equivalent to the chartSpace.Charts(0) object. |
// Change the background color. |
Before I get started, here's a quick review of VBScript that uses Log Parser COM objects:
Option Explicit
' Declare the variables.
Dim objLogQuery, strSQL
Dim objInputW3CFormat, objOutputChartFormat
' Create the Log Parser objects.
Set objLogQuery = WScript.CreateObject("MSUtil.LogQuery")
Set objInputW3CFormat = WScript.CreateObject("MSUtil.LogQuery.W3CInputFormat")
Set objOutputChartFormat = WScript.CreateObject("MSUtil.LogQuery.ChartOutputFormat")
' Define the SQL query.
strSQL = "SELECT Date, COUNT(*) AS Hits " & _
" INTO _Part2.gif " & _
" FROM *.log " & _
" GROUP BY Date " & _
" ORDER BY Date"
' Specify the chart options.
objOutputChartFormat.groupSize = "800x600"
objOutputChartFormat.fileType = "GIF"
objOutputChartFormat.chartType = "Area"
objOutputChartFormat.categories = "ON"
objOutputChartFormat.values = "ON"
objOutputChartFormat.legend = "OFF"
' Execute the SQL statement to create the chart.
objLogQuery.ExecuteBatch strSQL, objInputW3CFormat, objOutputChartFormat
As I mentioned in Part 1 of this series, you don't have to use the COM objects, but I chose to do so for this blog series because it makes it a little easier to script. That being said, if I use one month's worth of log files from one of my low-volume websites, Log Parser and this VBScript creates the following rather ugly daily hits chart:

With all of this in mind, let's take a look at some simple configuration scripts.
Setting Fonts and Titles and Such...
The above chart really needs some help, so the first thing that we'll do is change a few things. First things first, we need to specify the name of the chart configuration script in the VBScript sample:
Option Explicit
' Declare the variables.
Dim objLogQuery, strSQL
Dim objInputW3CFormat, objOutputChartFormat
' Create the Log Parser objects.
Set objLogQuery = WScript.CreateObject("MSUtil.LogQuery")
Set objInputW3CFormat = WScript.CreateObject("MSUtil.LogQuery.W3CInputFormat")
Set objOutputChartFormat = WScript.CreateObject("MSUtil.LogQuery.ChartOutputFormat")
' Define the SQL query.
strSQL = "SELECT Date, COUNT(*) AS Hits " & _
" INTO Part2.gif " & _
" FROM *.log " & _
" GROUP BY Date " & _
" ORDER BY Date"
' Specify the chart options.
objOutputChartFormat.groupSize = "800x600"
objOutputChartFormat.fileType = "GIF"
objOutputChartFormat.chartType = "Area"
objOutputChartFormat.categories = "ON"
objOutputChartFormat.values = "ON"
objOutputChartFormat.legend = "OFF"
objOutputChartFormat.config = "Part2.js"
' Execute the SQL statement to create the chart.
objLogQuery.ExecuteBatch strSQL, objInputW3CFormat, objOutputChartFormat
Next, we need to create the actual chart configuration script, which I wrote in JavaScript; you will need to save this as "Part2.js" in order to use my samples:
// Set the title above the chart.
chart.HasTitle = true;
chart.Title.Caption = "Hits by Day"
// Set the border style for the chart.
chartSpace.Border.Color = "#000000";
chartSpace.Border.Weight = 2;
// Change the background color for the plot area.
chart.PlotArea.Interior.Color = "#f0f0f0";
// Set the font size for the chart values.
chart.SeriesCollection(0).DataLabelsCollection(0).Font.Size = 6;
// Get the start and end dates from the X axis.
var startDate = chart.Axes(0).CategoryLabels.Item(0).Caption;
var endDate = chart.Axes(0).CategoryLabels.Item(chart.Axes(0).CategoryLabels.ItemCount-1).Caption;
// Set the caption below the chart.
chartSpace.HasChartSpaceTitle = true;
chartSpace.ChartSpaceTitle.Caption =
"This chart shows the hits by day from "
+ startDate + " to " + endDate + ".";
chartSpace.ChartSpaceTitle.Font.Size = 10;
chartSpace.ChartSpaceTitle.Position = chartSpace.Constants.chTitlePositionBottom;
// Set the style and caption for the Y axis.
chart.Axes(0).Font.Size = 8;
chart.Axes(0).HasTitle = true;
chart.Axes(0).Title.Caption = "Dates";
chart.Axes(0).Title.Font.Size = 9;
// Set the style and caption for the X axis.
chart.Axes(1).Font.Size = 7;
chart.Axes(1).HasTitle = true;
chart.Axes(1).Title.Caption = "Hits";
chart.Axes(1).Title.Font.Size = 9;
This chart configuration script does several things:
- Sets the title above the chart to "Hits by Day"
- Sets a black border style for the chart
- Sets the background color for the plot area to a light gray
- Sets the font size for the chart values to 6-point
- Sets the caption below the chart for the start and end date
- Sets the font styles and captions for the Y and Y axes
When you run the VBScript, the resulting chart looks like the following:

This looks a little more legible, but now let's look at setting some colors.
Setting a One-Color Gradient
Using the same JavaScript sample from earlier, we just need to make a couple of changes to the chart configuration script in order to use the SetOneColorGradient method:
// Set the title above the chart.
chart.HasTitle = true;
chart.Title.Caption = "Hits by Day"

// Set the border style for the chart.
chartSpace.Border.Color = "#000000";
chartSpace.Border.Weight = 2;

// Change the background color for the plot area.
chart.PlotArea.Interior.Color = "#f0f0f0";

// Specify the chart gradient styles.
chart.SeriesCollection(0).Interior.SetOneColorGradient(
 chartSpace.Constants.chGradientHorizontal,
 chartSpace.Constants.chGradientVariantEnd,
 1.0,
 "#ff0000");

// Set the font size for the chart values.
chart.SeriesCollection(0).DataLabelsCollection(0).Font.Size = 6;

// Get the start and end dates from the X axis.
var startDate = chart.Axes(0).CategoryLabels.Item(0).Caption;
var endDate = chart.Axes(0).CategoryLabels.Item(chart.Axes(0).CategoryLabels.ItemCount-1).Caption;

// Set the caption below the chart.
chartSpace.HasChartSpaceTitle = true;
chartSpace.ChartSpaceTitle.Caption =
    "This chart shows the hits by day from "
    + startDate + " to " + endDate + ".";
chartSpace.ChartSpaceTitle.Font.Size = 10;
chartSpace.ChartSpaceTitle.Position = chartSpace.Constants.chTitlePositionBottom;

// Set the style and caption for the Y axis.
chart.Axes(0).Font.Size = 8;
chart.Axes(0).HasTitle = true;
chart.Axes(0).Title.Caption = "Dates";
chart.Axes(0).Title.Font.Size = 9;

// Set the style and caption for the X axis.
chart.Axes(1).Font.Size = 7;
chart.Axes(1).HasTitle = true;
chart.Axes(1).Title.Caption = "Hits";
chart.Axes(1).Title.Font.Size = 9;
When you run the VBScript, this renders a chart that looks like the following:

There are four parameters for the SetOneColorGradient method to look at:
| Parameter | Description |
|---|---|
GradientStyle |
This is a value from the ChartGradientStyleEnum enumeration, which specifies how the gradient will be displayed. For example: horizontally, vertically, diagonally, etc. |
GradientVariant |
This is a value from the ChartGradientVariantEnum enumeration, which specifies which direction the gradient will be displayed. For example: lighter to darker, from the inside to the outside, etc. |
GradientDegree |
This is a double value from 0.0 to 1.0, which specifies whether the gradient will range from the color to lighter or darker shades. |
Color |
This is a string that specifies the color. This can be a commonly-named color, such as "red," "blue," etc., or this can be an RGB hexadecimal value, such as "#ff0000" (red), "#0000ff" (blue), etc. (See my 216-Color Safe Web Palette blog post for a large series of hexadecimal color values.) |
Let's make some quick changes to parameters that we are passing to the SetOneColorGradient method and alter a few of the colors:
// Set the title above the chart.
chart.HasTitle = true;
chart.Title.Caption = "Hits by Day"

// Set the border style for the chart.
chartSpace.Border.Color = "#000000";
chartSpace.Border.Weight = 2;

// Change the background color for the plot area.
chart.PlotArea.Interior.Color = "#333333";

// Specify the chart gradient styles.
chart.SeriesCollection(0).Interior.SetOneColorGradient(
    chartSpace.Constants.chGradientHorizontal,
    chartSpace.Constants.chGradientVariantStart,
    0.0,
    "#00ff00");

// Set the font size for the chart values.
chart.SeriesCollection(0).DataLabelsCollection(0).Font.Size = 6;
chart.SeriesCollection(0).DataLabelsCollection(0).Font.Color = "#ffffff";

// Get the start and end dates from the X axis.
var startDate = chart.Axes(0).CategoryLabels.Item(0).Caption;
var endDate = chart.Axes(0).CategoryLabels.Item(chart.Axes(0).CategoryLabels.ItemCount-1).Caption;

// Set the caption below the chart.
chartSpace.HasChartSpaceTitle = true;
chartSpace.ChartSpaceTitle.Caption =
    "This chart shows the hits by day from "
    + startDate + " to " + endDate + ".";
chartSpace.ChartSpaceTitle.Font.Size = 10;
chartSpace.ChartSpaceTitle.Position = chartSpace.Constants.chTitlePositionBottom;

// Set the style and caption for the Y axis.
chart.Axes(0).Font.Size = 8;
chart.Axes(0).HasTitle = true;
chart.Axes(0).Title.Caption = "Dates";
chart.Axes(0).Title.Font.Size = 9;

// Set the style and caption for the X axis.
chart.Axes(1).Font.Size = 7;
chart.Axes(1).HasTitle = true;
chart.Axes(1).Title.Caption = "Hits";
chart.Axes(1).Title.Font.Size = 9;
When you run the VBScript, that results in the following considerably cooler-looking chart:

Setting a Two-Color Gradient
The SetTwoColorGradient method offers more color flexibility than the one-color gradient method, and we only need to make a couple of changes to the JavaScript for the chart configuration script in order to use the new method:
// Set the title above the chart.
chart.HasTitle = true;
chart.Title.Caption = "Hits by Day"

// Set the border style for the chart.
chartSpace.Border.Color = "#000000";
chartSpace.Border.Weight = 2;

// Change the background color for the plot area.
chart.PlotArea.Interior.Color = "#FFFF99";

// Specify the chart gradient styles.
chart.SeriesCollection(0).Interior.SetTwoColorGradient(
 chartSpace.Constants.chGradientVertical,
 chartSpace.Constants.chGradientVariantStart,
 "#0066FF",
 "#00FFCC");

// Set the font size for the chart values.
chart.SeriesCollection(0).DataLabelsCollection(0).Font.Size = 6;

// Get the start and end dates from the X axis.
var startDate = chart.Axes(0).CategoryLabels.Item(0).Caption;
var endDate = chart.Axes(0).CategoryLabels.Item(chart.Axes(0).CategoryLabels.ItemCount-1).Caption;

// Set the caption below the chart.
chartSpace.HasChartSpaceTitle = true;
chartSpace.ChartSpaceTitle.Caption =
    "This chart shows the hits by day from "
    + startDate + " to " + endDate + ".";
chartSpace.ChartSpaceTitle.Font.Size = 10;
chartSpace.ChartSpaceTitle.Position = chartSpace.Constants.chTitlePositionBottom;

// Set the style and caption for the Y axis.
chart.Axes(0).Font.Size = 8;
chart.Axes(0).HasTitle = true;
chart.Axes(0).Title.Caption = "Dates";
chart.Axes(0).Title.Font.Size = 9;

// Set the style and caption for the X axis.
chart.Axes(1).Font.Size = 7;
chart.Axes(1).HasTitle = true;
chart.Axes(1).Title.Caption = "Hits";
chart.Axes(1).Title.Font.Size = 9;
When you run the VBScript, this will create the following chart:

There are four parameters for the SetTwoColorGradient method to consider:
| Parameter | Description |
|---|---|
GradientStyle |
This is a value from the ChartGradientStyleEnum enumeration, which specifies how the gradient will be displayed. For example: horizontally, vertically, diagonally, etc. |
GradientVariant |
This is a value from the ChartGradientVariantEnum enumeration, which specifies which direction the gradient will be displayed. For example: lighter to darker, from the inside to the outside, etc. |
Color |
This is a string that specifies the first color for the gradient; this can be a commonly-named color, such as "red," "blue," etc., or this can be an RGB hexadecimal value, such as "#ff0000" (red), "#0000ff" (blue), etc. (See my 216-Color Safe Web Palette blog post for a large series of hexadecimal color values.) |
BackColor |
This is a string that specifies the second color for the gradient; this can be a value like the Color parameter. |
Using a Preset Gradient
There is an additional gradient method that uses a collection of preset color palettes; this method is appropriately named SetPresetGradient. Once again, we need to make a couple of changes to the JavaScript for the chart configuration script in order to use the new method:
// Set the title above the chart.
chart.HasTitle = true;
chart.Title.Caption = "Hits by Day"

// Set the border style for the chart.
chartSpace.Border.Color = "#000000";
chartSpace.Border.Weight = 2;

// Change the background color for the plot area.
chart.PlotArea.Interior.Color = "#EEFFDD";

// Specify the chart gradient styles.
chart.SeriesCollection(0).Interior.SetPresetGradient(
 chartSpace.Constants.chGradientHorizontal,
 chartSpace.Constants.chGradientVariantStart,
 chartSpace.Constants.chGradientFire);

// Set the font size for the chart values.
chart.SeriesCollection(0).DataLabelsCollection(0).Font.Size = 6;

// Get the start and end dates from the X axis.
var startDate = chart.Axes(0).CategoryLabels.Item(0).Caption;
var endDate = chart.Axes(0).CategoryLabels.Item(chart.Axes(0).CategoryLabels.ItemCount-1).Caption;

// Set the caption below the chart.
chartSpace.HasChartSpaceTitle = true;
chartSpace.ChartSpaceTitle.Caption =
    "This chart shows the hits by day from "
    + startDate + " to " + endDate + ".";
chartSpace.ChartSpaceTitle.Font.Size = 10;
chartSpace.ChartSpaceTitle.Position = chartSpace.Constants.chTitlePositionBottom;

// Set the style and caption for the Y axis.
chart.Axes(0).Font.Size = 8;
chart.Axes(0).HasTitle = true;
chart.Axes(0).Title.Caption = "Dates";
chart.Axes(0).Title.Font.Size = 9;

// Set the style and caption for the X axis.
chart.Axes(1).Font.Size = 7;
chart.Axes(1).HasTitle = true;
chart.Axes(1).Title.Caption = "Hits";
chart.Axes(1).Title.Font.Size = 9;
When you run the VBScript, this will create the following chart:

There are three parameters for the SetPresetGradient method to look at:
| Parameter | Description |
|---|---|
GradientStyle |
This is a value from the ChartGradientStyleEnum enumeration, which specifies how the gradient will be displayed. For example: horizontally, vertically, diagonally, etc. |
GradientVariant |
This is a value from the ChartGradientVariantEnum enumeration, which specifies which direction the gradient will be displayed. For example: lighter to darker, from the inside to the outside, etc. |
GradientPreset |
This is a value from the ChartPresetGradientTypeEnum enumeration, which specifies the gradient preset palette. |
There are several of preset gradients in the ChartPresetGradientTypeEnum enumeration, and a little experimentation will yield the best results.
Using 3-D Area Charts
For one last sample, I'd like to show you what gradients can do for your 3-D area charts. To do so, we first need to make a couple of small changes the VBScript that will create the chart:
Option Explicit

' Declare the variables.
Dim objLogQuery, strSQL
Dim objInputW3CFormat, objOutputChartFormat

' Create the Log Parser objects.
Set objLogQuery = WScript.CreateObject("MSUtil.LogQuery")
Set objInputW3CFormat = WScript.CreateObject("MSUtil.LogQuery.W3CInputFormat")
Set objOutputChartFormat = WScript.CreateObject("MSUtil.LogQuery.ChartOutputFormat")

' Define the SQL query.
strSQL = "SELECT Date, COUNT(*) AS Hits " & _
    " INTO _Part2.gif " & _
    " FROM *.log " & _
    " GROUP BY Date " & _
    " ORDER BY Date"

' Specify the chart options.
objOutputChartFormat.groupSize = "1024x768"
objOutputChartFormat.fileType = "GIF"
objOutputChartFormat.chartType = "Area3D"
objOutputChartFormat.categories = "ON"
objOutputChartFormat.values = "ON"
objOutputChartFormat.legend = "OFF"
objOutputChartFormat.config = "Part2.js"

' Execute the SQL statement to create the chart.
objLogQuery.ExecuteBatch strSQL, objInputW3CFormat, objOutputChartFormat
Next, we need to update the JavaScript for the chart configuration script to work with the new VBScript; for the most part, I'm just updating font sizes and chart colors:
// Set the title above the chart.
chart.HasTitle = true;
chart.Title.Caption = "Hits by Day"

// Clear the caption for the chart series.
chart.SeriesCollection(0).Caption = "";

// Set the border style for the chart.
chartSpace.Border.Color = "#000000";
chartSpace.Border.Weight = 2;

// Change the background color for the plot area.
chart.PlotArea.Interior.Color = "#FFFFCC";

// Specify the chart gradient styles.
chart.SeriesCollection(0).Interior.SetTwoColorGradient(
    chartSpace.Constants.chGradientHorizontal,
    chartSpace.Constants.chGradientVariantEnd,
    "#00CCFF",
    "#FFFFFF");

// Set the font size for the chart values.
chart.SeriesCollection(0).DataLabelsCollection(0).Font.Size = 7;

// Get the start and end dates from the X axis.
var startDate = chart.Axes(0).CategoryLabels.Item(0).Caption;
var endDate = chart.Axes(0).CategoryLabels.Item(chart.Axes(0).CategoryLabels.ItemCount-1).Caption;

// Set the caption below the chart.
chartSpace.HasChartSpaceTitle = true;
chartSpace.ChartSpaceTitle.Caption =
    "This chart shows the hits by day from "
    + startDate + " to " + endDate + ".";
chartSpace.ChartSpaceTitle.Font.Size = 10;
chartSpace.ChartSpaceTitle.Position = chartSpace.Constants.chTitlePositionBottom;

// Set the style and caption for the Y axis.
chart.Axes(0).Font.Size = 10;
chart.Axes(0).HasTitle = true;
chart.Axes(0).Title.Caption = "Dates";
chart.Axes(0).Title.Font.Size = 11;

// Set the style and caption for the X axis.
chart.Axes(1).Font.Size = 9;
chart.Axes(1).HasTitle = true;
chart.Axes(1).Title.Caption = "Hits";
chart.Axes(1).Title.Font.Size = 11;
When you run the VBScript, this will create the following chart:

Summary
In this blog post, I've written a lot of code samples in order to show you four different ways to set gradients for your Log Parser area charts. In future posts, I'll show you how to do some more cool things with some other types of charts.
;-]
Note: This blog was originally posted at http://blogs.msdn.com/robert_mcmurray/
Advanced Log Parser Charts Part 1 - Working With Configuration Scripts
28 January 2012 • by Bob • IIS, LogParser, Scripting
I recently had a situation where I wanted to customize the chart output from Log Parser, and after a bunch of research I eventually arrived at the conclusion that configuration scripts to create customized charts are probably the least-documented feature of Log Parser. After a lot of experimentation, (and a bit of frustration), I finally managed to achieve the results that I wanted. With that in mind, I thought that it would make a great blog series if I documented some of the settings that I used.
Log Parser and Chart Configuration Scripts
When you look in the Log Parser help file, it makes mention of using configuration scripts to customize charts, and it provides the following small JavaScript sample:
// Add a caption
chartSpace.HasChartSpaceTitle = true;
chartSpace.ChartSpaceTitle.Caption = "Generated by Log Parser 2.2";
chartSpace.ChartSpaceTitle.Font.Size = 6;
chartSpace.ChartSpaceTitle.Position = chartSpace.Constants.chTitlePositionBottom;

// Change the background color
chart.PlotArea.Interior.Color = chartSpace.Constants.chColorNone;
Unfortunately, this sample isn't very useful, although I found dozens of forum posts that quote this sample as a way to do things - but it's the only sample that most people cite. The Log Parser help file mentions looking at the MSDN ChartSpace Object Model documentation, but that documentation is only slightly more useful. These two references are what led me to my earlier conclusion that chart configuration scripts are not well-documented, and especially when you are trying to do something with Log Parser.
What I found to be particularly helpful was to use the Log Parser COM interface and write scripts by using Adersoft's VbsEdit and JsEdit. In case you haven't used either of those applications, they are great IDEs for writing scripts; they both give you a great debugging environment, and they have a great object browser that I used to discover what options were available to me. In the end, these two editors made it possible to create the chart configuration scripts that I will discuss in this blog series.
By the way, chart configuration scripts can be written in VBScript or JavaScript, but for this blog I will use VBScript for the Log Parser COM samples and JavaScript for the configuration script samples. I didn't have to do it that way, but it seemed like a good idea to help differentiate between the samples.
Using COM versus the Command-Line
For the samples in this blog series, I will use Log Parser's COM interface and VBScript to create my charts, but this is not necessary; everything that I am documenting can be done from the command-line version of Log parser, and I'll give you some quick examples to see the differences.
The following examples generate some simple area charts that plot the total number of hits by day, and both examples do exactly the same thing:
Command-Line:
logparser.exe "
COM Interface:
Option Explicit

Dim objLogQuery, strSQL
Dim objInputW3CFormat, objOutputChartFormat

Set objLogQuery = WScript.CreateObject("MSUtil.LogQuery")
Set objInputW3CFormat = WScript.CreateObject("MSUtil.LogQuery.W3CInputFormat")
Set objOutputChartFormat = WScript.CreateObject("MSUtil.LogQuery.ChartOutputFormat")

strSQL = "SELECT Date, COUNT(*) AS Hits " & _
    " INTO HitsByDay.gif " & _
    " FROM *.log " & _
    " GROUP BY Date " & _
    " ORDER BY Date"

objOutputChartFormat.groupSize = "800x600"
objOutputChartFormat.fileType = "GIF"
objOutputChartFormat.chartType = "Area"
objOutputChartFormat.categories = "ON"
objOutputChartFormat.values = "ON"
objOutputChartFormat.legend = "OFF"

objLogQuery.ExecuteBatch strSQL, objInputW3CFormat, objOutputChartFormat
Ugly Charts
Using some of the log files from one of my websites, the above samples created the following basic chart:

Taking a look at this chart makes it easy to see why you would want to customize your output; that light blue is pretty awful, and those values are pretty hard to read.
Specifying Configuration Scripts
If you remember the incredibly basic configuration script from earlier, you only need to add one parameter to each example in order to specify the configuration script:
Command-Line:
logparser.exe "
COM Interface:
Option Explicit

Dim objLogQuery, strSQL
Dim objInputW3CFormat, objOutputChartFormat

Set objLogQuery = WScript.CreateObject("MSUtil.LogQuery")
Set objInputW3CFormat = WScript.CreateObject("MSUtil.LogQuery.W3CInputFormat")
Set objOutputChartFormat = WScript.CreateObject("MSUtil.LogQuery.ChartOutputFormat")

strSQL = "SELECT Date, COUNT(*) AS Hits " & _
    " INTO HitsByDay.gif " & _
    " FROM *.log " & _
    " GROUP BY Date " & _
    " ORDER BY Date"

objOutputChartFormat.groupSize = "800x600"
objOutputChartFormat.fileType = "GIF"
objOutputChartFormat.chartType = "Area"
objOutputChartFormat.categories = "ON"
objOutputChartFormat.values = "ON"
objOutputChartFormat.legend = "OFF"
objOutputChartFormat.config = "HitsByDay.js"

objLogQuery.ExecuteBatch strSQL, objInputW3CFormat, objOutputChartFormat
Simple Output
Taking a look at the resulting chart, you can see why I mentioned earlier that the configuration script wasn't very useful; all it does is add a centered title to the bottom of the chart:

Yup - that's a pretty useless sample configuration script for chart customization.
Next...
In my subsequent posts, I'll show how to make this chart (and several other types of charts) look a lot better.
Note: This blog was originally posted at http://blogs.msdn.com/robert_mcmurray/
Storing IIS 7.5 WebDAV Properties in NTFS Alternate Data Streams
30 December 2011 • by Bob • IIS, Scripting, WebDAV
Two months ago Microsoft published an update for the WebDAV module that shipped with IIS 7.5 in Windows 7 and Windows Server 2008 R2, and this update is documented in the Microsoft Knowledge Base article ID 2593591:
This update enables administrators to configure the IIS 7.5 WebDAV module to store WebDAV-based properties in NTFS alternate data streams instead of properties.dav files. By way of explanation, WebDAV has two HTTP methods - PROPFIND and PROPPATCH - which enable WebDAV clients to store custom properties on a WebDAV server. These properties may contain anything that makes sense to the WebDAV client. For example, if you were creating a WebDAV client that stored Microsoft Office documents on a WebDAV server, you could store metadata in WebDAV properties for each document, like the author's name, document abstract, etc.
By default, the IIS 7.5 WebDAV module stores properties in system files in each folder of a website that are called properties.dav. These files are essentially text-based INI files that contain the encoded WebDAV properties for the various files in each folder. In contrast, the WebDAV functionality in IIS 6 had used NTFS alternate data streams to store WebDAV properties, which are described in the following Microsoft TechNet article:
After we shipped IIS 6, we received a lot of complaints from customers who were losing their WebDAV properties when they were copying their website files between NTFS and FAT file systems. This was expected behavior - NTFS alternate data streams will be removed when you copy files from NTFS to FAT. To remedy this situation, in IIS 7.0 we decided to switch to using INI-based functionality in order to prevent losing custom WebDAV properties when files are copied between disparate file systems.
When we were designing IIS 7.5, we wanted to add optional support for storing WebDAV properties in NTFS alternate data streams, and we wanted to do so because NTFS alternate data streams might perform faster when you are working with larger websites; however, we ran out of time to implement that functionality before we shipped Windows 7 and Windows Server 2008 R2. That being said, we still wanted to implement the feature, and the update that I listed at the beginning of this blog contains the functionality that is required to enable storing WebDAV properties in NTFS alternate data streams.
Enabling Alternate Data Streams for WebDAV Properties
The above information is good news for anyone who is storing large quantities of WebDAV properties, so your next logical question might be: "How do I enable NTFS alternate data streams for WebDAV properties ?"
Actually, it's really simple. In the KB article that I listed in the beginning of this blog, I documented two methods that show you how to enable storing WebDAV properties in NTFS alternate data streams:
- By modifying your applicationHost.config file
- By using AppCmd.exe
For the sake of completeness, I will repost some of the information here.
Method #1: Modifying your applicationHost.config file
You can enable storing WebDAV properties in alternate data streams for the simple property provider by adding a "useAlternateDataStreams" attribute to the property provider’s registration settings in your applicationHost.config file, which is highlighted in the following global configuration snippet:
<webdav>
  <globalSettings>
    <propertyStores>
      <add name="webdav_simple_prop"
        image="%windir%\system32\inetsrv\webdav_simple_prop.dll"
        image32="%windir%\syswow64\inetsrv\webdav_simple_prop.dll"
        useAlternateDataStreams="true" />
    </propertyStores>
    <lockStores>
      <add name="webdav_simple_lock"
        image="%windir%\system32\inetsrv\webdav_simple_lock.dll"
        image32="%windir%\syswow64\inetsrv\webdav_simple_lock.dll" />
    </lockStores>
  </globalSettings>
  <authoring>
    <locks enabled="true" lockStore="webdav_simple_lock" />
    <properties>
      <clear />
      <add xmlNamespace="*" propertyStore="webdav_simple_prop" />
    </properties>
  </authoring>
  <authoringRules />
</webdav>
Once you have enabled the feature, you have to restart IIS in order for it to take effect.
Method #2: Using AppCmd.exe
I wrote the following batch file for the KB article, which uses AppCmd.exe to enable the NTFS alternate data streams functionality, and it automatically restarts IIS for you:
pushd "%SystemRoot%\System32\Inetsrv"
iisreset /stop
appcmd.exe set config -section:system.webServer/webdav/globalSettings -propertyStores.[name='webdav_simple_prop'].useAlternateDataStreams:true /commit:apphost
iisreset /start
popd
Migrating IIS 7 WebDAV Properties into Alternate Data Streams
Once you've enabled storing WebDAV properties in alternate data streams, you are presented with a new challenge: "How do I migrate my existing WebDAV properties?"
Here's the situation, once you have enabled the alternate data streams feature, the WebDAV property provider is going to ignore any properties that have already been set in properties.dav files. With this in mind, I wrote a script that will migrate all of the WebDAV properties from all of the properties.dav files in a website into their corresponding per-file NTFS alternate data streams.
To use the following script, you will need to update the folder path in the third line of the script with the path to your website. Once you have done that, you can run the script to migrate your existing WebDAV properties.
NOTE: You need to run this script as an administrator!
Option Explicit

Dim arrFolderTree, intFolderCount

arrFolderTree = BuildFolderTree("C:\inetpub\wwwroot")

For intFolderCount = 1 To UBound(arrFolderTree)
  MigratePropertiesToADS arrFolderTree(intFolderCount)
Next

Sub MigratePropertiesToADS(strFolderPath)
  On Error Resume Next

  ' Declare all our variables
  Dim objTempFSO, objTempFolder
  Dim objTempPropertiesFile, objTempAlternateDataStream
  Dim strTempLine, strTempObjectName, blnTempOpenStream
  Const strTempPropertiesDAV = "\properties.dav"
  Const strTempAlternateDataStream = ":properties.dav:$DATA"

  ' Create a file system object.
  Set objTempFSO = WScript.CreateObject("Scripting.FileSystemObject")

  ' Flag the function as having a closed output stream.
  blnTempOpenStream = False

  ' Retrieve a folder object for the path.
  Set objTempFolder = objTempFSO.GetFolder(strFolderPath)

  ' Check for a properties.dav file in the current folder.
  If objTempFSO.FileExists(objTempFolder.Path & strTempPropertiesDAV) Then
    ' Open the properties.dav file for the current folder.
    Set objTempPropertiesFile = objTempFSO.OpenTextFile(objTempFolder.Path & _
      strTempPropertiesDAV,1,False,-1)
    ' Loop through the properties.dav file.
    Do While Not objTempPropertiesFile.AtEndOfStream
      ' Retrieve a line from the properties.dav file.
      strTempLine = Trim(objTempPropertiesFile.ReadLine)
      ' Check if it's a section heading.
      If Left(strTempLine,1) = "[" And Right(strTempLine,1) = "]" Then
        ' Parse the name of the object (file/folder).
        strTempObjectName = Replace(Trim(Mid(strTempLine,2,Len(strTempLine)-2)),"/","\")
        ' Strip off a backslash from the parent folder.
        If Len(strTempObjectName) = 1 Then strTempObjectName = ""
        ' Check to see if the file/folder exists.
        If objTempFSO.FileExists(objTempFolder.Path & _
             strTempObjectName) Or objTempFSO.FolderExists(objTempFolder.Path & _
             strTempObjectName) Then
          ' Create a file object for the alternate data stream.
          Set objTempAlternateDataStream = objTempFSO.CreateTextFile(objTempFolder.Path & _
             strTempObjectName & _
             strTempAlternateDataStream,True,-1)
          ' Write the WebDAV section header.
          objTempAlternateDataStream.WriteLine "[WebDAV]"
          ' Flag the function as having an open output stream.
          blnTempOpenStream = True
        Else
          ' Flag the function as having a closed output stream.
          blnTempOpenStream = False
        End If
      Else
        ' Check if we have an open output stream.
        If blnTempOpenStream = True Then
          ' Output a property.
          objTempAlternateDataStream.WriteLine strTempLine
        End If
      End If
    Loop
    ' Close the properties.dav file.
    objTempPropertiesFile.Close
  End If
  Set objTempFSO = Nothing
End Sub

Function BuildFolderTree(strTempBaseFolder)
  On Error Resume Next

  ' Declare all our variables
  Dim objTempFSO
  Dim objTempFolder
  Dim objTempSubFolder
  Dim lngTempFolderCount
  Dim lngTempBaseCount

  ' Create our file system object.
  Set objTempFSO = WScript.CreateObject("Scripting.FileSystemObject")

  ' Define the initial values for our folder counters.
  lngTempFolderCount = 1
  lngTempBaseCount = 0

  ' Dimension an array to hold the folder names.
  ReDim strTempFolders(1)

  ' Store the root folder in our array.
  strTempFolders(lngTempFolderCount) = strTempBaseFolder

  ' Loop while we still have folders to process.
  While lngTempFolderCount <> lngTempBaseCount
    ' Set up a folder object to a base folder.
    Set objTempFolder = objTempFSO.GetFolder(strTempFolders(lngTempBaseCount+1))
    ' Loop through the collection of subfolders for the base folder.
    For Each objTempSubFolder In objTempFolder.SubFolders
      ' Increment our folder count.
      lngTempFolderCount = lngTempFolderCount + 1
      ' Increase our array size
      ReDim Preserve strTempFolders(lngTempFolderCount)
      ' Store the folder name in our array.
      strTempFolders(lngTempFolderCount) = objTempSubFolder.Path
    Next
    ' Increment the base folder counter.
    lngTempBaseCount = lngTempBaseCount + 1
  Wend

  ' Return the array of folder names.
  BuildFolderTree = strTempFolders

End Function
In Closing
I have a couple final notes for you to consider:
- Enabling NTFS alternate data streams is a global WebDAV setting; you cannot do this on a per-site basis.
- As with IIS 6, once you enable storing WebDAV properties in NTFS alternate data streams, you will lose your WebDAV properties if you copy your files between NTFS and FAT file systems.
Note: This blog was originally posted at http://blogs.msdn.com/robert_mcmurray/
How to create an HTML Application to configure your WebDAV Redirector settings
07 October 2011 • by Bob • IIS, Scripting, WebDAV
I've mentioned in previous blog posts that I use the Windows WebDAV Redirector a lot. (And believe me, I use it a lot.) Having said that, there are a lot of registry settings that control how the Windows WebDAV Redirector operates, and I tend to tweak those settings fairly often.
I documented all of those registry settings in my Using the WebDAV Redirector walkthrough, but unfortunately there isn't a built-in interface for managing the settings. With that in mind, I decided to write my own user interface.
I knew that it would be pretty simple to create a basic Windows Form application that does everything, but my trouble is that I would want to share the code in a blog, and the steps create a Windows application are probably more than I would want to write in such a short space. So I decided to reach into my scripting past and create an HTML Application for Windows that configures all of the Windows WebDAV Redirector settings.
It should be noted, like everything else these days, that this code is provided as-is. ;-]
Using the HTML Application
When you run the application, it will present you with the following user interface, which allows you to configure most of the useful Windows WebDAV Redirector settings:

Creating the HTML Application
To create this HTML Application, save the following HTMLA code as "WebDAV Redirector Settings.hta" to your computer, and then double-click its icon to run the application.
<html> <head> <title>WebDAV Redirector Settings</title> <HTA:APPLICATION APPLICATIONNAME="WebDAV Redirector Settings" ID="WebDAV Redirector Settings" VERSION="1.0" BORDER="dialog" BORDERSTYLE="static" INNERBORDER="no" SYSMENU="no" MAXIMIZEBUTTON="no" MINIMIZEBUTTON="no" SCROLL="no" SCROLLFLAT="yes" SINGLEINSTANCE="yes" CONTEXTMENU="no" SELECTION="no"/> <script language="vbscript"> ' ---------------------------------------- ' Start of main code section. ' ---------------------------------------- Option Explicit Const intDialogWidth = 700 Const intDialogHeight = 620 Const HKEY_LOCAL_MACHINE = &H80000002 Const strWebClientKeyPath = "SYSTEM\CurrentControlSet\Services\WebClient\Parameters" Const strLuaKeyPath = "Software\Microsoft\Windows\CurrentVersion\Policies\System" Dim objRegistry Dim blnHasChanges ' ---------------------------------------- ' Start the application. ' ---------------------------------------- Sub Window_OnLoad On Error Resume Next ' Set up the UI dimensions. Self.resizeTo intDialogWidth,intDialogHeight Self.moveTo (Screen.AvailWidth - intDialogWidth) / 2, _ (Screen.AvailHeight - intDialogHeight) / 2 ' Retrieve the current settings. Document.all.TheBody.ClassName = "hide" Set objRegistry = GetObject( _ "winmgmts:{impersonationLevel=impersonate}!\\.\root\default:StdRegProv") Call CheckForLUA() Call GetValues() Document.All.TheBody.ClassName = "show" End Sub ' ---------------------------------------- ' Check for User Access Control ' ---------------------------------------- Sub CheckForLUA() If GetRegistryDWORD(strLuaKeyPath,"EnableLUA",1)<> 0 Then MsgBox "User Access Control (UAC) is enabled on this computer." & _ vbCrLf & vbCrLf & "UAC must be disabled in order to edit " & _ "the registry and restart the service for the WebDAV Redirector. " & _ "Please disable UAC before running this application again. " & _ "This application will now exit.", _ vbCritical, "User Access Control" Self.close End If End Sub ' ---------------------------------------- ' Exit the application. ' ---------------------------------------- Sub ExitApplication() If blnHasChanges = False Then If MsgBox("Are you sure you want to exit?", _ vbQuestion Or vbYesNo Or vbDefaultButton2, _ "Exit Application") = vbNo Then Exit Sub End If Else Dim intRetVal intRetVal = MsgBox("You have unsaved changes. " & _ "Do you want to save them before you exit?", _ vbQuestion Or vbYesNoCancel Or vbDefaultButton1, _ "Exit Application") If intRetVal = vbYes Then Call SetValues() ElseIf intRetVal = vbCancel Then Exit Sub End If End If Self.close End Sub ' ---------------------------------------- ' Flag the application as having changes. ' ---------------------------------------- Sub FlagChanges() blnHasChanges = True End Sub ' ---------------------------------------- ' Retrieve the settings from the registry. ' ---------------------------------------- Sub GetValues() On Error Resume Next Dim tmpCount,tmpArray,tmpString ' Get the radio button values Call SetRadioValue(Document.all.BasicAuthLevel, _ GetRegistryDWORD(strWebClientKeyPath, _ "BasicAuthLevel",1)) Call SetRadioValue(Document.all.SupportLocking, _ GetRegistryDWORD(strWebClientKeyPath, _ "SupportLocking",1)) ' Get the text box values Document.all.InternetServerTimeoutInSec.Value = _ GetRegistryDWORD(strWebClientKeyPath, _ "InternetServerTimeoutInSec",30) Document.all.FileAttributesLimitInBytes.Value = _ GetRegistryDWORD(strWebClientKeyPath, _ "FileAttributesLimitInBytes",1000000) Document.all.FileSizeLimitInBytes.Value = _ GetRegistryDWORD(strWebClientKeyPath, _ "FileSizeLimitInBytes",50000000) Document.all.LocalServerTimeoutInSec.Value = _ GetRegistryDWORD(strWebClientKeyPath, _ "LocalServerTimeoutInSec",15) Document.all.SendReceiveTimeoutInSec.Value = _ GetRegistryDWORD(strWebClientKeyPath, _ "SendReceiveTimeoutInSec",60) Document.all.ServerNotFoundCacheLifeTimeInSec.Value = _ GetRegistryDWORD(strWebClientKeyPath, _ "ServerNotFoundCacheLifeTimeInSec",60) ' Get the text area values tmpArray = GetRegistryMULTISZ( _ strWebClientKeyPath,"AuthForwardServerList") For tmpCount = 0 To UBound(tmpArray) tmpString = tmpString & tmpArray(tmpCount) & vbTab Next If Len(tmpString)>0 Then Document.all.AuthForwardServerList.Value = _ Replace(Left(tmpString,Len(tmpString)-1),vbTab,vbCrLf) End If blnHasChanges = False End Sub ' ---------------------------------------- ' Save the settings in the registry. ' ---------------------------------------- Sub SetValues() On Error Resume Next ' Set the radio button values Call SetRegistryDWORD( _ strWebClientKeyPath, _ "BasicAuthLevel", _ GetRadioValue(Document.all.BasicAuthLevel)) Call SetRegistryDWORD( _ strWebClientKeyPath, _ "SupportLocking", _ GetRadioValue(Document.all.SupportLocking)) ' Set the text box values Call SetRegistryDWORD( _ strWebClientKeyPath, _ "InternetServerTimeoutInSec", _ Document.all.InternetServerTimeoutInSec.Value) Call SetRegistryDWORD( _ strWebClientKeyPath, _ "FileAttributesLimitInBytes", _ Document.all.FileAttributesLimitInBytes.Value) Call SetRegistryDWORD( _ strWebClientKeyPath, _ "FileSizeLimitInBytes", _ Document.all.FileSizeLimitInBytes.Value) Call SetRegistryDWORD( _ strWebClientKeyPath, _ "LocalServerTimeoutInSec", _ Document.all.LocalServerTimeoutInSec.Value) Call SetRegistryDWORD( _ strWebClientKeyPath, _ "SendReceiveTimeoutInSec", _ Document.all.SendReceiveTimeoutInSec.Value) Call SetRegistryDWORD( _ strWebClientKeyPath, _ "ServerNotFoundCacheLifeTimeInSec", _ Document.all.ServerNotFoundCacheLifeTimeInSec.Value) ' Set the text area values Call SetRegistryMULTISZ( _ strWebClientKeyPath, _ "AuthForwardServerList", _ Split(Document.all.AuthForwardServerList.Value,vbCrLf)) ' Prompt to restart the WebClient service If MsgBox("Do you want to restart the WebDAV Redirector " & _ "service so your settings will take effect?", _ vbQuestion Or vbYesNo Or vbDefaultButton2, _ "Restart WebDAV Redirector") = vbYes Then ' Restart the WebClient service. Call RestartWebClient() End If Call GetValues() End Sub ' ---------------------------------------- ' Start the WebClient service. ' ---------------------------------------- Sub RestartWebClient() On Error Resume Next Dim objWMIService,colServices,objService Document.All.TheBody.ClassName = "hide" Set objWMIService = GetObject( _ "winmgmts:{impersonationLevel=impersonate}!\\.\root\cimv2") Set colServices = objWMIService.ExecQuery( _ "Select * from Win32_Service Where Name='WebClient'") For Each objService in colServices objService.StopService() objService.StartService() Next Document.All.TheBody.ClassName = "show" End Sub ' ---------------------------------------- ' Retrieve a DWORD value from the registry. ' ---------------------------------------- Function GetRegistryDWORD( _ ByVal tmpKeyPath, _ ByVal tmpValueName, _ ByVal tmpDefaultValue) On Error Resume Next Dim tmpDwordValue If objRegistry.GetDWORDValue( _ HKEY_LOCAL_MACHINE, _ tmpKeyPath, _ tmpValueName, _ tmpDwordValue)=0 Then GetRegistryDWORD = CLng(tmpDwordValue) Else GetRegistryDWORD = CLng(tmpDefaultValue) End If End Function ' ---------------------------------------- ' Set a DWORD value in the registry. ' ---------------------------------------- Sub SetRegistryDWORD( _ ByVal tmpKeyPath, _ ByVal tmpValueName, _ ByVal tmpDwordValue) On Error Resume Next Call objRegistry.SetDWORDValue( _ HKEY_LOCAL_MACHINE, _ tmpKeyPath, _ tmpValueName, _ CLng(tmpDwordValue)) End Sub ' ---------------------------------------- ' Retrieve a MULTISZ value from the registry. ' ---------------------------------------- Function GetRegistryMULTISZ( _ ByVal tmpKeyPath, _ ByVal tmpValueName) On Error Resume Next Dim tmpMultiSzValue If objRegistry.GetMultiStringValue( _ HKEY_LOCAL_MACHINE, _ tmpKeyPath, _ tmpValueName, _ tmpMultiSzValue)=0 Then GetRegistryMULTISZ = tmpMultiSzValue Else GetRegistryMULTISZ = Array() End If End Function ' ---------------------------------------- ' Set a MULTISZ value in the registry. ' ---------------------------------------- Sub SetRegistryMULTISZ( _ ByVal tmpKeyPath, _ ByVal tmpValueName, _ ByVal tmpMultiSzValue) On Error Resume Next Call objRegistry.SetMultiStringValue( _ HKEY_LOCAL_MACHINE, _ tmpKeyPath, _ tmpValueName, _ tmpMultiSzValue) End Sub ' ---------------------------------------- ' Retrieve the value of a radio button group. ' ---------------------------------------- Function GetRadioValue(ByVal tmpRadio) On Error Resume Next Dim tmpCount For tmpCount = 0 To (tmpRadio.Length-1) If tmpRadio(tmpCount).Checked Then GetRadioValue = CLng(tmpRadio(tmpCount).Value) Exit For End If Next End Function ' ---------------------------------------- ' Set the value for a radio button group. ' ---------------------------------------- Sub SetRadioValue(ByVal tmpRadio, ByVal tmpValue) On Error Resume Next Dim tmpCount For tmpCount = 0 To (tmpRadio.Length-1) If CLng(tmpRadio(tmpCount).Value) = CLng(tmpValue) Then tmpRadio(tmpCount).Checked = True Exit For End If Next End Sub ' ---------------------------------------- ' ' ---------------------------------------- Sub Validate(tmpField) Dim tmpRegEx, tmpMatches Set tmpRegEx = New RegExp tmpRegEx.Pattern = "[0-9]" tmpRegEx.IgnoreCase = True tmpRegEx.Global = True Set tmpMatches = tmpRegEx.Execute(tmpField.Value) If tmpMatches.Count = Len(CStr(tmpField.Value)) Then If CDbl(tmpField.Value) => 0 And _ CDbl(tmpField.Value) =< 4294967295 Then Exit Sub End If End If MsgBox "Please enter a whole number between 0 and 4294967295.", _ vbCritical, "Validation Error" tmpField.Focus End Sub ' ---------------------------------------- ' ' ---------------------------------------- Sub BasicAuthWarning() MsgBox "WARNING:" & vbCrLf & vbCrLf & _ "Using Basic Authentication over non-SSL connections can cause " & _ "serious security issues. Usernames and passwords are transmitted " & _ "in clear text, therefore the use of Basic Authentication with " & _ "WebDAV is disabled by default for non-SSL connections. That " & _ "being said, this setting can override the default behavior for " & _ "Basic Authentication, but it is strongly discouraged.", _ vbCritical, "Basic Authentication Warning" End Sub ' ---------------------------------------- ' End of main code section. ' ---------------------------------------- </script> <style> body { color:#000000; background-color:#cccccc; font-family:'Segoe UI',Tahoma,Verdana,Arial; font-size:9pt; } fieldset { padding:10px; width:640px; } .button { width:150px; } .textbox { width:200px; height:22px; text-align:right; } .textarea { width:300px; height:50px; text-align:left; } .radio { margin-left:-5px; margin-top: -2px; } .hide { display:none; } .show { display:block; } select { width:300px; text-align:left; } table { border-collapse:collapse; empty-cells:hide; } h1 { font-size:14pt; } th { font-size:9pt; text-align:left; vertical-align:top; padding:2px; } td { font-size:9pt; text-align:left; vertical-align:top; padding:2px; } big { font-size:11pt; } small { font-size:8pt; } </style> </head> <body id="TheBody" class="hide"> <h1 align="center" id="TheTitle" style="margin-bottom:-20px;">WebDAV Redirector Settings</h1> <div align="center"> <p style="margin-bottom:-20px;"><i><small><b>Note</b>: See <a target="_blank" href="https://docs.microsoft.com/iis/publish/using-webdav/using-the-webdav-redirector/">Using the WebDAV Redirector</a> for additional details.</small></i></p> <form> <center> <table border="0" cellpadding="2" cellspacing="2" style="width:600px;"> <tr> <td style="width:600px;text-align:left"><fieldset title="Security Settings"> <legend> <b>Security Settings</b> </legend> These values affect the security behavior for the WebDAV Redirector.<br> <table style="width:600px;"> <tr title="Specifies whether the WebDAV Redirector can use Basic Authentication to communicate with a server."> <td style="width:300px"> <table border="0"> <tr> <td style="width:300px"><b>Basic Authentication Level</b></td> </tr> <tr> <td style="width:300px;"><span style="width:280px;padding-left:20px;"><small><i><b>Note</b>: Using basic authentication can cause <u>serious security issues</u> as the username and password are transmitted in clear text, therefore the use of basic authentication over WebDAV is disabled by default unless the connection is using SSL.</i></small></span></td> </tr> </table> </td> <td style="width:300px"> <table style="width:300px"> <tr> <td style="width:020px"><input class="radio" type="radio" value="0" name="BasicAuthLevel" onchange="VBScript:FlagChanges()" id="BasicAuthLevel0"></td> <td style="width:280px"><label for="BasicAuthLevel0">Basic Authentication is disabled</label></td> </tr> <tr> <td style="width:020px"><input class="radio" type="radio" value="1" checked name="BasicAuthLevel" onchange="VBScript:FlagChanges()" id="BasicAuthLevel1"></td> <td style="width:280px"><label for="BasicAuthLevel1">Basic Authentication is enabled for SSL web sites only</label></td> </tr> <tr> <td style="width:020px"><input class="radio" type="radio" value="2" name="BasicAuthLevel" onchange="VBScript:FlagChanges()" id="BasicAuthLevel2" onClick="VBScript:BasicAuthWarning()"></td> <td style="width:280px"><label for="BasicAuthLevel2">Basic Authentication is enabled for SSL and non-SSL web sites</label></td> </tr> </table> </td> </tr> <tr title="Specifies a list of local URLs for forwarding credentials that bypasses any proxy settings. (Note: This requires Windows Vista SP1 or later.)"> <td style="width:300px"> <table border="0"> <tr> <td style="width:300px"><b>Authentication Forwarding Server List</b></td> </tr> <tr> <td style="width:300px;"><span style="width:280px;padding-left:20px;"><small><i><b>Note</b>: Include one server name per line.</i></small></span></td> </tr> </table> </td> <td style="width:300px"><textarea class="textarea" name="AuthForwardServerList" onchange="VBScript:FlagChanges()"></textarea></td> </tr> <tr title="Specifies whether the WebDAV Redirector supports locking."> <td style="width:300px"><b>Support for WebDAV Locking</b></td> <td style="width:300px"> <table style="width:300px"> <tr> <td style="width:020px"><input class="radio" type="radio" value="1" checked name="SupportLocking" onchange="VBScript:FlagChanges()" id="SupportLocking1"></td> <td style="width:280px"><label for="SupportLocking1">Enable Lock Support</label></td> </tr> <tr> <td style="width:020px"><input class="radio" type="radio" value="0" name="SupportLocking" onchange="VBScript:FlagChanges()" id="SupportLocking0"></td> <td style="width:280px"><label for="SupportLocking0">Disable Lock Support</label></td> </tr> </table> </td> </tr> </table> </fieldset> </td> </tr> <tr> <td style="width:600px;text-align:left"><fieldset title="Time-outs"> <legend> <b>Time-outs and Maximum Sizes</b> </legend> These values affect the behavior for WebDAV Client/Server operations.<br> <table border="0" style="width:600px;"> <tr title="Specifies the connection time-out for the WebDAV Redirector uses when communicating with non-local WebDAV servers."> <td style="width:300px"><b>Internet Server Time-out</b> <small>(In Seconds)</small></td> <td style="width:300px"><input class="textbox" type="text" name="InternetServerTimeoutInSec" onchange="VBScript:FlagChanges()" onblur="VBScript:Validate(Me)" value="30"></td> </tr> <tr title="Specifies the connection time-out for the WebDAV Redirector uses when communicating with a local WebDAV server."> <td style="width:300px"><b>Local Server Time-out</b> <small>(In Seconds)</small></td> <td style="width:300px"><input class="textbox" type="text" name="LocalServerTimeoutInSec" onchange="VBScript:FlagChanges()" onblur="VBScript:Validate(Me)" value="15"></td> </tr> <tr title="Specifies the time-out in seconds that the WebDAV Redirector uses after issuing a request."> <td style="width:300px"><b>Send/Receive Time-out</b> <small>(In Seconds)</small></td> <td style="width:300px"><input class="textbox" type="text" name="SendReceiveTimeoutInSec" onchange="VBScript:FlagChanges()" onblur="VBScript:Validate(Me)" value="60"></td> </tr> <tr title="Specifies the period of time that a server is cached as non-WebDAV by the WebDAV Redirector. If a server is found in this list, a fail is returned immediately without attempting to contact the server."> <td style="width:300px"><b>Server Not Found Cache Time-out</b> <small>(In Seconds)</small></td> <td style="width:300px"><input class="textbox" type="text" name="ServerNotFoundCacheLifeTimeInSec" onchange="VBScript:FlagChanges()" onblur="VBScript:Validate(Me)" value="60"></td> </tr> <tr title="Specifies the maximum size in bytes that the WebDAV Redirector allows for file transfers."> <td style="width:300px"><b>Maximum File Size</b> <small>(In Bytes)</small></td> <td style="width:300px"><input class="textbox" type="text" name="FileSizeLimitInBytes" onchange="VBScript:FlagChanges()" onblur="VBScript:Validate(Me)" value="50000000"></td> </tr> <tr title="Specifies the maximum size that is allowed by the WebDAV Redirector for all properties on a specific collection."> <td style="width:300px"><b>Maximum Attributes Size</b> <small>(In Bytes)</small></td> <td style="width:300px"><input class="textbox" type="text" name="FileAttributesLimitInBytes" onchange="VBScript:FlagChanges()" onblur="VBScript:Validate(Me)" value="1000000"></td> </tr> </table> </fieldset> </td> </tr> <tr> <td style="text-align:center"> <table border="0"> <tr> <td style="text-align:center"><input class="button" type="button" value="Apply Settings" onclick="VBScript:SetValues()"> <td style="text-align:center"><input class="button" type="button" value="Exit Application" onclick="VBScript:ExitApplication()"> </tr> </table> </td> </tr> </table> </center> </form> </div> </body> </html>
Additional Notes
You will need to run this HTML Application as an administrator in order to save the settings and restart the Windows WebDAV Redirector. (Which is listed as the "WebClient" service in your Administrative Tools.)
This HTML Application performs basic validation for the numeric fields, and it prevents you from exiting the application when you have unsaved changes, but apart from that there's not much functionality other than setting and retrieving the registry values. How else can you get away with posting an application in a blog with only 500 lines of code and no compilation required? ;-]
Note: This blog was originally posted at http://blogs.msdn.com/robert_mcmurray/